Creating an Email Address

Creating an email address in the control panel creates a mailbox on the server for mail to be delivered to. In some cases this might be desired if you want to maintain full control of the email you receive, however in many cases users may wish to simply create an Email Forwarder that sets up a custom email address and sends all mail sent to it on to the address of your choice. This article will show you how to setup both methods.

  • On the homepage of the control panel you will see a section titled Email that contains several tools for setting up email addresses. To get started let’s go to the Email Accounts page.email.001

This screen will allow us to setup an email address that uses a mailbox stored on the server. You will be able to access mail sent to this email address either through a webmail client or a desktop/mobile client directly. Enter the desired email address as well as a password to associate with that email address. You can choose to set a quota for how large of a mailbox you need, or set this to unlimited (keep in mind your quota will still be dictated by the limits of the hosting account). Once you’re done click Create Account.email setup.001

Your email address is created and it’s ready to be used. You have the choice of accessing it via the webmail options built into your control panel, or setting up a mail client directly from your desktop, laptop, or mobile device. To access these options you can click on the More button.email settings.001

email settings more.001

If you already have an email address you want to use like a Gmail or Hotmail account, you may wish to create an Email Forwarder instead of a mailbox. Setting up a forwarder is very simple. Start by clicking on instead of a mailbox. Setting up a forwarder is very simple. Start by clicking on Forwarders from the Mail section of your control panel homepage.

forwarder.001

The first screen will show you any existing forwarders that you have created. To setup a new forwarding account, click Add Forwarder.

add forwarder.001

To create a new forwarding account, simply type in the desired email address as well as the email address you’d like all mail to be forwarded to. When you are done click Add Forwarder.forwarding address.001

You have now successfully created an Email Forwarder and all email sent to your custom email address will be forwarded on to the address you entered.

Video Tutorials

Create a Self-Hosted Email Account:


Access your Self-Hosted Email Account:

Understanding Skidmore Domains’s Accounts & Passwords

One aspect of domains.skidmore.edu that users may find a bit complicated at first is understanding the different accounts (and associated passwords) that you can manage as part of your participation in the project. This article outlines the types of accounts that you are likely to have, what they are for, and how you go about resetting passwords on each of them.

Your cPanel Account

When you first sign-up for your domain and hosting, a cPanel account will be generated that provides you with access to your slice of the domains.skidmore.edu Web server. Your cPanel account is automatically associated with your Skidmore account. Therefore, your Skidmore account credentials will grant you access to your cPanel account.

Your Application Administrator Accounts

Every time you install a new application in cPanel, an Administrator Account for that application will be created. You will likely use these accounts very often – every time you need to login to your application to manage the associated Web site, you will use this account.

For example, if you install WordPress to manage your Web site, every time you need to add content to WordPress, change your theme, approve comments, etc. you will use this account to login.

Usually, you will be given the opportunity to choose the userid and password for that account. We recommend choosing something that you are likely to remember but that is strong and secure.

Upon installation, you will likely receive an email confirming the user-id/password combination you chose. It will also have information about how to access the login page for that application. You may wish to make sure you don’t delete this message.

Depending on the application you’re working with, managing and resetting the password for this account will vary. If you’ve used Installatron (in cPanel) to install the application, however, you can always review the account credentials:

  • Login to cPanel through https://domains.skidmore.edu/dashboard.
  • Click the Installatron icon in the Software/Services section.
  • Find the application you installed under My Applications.
  • Click the Edit button (this looks like a blue wrench).
  • Scroll down to find the Administrator Username and Password.

In addition, most applications should have some kind of password reset link on the login page.

Other Types of Accounts

In addition to the three account types outlined above, there are a few other kinds of accounts you may have as part of create.ou.edu:

  • FTP: If you set up FTP on your account, you will need to set up an account.
  • Application User Accounts: In addition to the Administrator Account that you set up when installing an application, most applications will also let you set up user accounts.

File Structures and the File Manager

Web hosting is, at it’s basic core, files and folders on a computer that is connected to the internet and setup to distribute them. How that computer (typically a server) is setup to do that is covered more in LAMP Environments but this article will explain the idea of the file structure and how it relates to what you view on your domain.

When you signed up for your domain a web hosting account was created. Although you typically will interact mostly with the web interface to create subdomains, install applications, and other common tasks, you might occasionally also need to work directly with the files in your account. The File Manager in your cPanel is one way to see these files. You can also create an FTP account in cPanel and use an FTP program to interact with these files (FTP stands for File Transfer Protocol, and it’s a way of using a desktop client to transfer files to and from your Web server space).

Let’s take a look at the File Manager built into your cPanel to get a better understanding of the file structure that makes up your website(s).

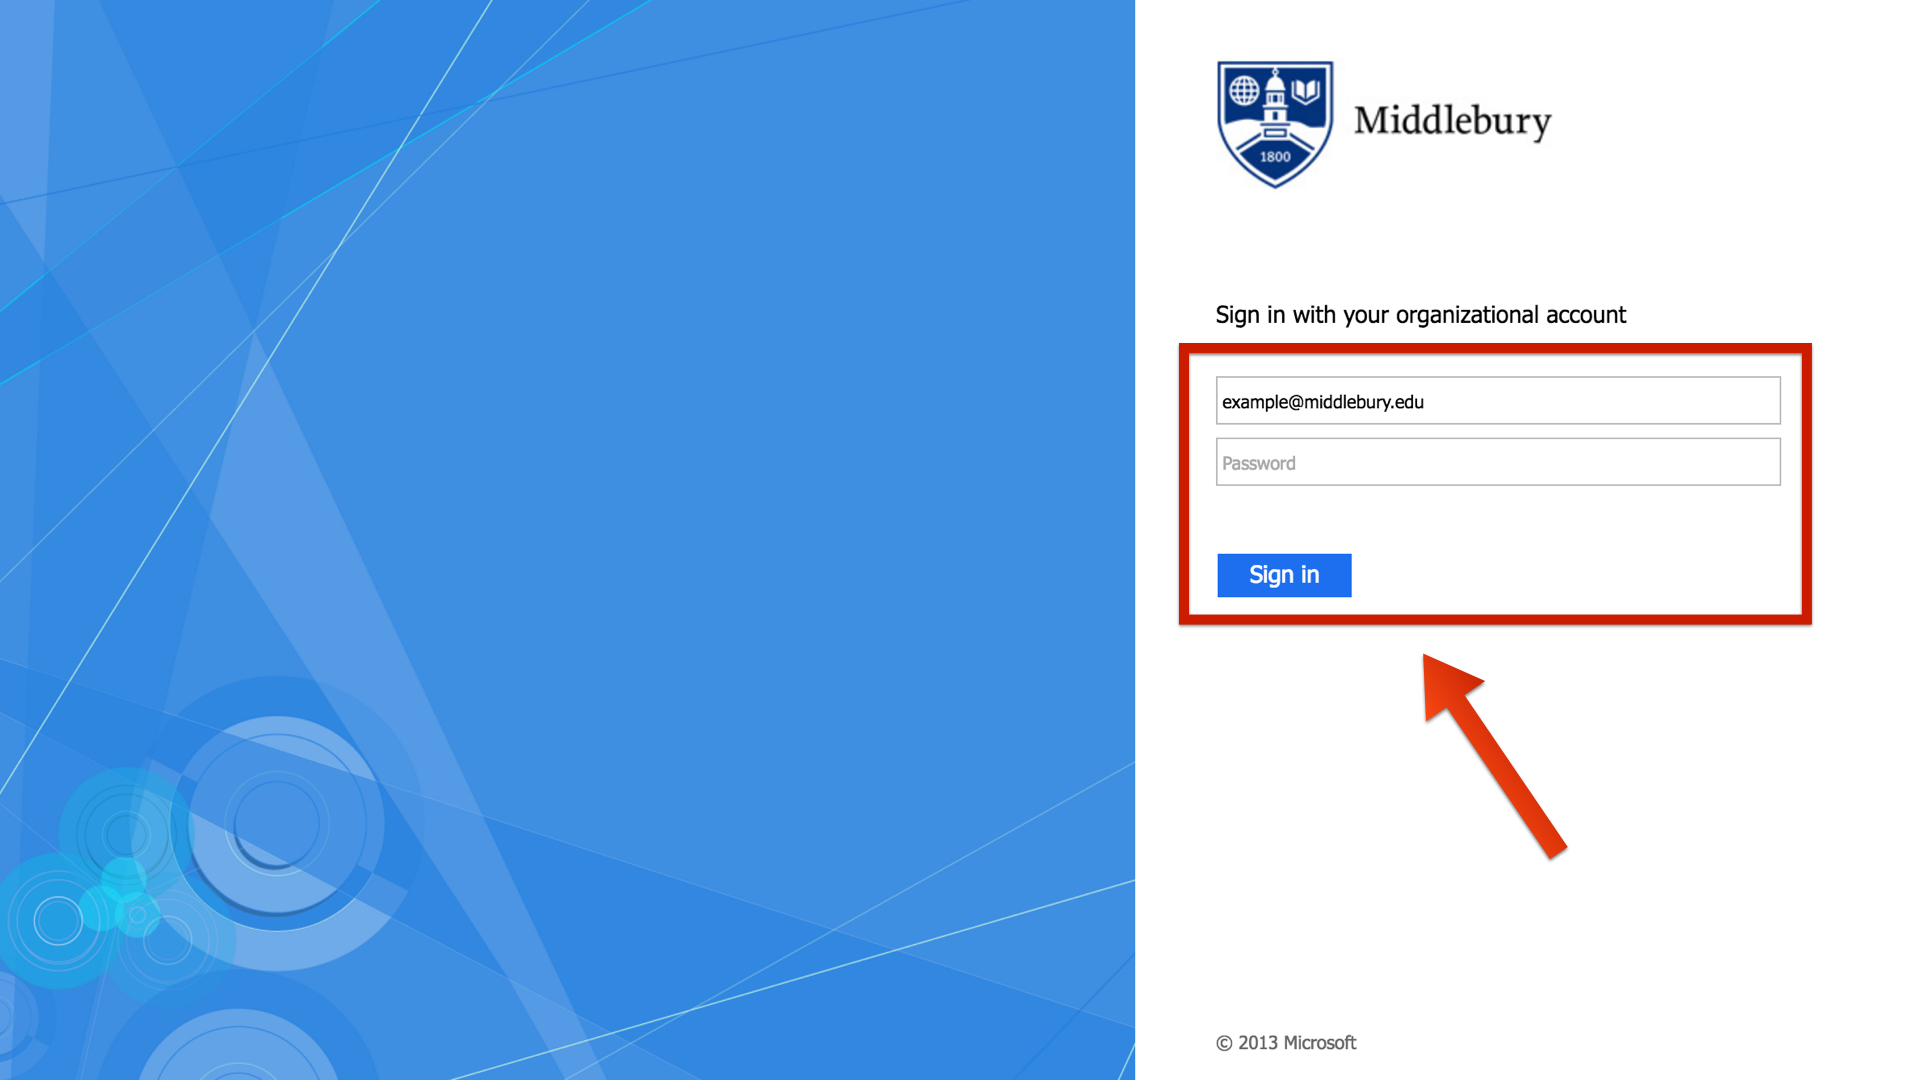
  • Login to cPanel with your Skidmore username and password.sign in.001


  • On the homepage of your control panel you’ll have all the various tools listed. You can easily find the File Manager by using the search tool in the upper righthand corner and typing File Manager. You can also find its icon under Files.file manager search.001


  • You are now sent to the File Manager and can navigate the folder structure there.

You’ll notice when the File Manager opens up that this looks very much like a folder on your computer. There are a few folders in it as well as files, and you can navigate down into those folders and see what’s inside of them. At the top level of the File Manager you also have the option of interacting with files and folders you select by moving them around or removing them. There is a larger article all about how to use the file manager at Accessing Your Files through the File Manager so we won’t talk much about how the interface works, rather we’ll cover what those folders and files actually mean and how they relate to what someone sees when they visit your website.

By default you have a variety of folders at the root of your web space (the first screen you see when you open up the file manager). Some of them are created automatically to store information about the panel and setup of certain sites. These folders are things like access-logs, etc, ssl, and tmp. You can safely ignore most of those folders because they don’t correspond to actual websites. Let’s look at which folders do and how it all works.

Your main domain, mydomain.com, corresponds with a folder called “public_html.” Whatever files and folders are inside of this folder are available at that domain. If you installed WordPress here you’ll likely see a lot of WordPress-related files within it (which were probably helpfully put there by the automated installer). Let’s say we uploaded an image called mypicture.jpg into the public_html folder. That image would now be available at mydomain.com/mypicture.jpg. The slash after your domain implies “this file is inside this folder”. But what if we had a folder inside the public_html folder? How does that appear? This is typically called a subfolder so let’s put a folder in public_html called “images” and put our image, mypicture.jpg, inside of that folder. What would you type in a browser to get to that file now? The location would be mydomain.com/images/mypicture.jpg. So subfolders are also indicated by a forward slash after a domain.

What about subdomains? You can have completely separate sites called subdomains that appear as nameofsubdomain.mydomain.com. But where are they in the file structure? When you created your subdomain the control panel asked you to give the folder a name. If I had a subdomain called photos.mydomain.com for example, I might want to name the folder “photos” (by default your control panel will call the folder by the name of the subdomain). Folders for subdomains are located inside the public_html folder. So when you go to the File Manager and navigate to public_html you’ll see folders listed for all of your subdomains and once you navigate inside one of those folders you’ll see files and folders specifically for that subdomain that appear on the web at that subdomain’s address.

The File Manager in your control panel is great to view these files and folders, but it can be limiting if you want to upload an entire folder of information to your website. If you find yourself wanting to do more with the files and folders on your web space you can download an FTP program like Filezilla and connect to your website by creating an FTP account in your control panel (also located in the Websites and Domains tab). An FTP program will allow you to upload and download an unlimited number of files and folders quickly.

Signing up on Skidmore Domains

Reviewing the Guidelines

Before you get started, we recommend that you review our information about Choosing a Domain Name.

The Sign-Up Process (2 Options)

Once you’ve reviewed the guidelines, you can proceed to the sign-up page.

Click on the right hand side where it says Dashboard.


dashboard.001

You will be redirected to login for verification. You will use your Skidmore username and password to login.

sign in.001

Option 1: Free Subdomain

If you wish to create a free subdomain of domains.skidmore.edu, leave this default option selected and enter in the subdomain you want for your Skidmore Domains website. When you’ve found an available subdomain, click the button labeled Click to Continue.


You will be brought to the sign up page. Since you selected the subdomain option, you should see that it is available for free.

sign up.001

Read the Terms of Service. To continue, you will need to check the box to agree to the Terms of Service and select Register Now.

register now.001

After you click “Register Now”, you will be brought to the cPanel and are on your way to creating your own Skidmore Domains space.

cpanel.001


Accessing Your Files through the File Manager

Your domains.skidmore.edu cPanel includes a File Manager that allows you to interact directly with the files stored in your webhosting account. This can be useful if you want to upload software that cannot be automatically installed via the Web Applications section of your cPanel, if you need to change the name or permissions of a file or group or files, or if you want to edit a plain text file. To access your files via the File Manager, use these steps:

Login to domains.skidmore.edu with your Skidmore username and password.

sign in.001


Once logged in you’ll be at the homepage of your control panel. The easiest way to navigate the panel is using the search feature in the top right panel. Click the Search box and type “File Manager” (without the quotes). When you press enter, you will be automatically redirected to the File Manager.  You can also find its icon under Files.

file manager search.001

On the left side of the “File Manager” window, you’ll see a navigation menu containing the file structure of your webhosting account. More information about the contents of these files and folders can be found in the “File Structures and the File Manager” documentation in this knowledge base.

In the navigation menu, choose the public_html option. This will take you directly into the folder that contains the files associated with your website(s). You’ll notice your current location (the public_html folder) is bolded and highlighted in this menu. Click the [+] (expand) icon next to a folder to see what subfolders it contains, or click on the name of the folder to view all of its contents in the file browser on the right side of the page. You can also navigate through the folders in your account by double-clicking on them in the file browser on the right side of the “File Manager” page.

file manager public html.001

To select an item, click once on its icon in the file browser. You can also use the “Select All” button above the file browser, or your computer’s keyboard shortcuts (Shift, Command, Control, etc), to select multiple items from this list.

file manager selection.001

Depending on what you have selected, different options will be available to you in the action menu across the top of the “File Manager” page. If you have selected a folder, for example, you can “Rename” it or “Change Permissions” on it, but do not edit it using the Code Editor or HTML Editor.

file manager options.001

If you know exactly what location you want to skip to within your webhosting account, you can type it into the box directly above the navigation menu and click Go.

file manager internal search.001

Alternatively, if you know the exact name of the file or folder you are looking for, but not its location, you can use the Search box to find it.

file manager search2.001

Choosing your domain name

Choosing your domain name is the first step in getting started with staking your claim on the web. Your domain name is really just a unique Web address that can be used to build out your own digital presence. As you make your choice, there are a few considerations to keep in mind:

Your Domain Name Must Be Available: Domain names must be unique, which means in order for you to claim your own, you need to be sure that it is currently available (and not being used by any one else or any company or organization). There are lots of tools to check on domain availability, and when you sign up on domains.skidmore.edu, we’ll actually check the availability of your choice for you. If you’d like to spend some time thinking about your choice and checking availability before you actually sign-up, we recommend using whois.net.

You Must Choose a “Top Level Domain” or TLD: The TLD is the suffix (or ending part) of your domain name. On domains.skidmore.edu, we only allow you to choose from 5 TLDs: .com, .net, .org., .info. and .us. You must choose which one you want to use (and the availability of your domain may depend upon the TLD you choose). Historically, .com domains were meant for businesses and commercial entities. On the other hand, .org domains were usually used by non-profit organizations. The .net domain was mean to be used by internet service providers. All of that said, the “historic” uses of these TLDs means very little anymore. You may find that .com domains are easier for people to remember, or you may like the “non-commercial” message of using a .org. The bottom line is that your choice of a TLD is entirely personal: just make sure that you choose one of the TLDs allowed by domains.skidmore.edu.

Choose a Domain You Can Live With: You should choose a domain name that you feel you can live with for quite some time. You should pick something that you won’t find embarrassing in the future. A good rule of thumb is to pick a domain that you would be comfortable putting on a future job application.

You May Wish to Include Your Name in Your Domain: There is no requirement that your domain reflect your specific identity in the form of your first and last name. However, choosing a domain name that includes your name may make it easier for you to achieve higher rankings in search engines when someone queries your real name.

Pick a Domain you Like: At the end of the day, your domain should reflect you. Pick a domain you like and are proud of. It can reflect your interests, sports you play, or your hobby. Or it could just be your name. The “right” domain for you is the one you’re comfortable with.

Applications Available in Installatron

Installatron, the script installer that is part of the domains.skidmore.edu cPanel, allows you to easily install Web applications to your Web space. Below is a list of all of the applications currently available to you through Installatron:

Community Building

  • Vanila Forums
  • MediaWiki
  • ExtCalendar
  • phpScheduler
  • WebCalendar
  • phpFreeChat
  • phpMyChat
  • Dada Mail
  • PHPlist
  • Site Recommender
  • FluxBB
  • MyBB
  • phpBB
  • Simple Machines
  • XMB Forum
  • Elgg
  • Oxwall
  • Pligg
  • GBook
  • Lazarus Guestbook
  • DokuWiki
  • PmWiki
  • WikkaWiki

Content Management

  • WordPress
  • Drupal
  • Omeka
  • b2evolution
  • Geeklog
  • PivotX
  • Serendipity
  • Textpattern
  • CMS Made Simple
  • concrete5
  • Contao
  • ImpressPages
  • liveSite
  • Nucleus CMS
  • phpwcms
  • PyroCMS
  • SilverStripe
  • Soholaunch
  • TYPO3
  • WebsiteBaker
  • Chamilo
  • Moodle
  • phpMyFAQ
  • Code Igniter
  • Coranto
  • MODx
  • e107
  • Joomla
  • Mahara
  • Mambo
  • ocPortal
  • PHP-Fusion
  • PHP-Nuke
  • Tiki Wiki CMS Groupware
  • Xoops
  • Zikula

e-Commerce and Business

  • OpenX
  • OSClass
  • Quicksell Classifieds
  • FrontAccounting
  • OrangeHRM
  • Feng Office
  • SugarCRM
  • Vtiger
  • Zurmo
  • CubeCart
  • Magento
  • OpenCart
  • osCommerce
  • PrestaShop
  • TomatoCart
  • Zen Cart
  • BoxBilling
  • phpCOIN
  • Simple Invoices
  • WHMCS
  • Collabtive
  • Mantis
  • PHProjekt
  • Crafty Syntax Live Help
  • Help Center Live
  • HESK
  • osTicket

Photos and Files

  • ownCloud
  • Gallery
  • GQ File Manager
  • OpenDocMan
  • Power File Manager
  • ProjectSend
  • Coppermine
  • Piwigo
  • TinyWebGallery
  • ZenPhoto

Surveys and Statistics

  • Aardvark Topsites
  • Advanced Poll
  • LimeSurvey
  • phpESP
  • Simple Poll
  • phpMyCounter
  • Piwiki
  • Seo Panel

Miscellaneous

  • YOURLS
  • Tiny Tiny RSS
  • PHPLinks
  • SiteBar
  • iTron Clock
  • WebCards
  • Contact Form
  • Form Tools
  • phpFormGenerator
  • webtrees
  • Feed on Feeds
  • selfoss
  • Search Engine Project

Registering a Domain

Skidmore Domains currently utilizes subdomains of .domains.skidmore.edu for the initial signup, however after using your space you may decide you’d like to register a top-level domain (a .com, .net, .org address). You can do this by registering a domain with a service provider (we make a recommendation below, but any domain provider should work) and adding it to your space as an Addon Domain.

To start you’ll need to get the domain registered. When choosing a domain we recommend keeping it all lower-case, avoiding hyphens, keeping it short, and of course it will need to be a unique address. Our service provider, Reclaim Hosting, has made the process of registering a domain quite simple, and the domain will work with very few additional steps due to the integration they have with our hosting system. To register a domain you would go to https://portal.reclaimhosting.com/cart.php?a=add&domain=register and type in the domain you’d like to purchase:

Screen Shot 2015-12-07 at 9.23.30 PM

After ensuring the domain is available for purchase you’ll be prompted to select whether you’d like to protect the contact information associated with the domain. All domain registrations are required to have valid contact information publicly available, however a proxy service to protect your identity is available for an additional fee. You can read more about this service, ID Protect, at http://docs.reclaimhosting.com/FAQ/ID-Protect-FAQ/.

Screen Shot 2015-12-07 at 9.25.46 PM

You’ll also be prompted for nameservers for the domain. If registering the domain through Reclaim Hosting you can leave these with the default. If registering the domain elsewhere you’ll want to point the nameservers to ns1.reclaimhosting.com and ns2.reclaimhosting.com in order for the domain to work with our system.

Once you’ve completed the checkout process with payment information the domain will be registered automatically. The last step is to add it to your existing account here at Skidmore Domains. To do that you’ll log into your account at https://domains.skidmore.edu/dashboard and in cPanel navigate to Domains > Add-on Domains.

addon domains.001

Here you will type in the domain that you registered previously to host it within your space on Skidmore Domains. cPanel will also setup a subdomain which you can leave with the default that it creates and verify a location for the files for the domain (typically a folder inside of public_html). The option to create an additional FTP account is present but not necessary. Once the domain is entered click Add Domain to add the domain to your hosting account.

create an addon domain.001

At this point the domain will now be hosted in your account and you can use it to install software, upload files, and any number of other actions available to you in cPanel.

Installing Applications with Installatron

Installatron is a script installer that allows you to quickly and easily install Web applications to on the Web space. By default, when you use Installatron, the application you add will be automatically upgraded whenever a new version is available (and a backup will be kept, just in case).

Installing Applications Using Installatron

sign in.001

  • Once logged in you’ll be at the homepage of your control panel. You will need to scroll down until you see a section of the Control Panel labeled “Web Applications.” Within this section you will see a link to the Installatron which you should click.​ Or, you can type “installatron” (without quotes) into the search bar.  When you press enter you will automatically be redirected to the Installatron page.

installatron new.001

  • When Installatron opens, you will see a list of any applications you’ve already installed. To install something new, click on the Applications Browser button (labeled with a large star).

apps browser.001


  • A listing of all of the applications you can install be default in Installatron will appear. Browse to the one you want to install, and click the icon.
  • After clicking the icon, a page will appear with information about the application, links to resources, and a link to install it.

install window.001


  • Click “Install this application” when you are ready.
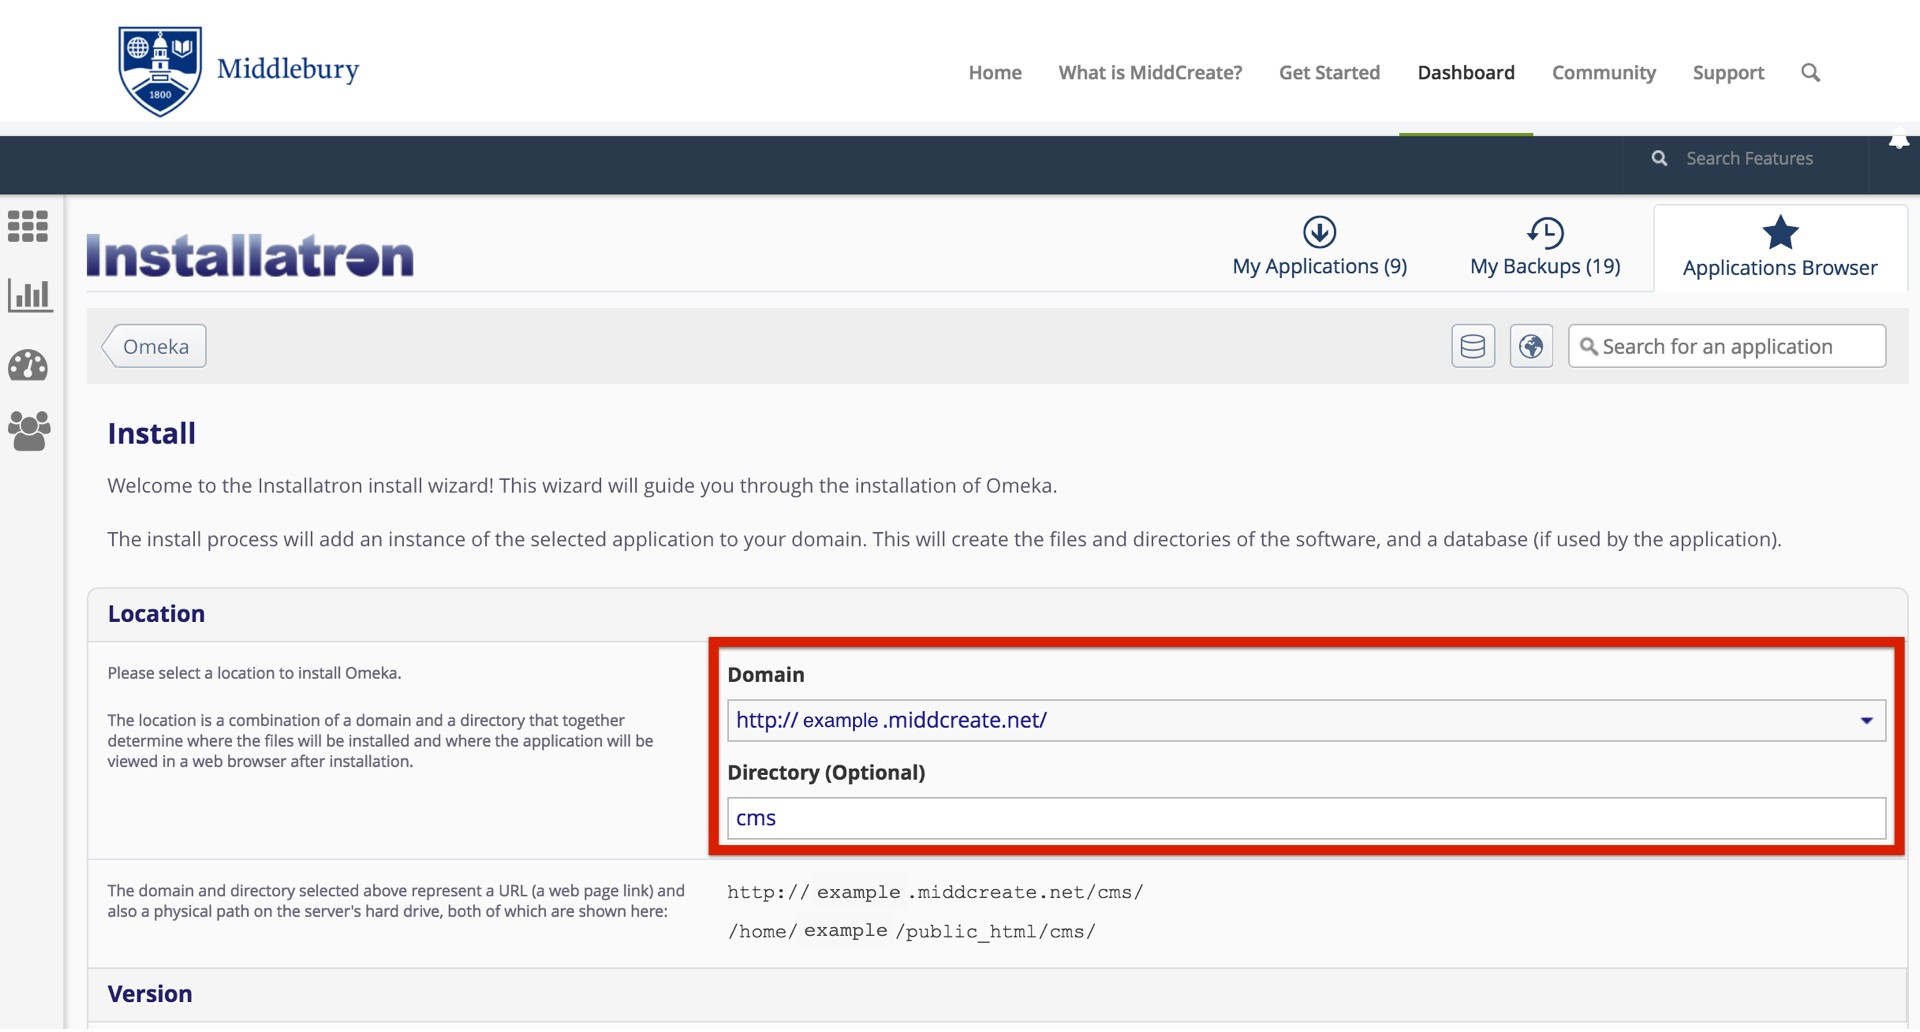
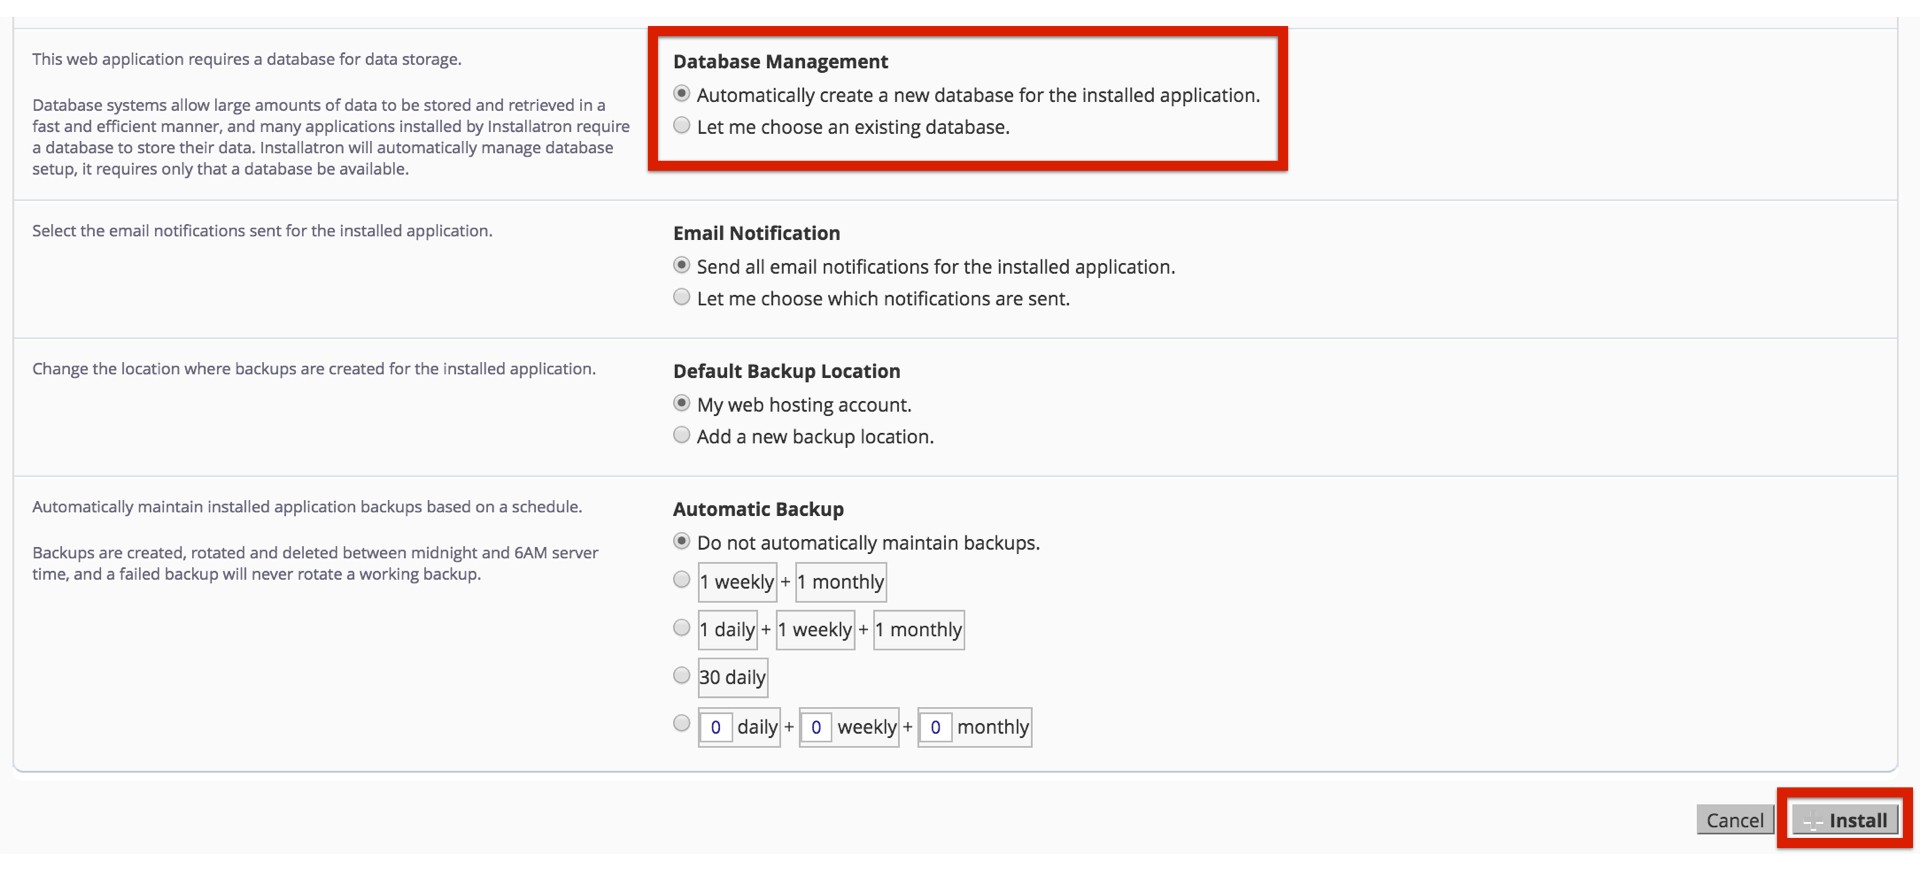
  • A page will appear with a number of settings you can choose/change. The image below shows these settings; here is a rundown of them:

installing an app.jpeg.001


  • Location: You’ll need to choose where to install your new application. You can install it at the root of your domain or in a subdomain (which you need to set up first). In addition, you can place your application in a folder (in either your root domain or a subdomain)
  • Version Information: You can choose a version of the application. Generally, we recommend choosing the default version. It is likely to be the most recent, stable release.
  • Updates & Database Management: By default, the system is set up to automatically upgrade (and create backups upon upgrading) all applications. In addition, by default, the database will be set up for you automatically. We recommend NOT changing these options.
  • Username/Password: An username/password will be automatically generated for you. You can choose to change this, if you like.
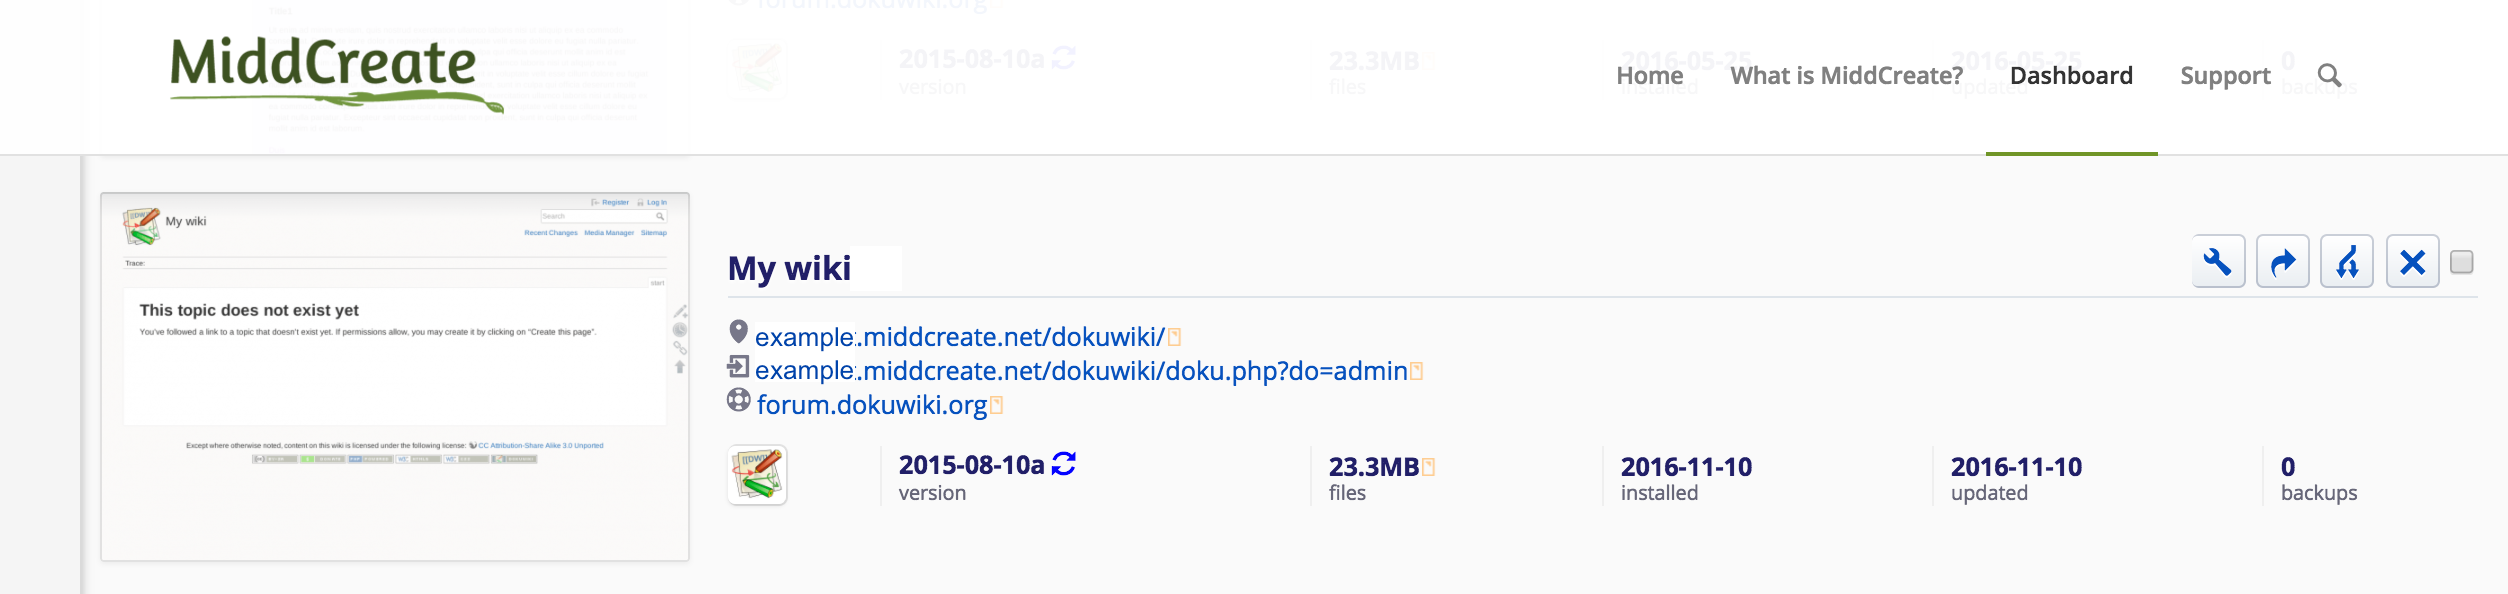
  • Website Title: Pick a title for the site that will be created when you install your application. You should change this from the default title! After installation, you’ll be taken back to the main Installatron page, with details about the application you just installed. At anytime you can come back here to review the application details, back it up manually, or uninstall it.

app controls.001


To get to your new site, you can click the “website” link. What’s more, with certain applications you can use this space to login to the admin area.

In addition, you’ll have received an email with your username/password and a link to your new site.

Map Your Domain to Blogger

Mapping your domain is an important part of domains.skidmore.edu; it reinforces the idea that you don’t necessary need to host all your own applications. You should, however, be mindful of making your web presences part of a domain you control. If you would like to map a subdomain and have not yet created it, use this tutorial on creating subdomains before proceeding. To map your domain, or a subdomain, to Blogger, use these steps:

  1. To get started you’ll need to login to your control panel by going to the domains.skidmore.edu homepage and logging in. dashboard.001
  2. Here you’ll login with you Skidmore username and password. sign in.001
  3. Once logged in you’ll be at the homepage of your control panel. The easiest way to navigate the panel is using the search feature in the top right panel. Click the Search box and type “DNS” (without the quotes). Click on Advanced Zone Editor and you will automatically be directed to the DNS Advanced Zone Editor page. Or, you can scroll down and click on the DNS Advanced Zone Editor button on the cPanel.DNS.001
  4. Find the domain, or subdomain, you want to map to Blogger in the list of Zone File Records. Under the Action column, click Edit
  5. Leave the Name, and TTL fields set to their defaults. Update the Type drop-down menu to CNAME, and the Address field to ghs.google.com. Click Edit Record when you are done. Keep this window open; you will need it in later steps. 
  6. In a new window, go to the Blogger website, and login with your Blogger/Google username and password. blogger sign in.001
  7. From your Blogger Dashboard, find the blog you’d like to use, expand the More Options menu, and click Settingsblogger edit.001
  8. On the “Basic Settings” page, find the Publishing section, and click the Setup a 3rd party URL for your blog link. blogger url.001
  9. Under Advanced Settings, type the full subdomain or domain you are mapping into the box, leave the Use missing files host? option set to No, then click Saveblogger publish.001
  10. You will be presented with a message that your domain cannot be verified, along with information about your existing DNS entry, and an additional DNS entry that needs to be made. This is normal. Copy the second entry under the Name, Label, or Host entry to your clipboard. blogger error.001
  11. Go back to the window or tab containing the Advanced DNS Zone Editor in your create.ou.edu cPanel. In the Add a Record section, paste the text you just copied into the Name field. This information will be different for each domain. Set the TTL field to 14400, and the Type drop-down menu to CNAME
  12. Go back to the window or tab containing the Blogger Advanced settings panel, and copy the second entry under the Destination, Target, or Points to column to your clipboard. blogger error2.001
  13. Go back to the window or tab containing the Advanced DNS Zone Editor in your create.ou.edu cPanel. In the Zone File Records section, find the domain you were editing Action for and paste the text you just copied into the CNAME field. This information will be different for each domain. Click Edit record when you are done. 
  14. Return to the window or tab containing the Blogger Advanced settings panel, and click Save.blogger save.001
  15. If everything was successful, your domain will now appear as the Blog Address. Keep in mind that it may take up to 72 hours for your domain or subdomain to correctly point all visitors to the correct location.