LAMP Environments

When you sign up for domains.skidmore.edu, you get space on a Web host that is associated with the project. There are a few things you need to know about the Web host that will make it easier to understand what you can do with your new space.

The Web Server

The Web server is the main computer that is associated with the domains.skidmore.edu hosting account. It’s literally a computer, but it’s a computer that has special software on it that allows it to be accessible via the Web. The files that run your applications, images or video you upload, or any other files you upload into your Web space are stored on this server.

(For comparison’s sake, your desktop or laptop computer, by default, doesn’t allow this; I can’t access files on your computer through a Web browser by default. You CAN actually install Web server software on your own computer, essentially making your files accessible over the Web.)

In order to run, a Web server has an operating system installed and some kind of Web server software. The domains.skidmore.edu server runs the 'LINUX' operating system and an 'APACHE' Web server.

The Database Server

In addition to the Web server, there is also an associated database server. This is another computer, but it is configured with software that allows it to host databases. It is also connected to your Web server so that your applications (hosted on the Web server) can retrieve data (from databases hosted on the database server).

Databases come in LOTS of varieties. The kind of database you can use for a Web application depends on the kind of software that’s installed on the database server. The domains.skidmore.edu server can run 'MYSQL' databases.

The Programming Language

When you install open-source software on your Web account, it’s going to be written in some programming language. Your Web server has software installed on it that allows it to understand different languages. If you install software that’s written in a language that your Web server doesn’t read, it won’t work.

The domains.skidmore.edu server has software installed on it that allows it to understand 'PHP''PERL', and 'PYTHON'.

Add it Together: LAMP

If you take a look at all the descriptions above, you can determine that we are running what is known as a LAMP server for create.ou.edu:

  • Linux (operating system)
  • Apache (Web server)
  • MySQL (database server)
  • PHP/PERL/PYTHON (programming language)

Applications that are written for LAMP environments will, presumably, run on the server. HOWEVER, some applications do require additional extensions or libraries that aren’t included, by default, in a LAMP environment. The applications you can install via Installatron (in cPanel) should work just fine.

What makes LAMP environments special is that all of the component parts are open-source. Linux, Apache, MySQL, PHP, PERL, and PYTHON are all open-source programs or systems. Anyone can download them (for free) and install them. Anyone can also modify them and redistribute them. As a result, there are lots of online resources for using these systems that have been built by their communities of users. But, also as a result, since you’re not paying for these systems, you can’t just call up a company and ask them to fix a problem.

Video Resource

You may find this video, which explains how the LAMP technology stack works, useful in further understanding LAMP Web environments.

What is DNS?

Remember back before everyone had computers that fit in their pocket, how companies would ship a book full of phone numbers to your doorstep? We might have known who we were looking for, but we needed to look up phone numbers unless they were your crazy relatives that you learned to memorize. When you get your own domain name, by default it’s nothing more than a shortcut, an address, or (to fit this very imperfect analogy) a phone number. When you type a domain name into the address bar of your browser, someone has to identify it and tell it what to display. That’s where a name server comes in.

A name server is a computer, running as a server, that keeps a record of all the domain names that are associated with it and keeps track of where those domains should go. In the case of domains.skidmore.edu the name server is the same computer that runs the hosting. You can peek behind the hood and see this in action by going to the 'Websites and Domains' tab of your panel account and clicking on 'DNS Settings'. You see, DNS stands for Domain Name System and the name server on domains.skidmore.edu gives control to it to identify what should be displayed when someone types in your domain. Consider the fact that you might have one or more subdomains in your account. The name server and DNS are able to identify those subdomains and let the world wide web know that they exist and point to some files/folders on a computer somewhere.

When you signed up for a domain through the domains.skidmore.edu system your name servers were chosen for you. So when people type in your address, the server responds with information about your account. When you migrate an account away from one hosting platform like domains.skidmore.edu and onto a new service, it will require you to change the name servers so that your domain name points to a new server with its own files and structure. It’s also possible to have subdomains that point to entirely different servers than domains.skidmore.edu. For example, you could have a subdomain that looks to Tumblr for files.

DokuWiki

DokuWiki is a standards compliant, simple to use wiki, mainly aimed at creating documentation of any kind. It can be used as an encyclopedia of knowledge or resources, for outlining projects, or to draft documents. Some of the features it includes are:

  • Simple syntax
  • Unlimited page revisions
  • Track recent changes
  • Colored side by side diff support
  • Uploading and embedding of images and other media
  • Content can be categorized in namespaces, easily browsable through an automatic index
  • Straightforward configuration
  • Section Editing allows editing of small parts of a page
  • Toolbar and access keys make editing easy for both beginners and professional
  • Easy navigation through breadcrumbs
  • Automatic table of contents generation
  • Locking to avoid edit conflicts
  • Automatic save to avoid content lost during editing
  • Extended Access Control Lists
  • Support for over 50 languages

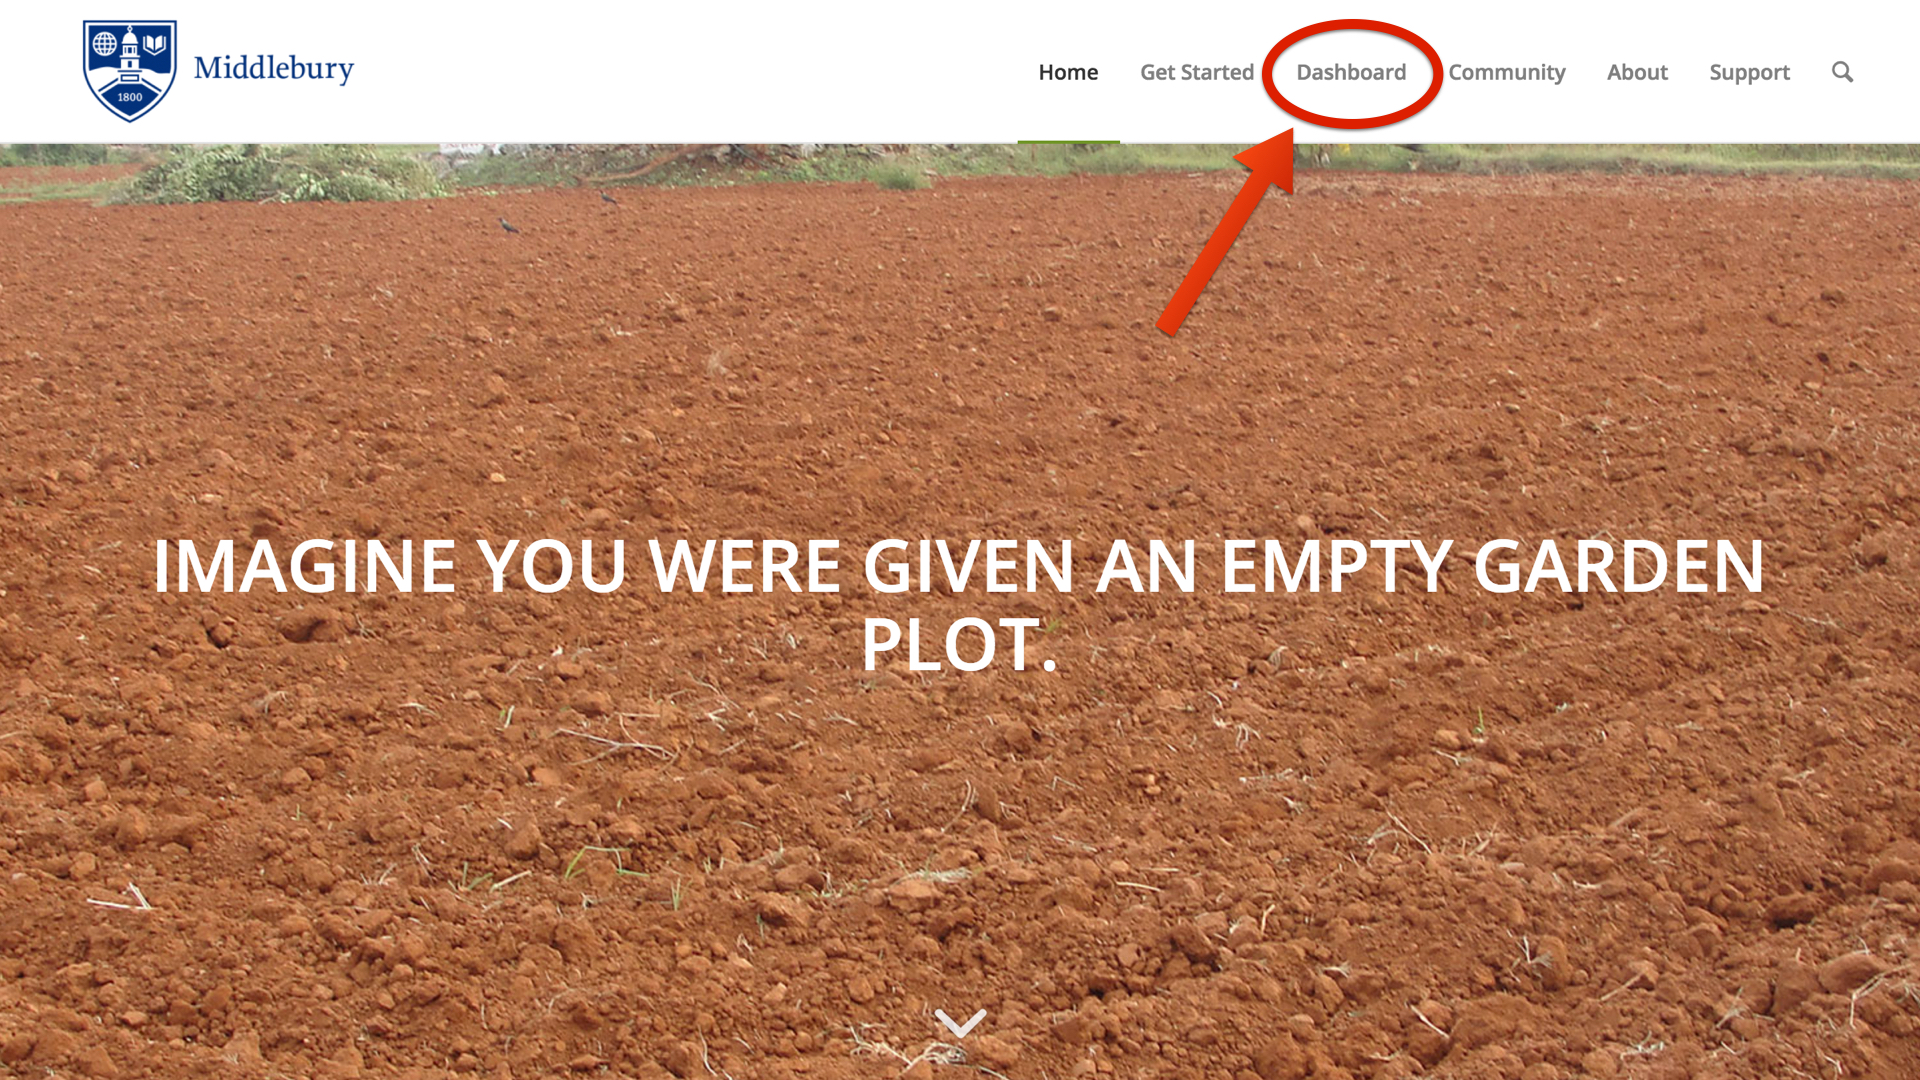
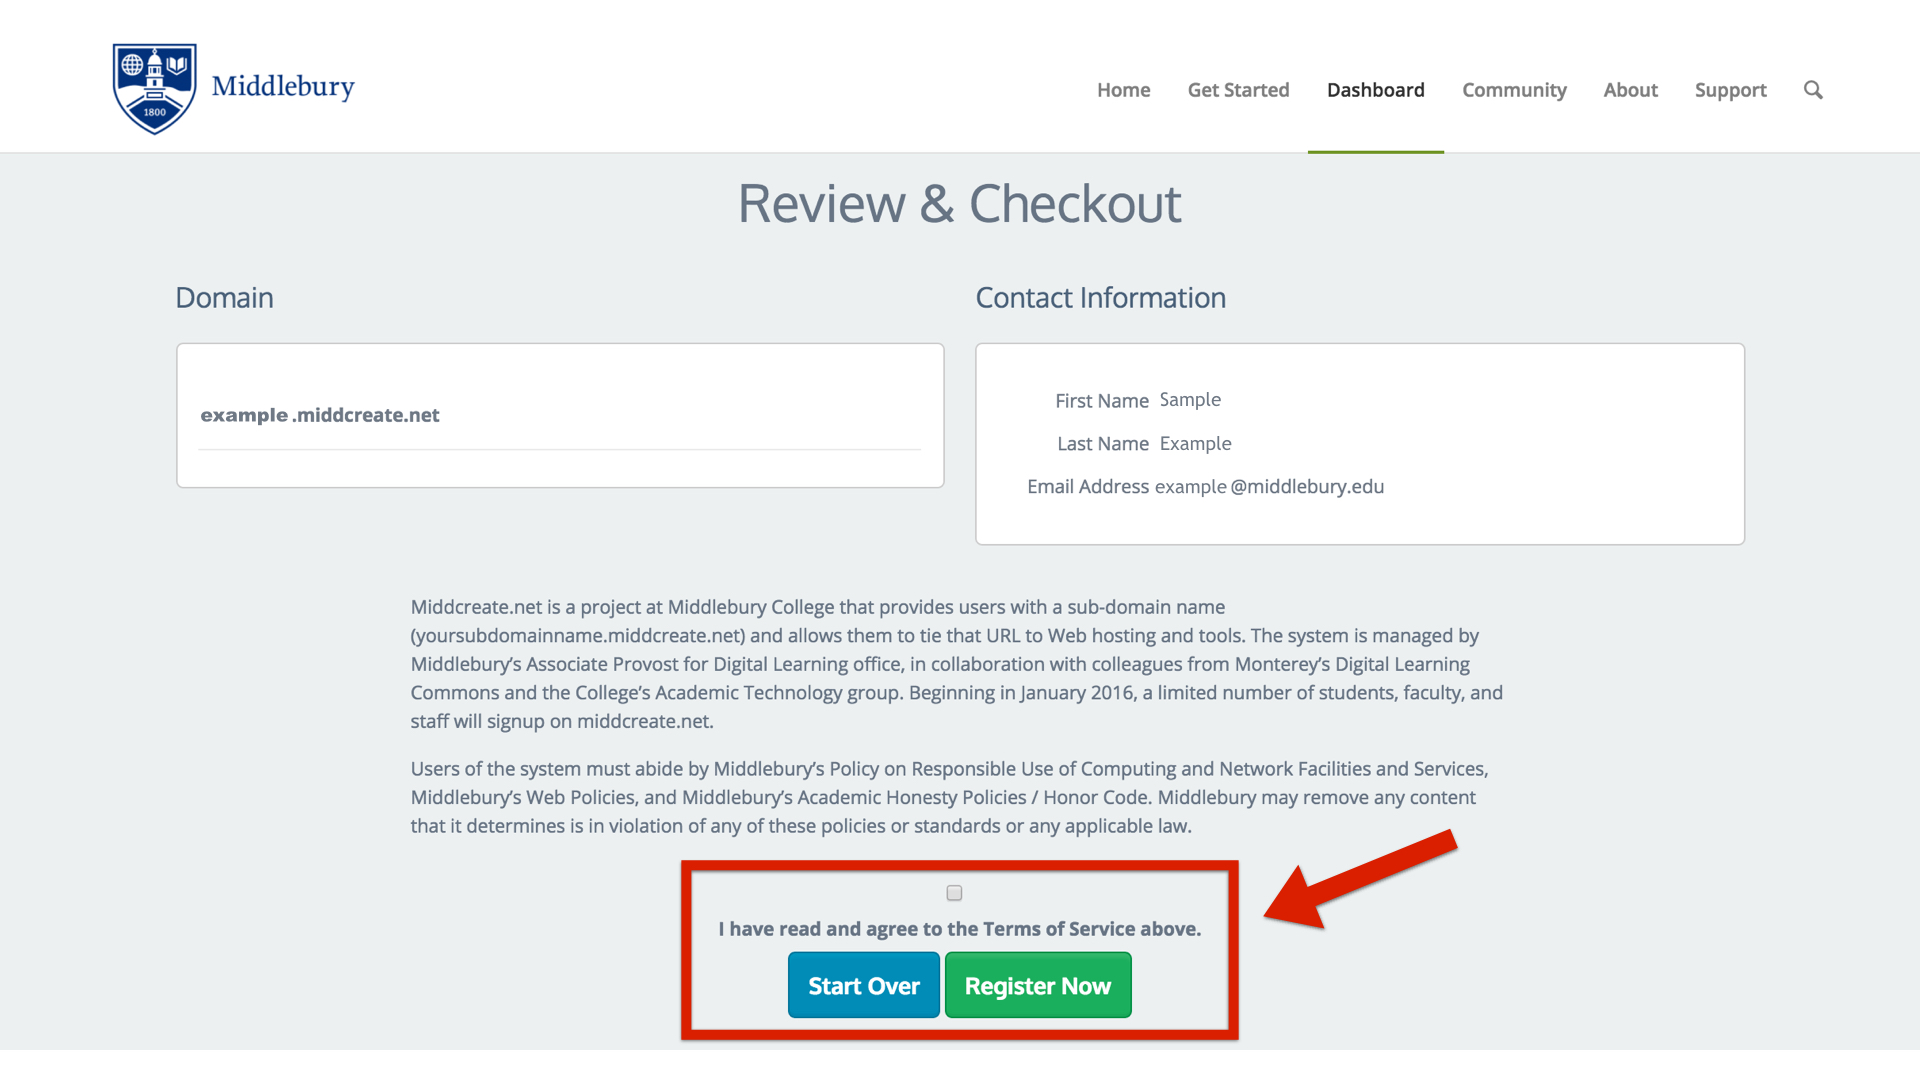
1. To get started you’ll need to log in to your control panel (https://domains.skidmore.edu/dashboard) using your Skidmore username and password.

sign in.001

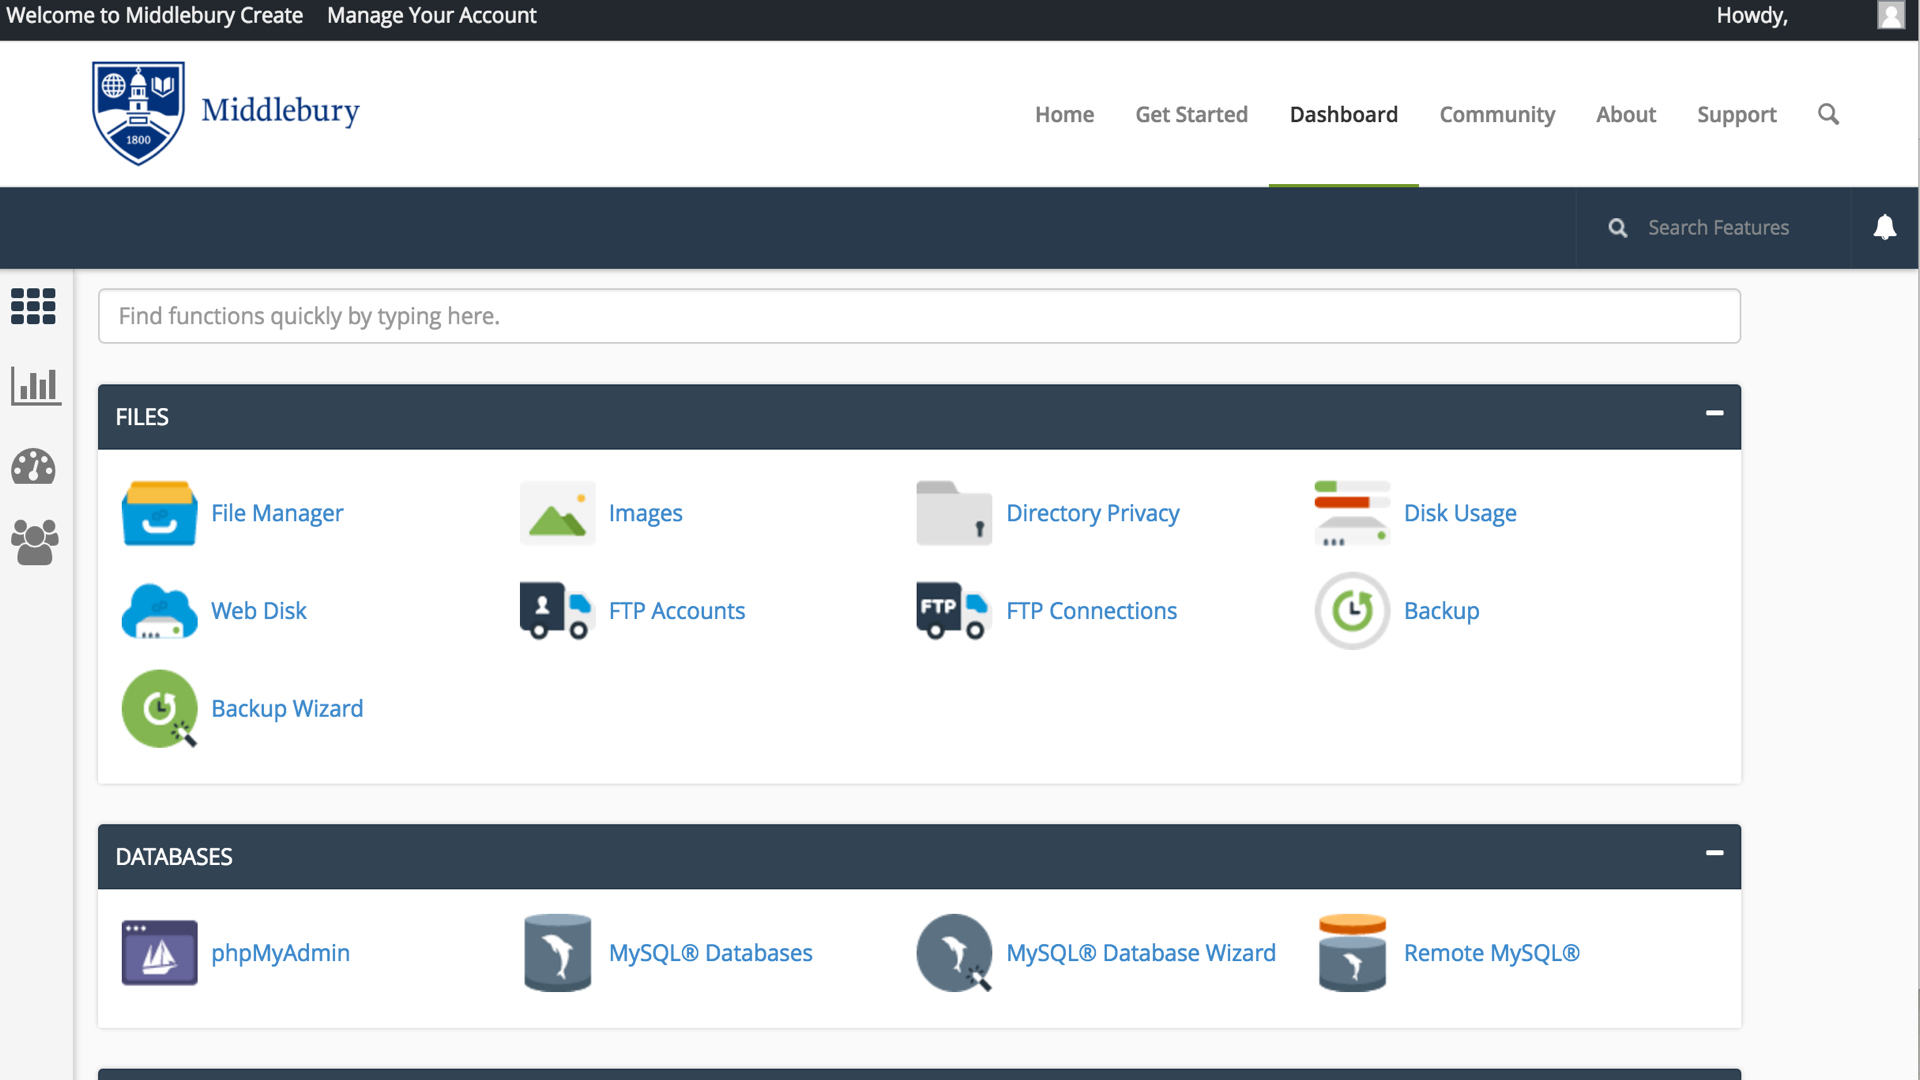
2. Once logged in you’ll be at the homepage of your control panel. Navigate to the Installatron by looking under the ‘Software’ section or typing “Installatron” into the search bar at the upper right corner of the page.

installatron new.001

3. Click on the Applications Browser tab (the one with the star). Then select DokuWiki under the ‘Apps for Content Management’ section.

dokuwiki

4. This page gives you more information about the DokuWiki software. To begin the install, click ‘install this application’ in the upper right-hand corner.

dokuwiki1

5. On the next page the installer will ask for some information about this install. The first thing you’ll want to do is decide where to install it. If you’re wanting to install DokuWiki on your main domain, you can leave the directory area empty. If you created a subdomain, you can select it from the dropdown menu. You also have the option of installing DokuWiki in a subfolder by typing in the folder name in the Directory field. Click here for more information about subdomains and subfolders.

install omeka.001

6. By default the installer will automatically backup your website and update it anytime a new version comes out. While we recommend you keep this option, it is possible to only do minor updates, or turn them off completely. The installer will also create a database for you automatically, but if you’ve already created one for this website you can choose Let me manage the database settings and enter the details. Click Install to continue. omeka database.001

7. The installer will take just a few moments to install DokuWiki and a progress bar will keep you updated. When it is complete you will see links to your new DokuWiki site.

dokuwiki3

8. Congratulations, you have now completed the installation of DokuWiki! Click the top link to log in to your DokuWiki installation.

Using DokuWiki

You can learn how to use this application in the official DokuWiki User Manual, including how to write in wiki syntax when editing pages. These manuals will help you get started and begin building your DokuWiki.

Static and Dynamic Websites

Static Websites

In the early days of the Web, almost all Web sites were what is known as 'static sites.' Content (text, images, video, audio, etc), was placed or embedded in a file in which HTML tags were used to format it. If you looked at the actual contents of the file, you might see something like this:

image

The content and the tags lived side-by-side. To edit the page, you’d open up the file (on your own computer) in a program capable of editing HTML files and make changes to either the content or the presentation. Every page had to be edited individually, even if the edits you were making were for common elements that appeared on many pages (like menu bars).

From a technical perspective, accessing a static Web site is fairly straightforward. When your computer is connected to the Internet, you can use a Web browser to access files on a Web server (as long as you know the address). The Web server delivers the contents of those files to your browser, and your browser displays them.

Dynamic Websites

Over time, as the Web became more sophisticated, new systems emerged for creating and managing Web sites. These moved beyond the model of having content and HTML tags live in a simple HTML page which your browser accessed and displayed. Instead, these systems were Web applications – software that literally runs on the Web server and makes it possible to manage a Web site, often with very sophisticated features. One feature of these applications is that they separate content and presentation by storing most content (your text, images, etc) and data about the site (the title, options, etc). in a database.

On the Web server, the Web application installs files that are written in some kind of programming language. The server reads this code and obeys any requests in it to access data in the database (which lives on a separate server) and displays it according to the instructions in the code.

image

Essentially, the data for the site (living in a series of tables in a database on the database server) is entirely separate from the actual presentation of the site (living in the code of the programmed files on the Web server). Special software on both the Web server and the Database server enable the two to speak to each other and work together.

One of the benefits of using a Web application is that you usually don’t need to touch (or even look at!) the code in order to make changes to your content. In addition, editing the site usually involves accessing some kind of control panel through your Web browser and filling out a form, instead of having to download and access files in software on your own computer.

Dynamic vs Static Content

Sometimes when we talk about the difference between dynamic and static content we get bogged down in the idea of whether or not the content is “fresh” (dynamic, regularly updated) or “old” (static, never updated). How frequently you update your content has nothing to do with what kind of system you are using to manage your site. You can manage a static Web site (as described above) and update the content every day. You can also have a dynamic Web site (running something like WordPress) and never change the content after you create it.

Generally speaking, it IS easier to regularly update content on a dynamic Web site because the Web application just makes it easier. Sometimes, even when you just want a very basic page or placeholder, it’s easier to install a Web application (and only put up a single page) then to manually create an HTML page and upload it.

A Side Note about Separating Content from Presentation: Style Sheets

Another aspect of separating content from presentation involves the use of 'Cascading Style Sheets' (CSS). These are special files that live on your Web server and are linked to your Web pages. They contain information (written in a special markup language) about how to make elements on your site look. They allow you, for example, to define in a single location what all Level 1 Headings look like on your site. They are an important aspect of understanding how to separate content from presentation, but they’re not really an aspect of the difference between static and dynamic sites. Both static and dynamic sites can use style sheets.

Subdomains vs. Subdirectories

When you’re first getting started with a new space on a new Web host, you might think of yourself as owning a small “territory” of the Web. Everything you place in your public folder on the server becomes available for anyone on the Web to see (assuming they know the address of your site and the files you’ve placed there).

If you’re just putting up a handful of static, HTML pages which you want to make available to colleagues, friends, or family by sending them links, then working with this large, unorganized space may work. But as soon as you get to the point where you want to organize your site, you’re going to need a new strategy.

Consider this scenario: you want to have a personal blog on your new Web space, where you share pictures and short written pieces with family, friends, and colleagues. In addition, you’re working on a large research project that requires you to build a Web-based repository of digital images related to your discipline. You want to use one application (say, WordPress) to manage your personal blog. For your research project, you’ve settled on another open-source application (Say, Omeka). Both of these are applications that need to be installed on your Web host, but you can’t just put them both at your main domain name – if you did, both sites would quickly experience conflicts and errors. You need to cordon off separate spaces for your different Web “properties.”

There are two primary strategies for parceling up your Web space. You can create subdomains or subdirectories. But before you can understand the difference, you need to first understand what we mean when we talk about your root domain.

Root Domain

Let’s say you’ve registered a new domain for domains.skidmore.edu called yourdomain.com. Anything that is stored at this core URL is considered to be at the root of your domain: Nothing comes before the address or after the address. You can certainly decide that you simply want to have a single site on your Web host (say a blog running WordPress), and you can set that blog up at your domain’s root. To get to your site in this scenario, users would simply go to yourdomain.com.

Subdomains

When you want to do more than just have a single site at the root of your site, you need to decide now to organize your space. One way to do so is by setting up subdomains.

You’re already familiar with the concept of subdomains, even if you don’t know it. Consider OU’s public Web site at http://ou.edu. As you browse parts of that site, you’ll notice that the domain changes. When you’re looking at your department Web site, say the site for the Chemistry & Biochemistry Department at http://chem.ou.edu, the URL is no longer just ou.edu. Now the root of the url is chem.ou.edu, indicating that you’re on the part of the site that is dedicated to the Chemistry & Biochemistry Department.

If you browse to the technology store pages at http://itstore.ou.edu, you’ll notice that the domain changes again, this time indicating that you’re in the technology store of the OU site.

As you can see the domains serve two purposes: they help to organize the site from a technical perspective, but they also serve as indications to the users that they are in a new/different space.

As you work on your site, you’re welcome to create as many subdomains as you like, and in each subdomain you can actually create a distinct, individual Web site.

Subdirectories

The alternative for organizing your space is to simply set up subdirectories. These function much like file folders on your computer. Instead of creating a blog at blog.yourdomain.com you would place it in a subdirectory called “blog” making the address yourdomain.com/blog. Setting up subdirectory is really easy. You can create folders on the fly when installing applications (like WordPress), and you can also manually create them in your file browser.

There is one particular issue you need to be aware of. Let’s say you’ve installed WordPress to be your primary blog at yourdomain.com. Later, you decide you want to create another image gallery site on your site, and you want to place it at yourdomain.com/gallery. But, if for some reason you’ve already created a page on your WordPress site called “Gallery” then the url yourdomain.com/gallery will already be taken. If you try to create a subdirectory of the same name, you’ll get a conflict and errors.

Tips & Review
  • Subdomains are generally a cleaner, more elegant solution to organizing your site. You’re less likely to get conflicts or errors. However, when using subdomains the process is slightly more complicated: You must create subdomains first, before you can install anything in them.
  • Subdirectories don’t create as pretty URLs as subdomains, but they’re easier to set up. They can, however, result in conflicts with existing Web pages.
  • As soon as you create subdomains or subdirectories to organize your site, you need to consider how people are going to find them. If you’ve created a new primary blog at blog.yourdomain.com, and someone goes to just yourdomain.com, they won’t see that new site. It is possible to set up redirects to avoid this issue. You can also always create links from pages on one subdomain of your site to another.
  • If you really just need one site, sometimes installing at the root of your domain is the easiest thing to do, at least as you’re getting started. You can always add more pieces to your territory later with either subdomains or subdirectories.
Tutorials

What Exactly is a Web Application?

In the most general terms, a Web application is a piece of software that runs on a Web server. A Web server is a just a specialized computer designed to host Web pages.

Most Web applications are comprised of two components: files and a database. When you install a Web application, you will need to make sure all of the files are copied over into the appropriate location AND that a database (and database user) has been set up to connect to those files. Often, you will have to do some configuration to make sure the application knows how to access the database.

The system we use for domains.skidmore.edu uses a special script installer called Installatron (in cPanel) that allows you to automatically install dozens of open source applications. When you use Installatron, you don’t need to worry about moving files, creating databases, or doing the initial configuration. It’s all taken care of for you. You can find out more about Installatron here.

In order to run on the domains.skidmore.edu server, Web applications must be able to run on a LAMP server, which is the particular kind of Web server that we use. Occasionally, a Web application may require additional components or modules that need to be installed on the server.

Setting Up Subdomains

A subdomain is one way of organizing and separating content on your site. To create a subdomain, use the following steps:

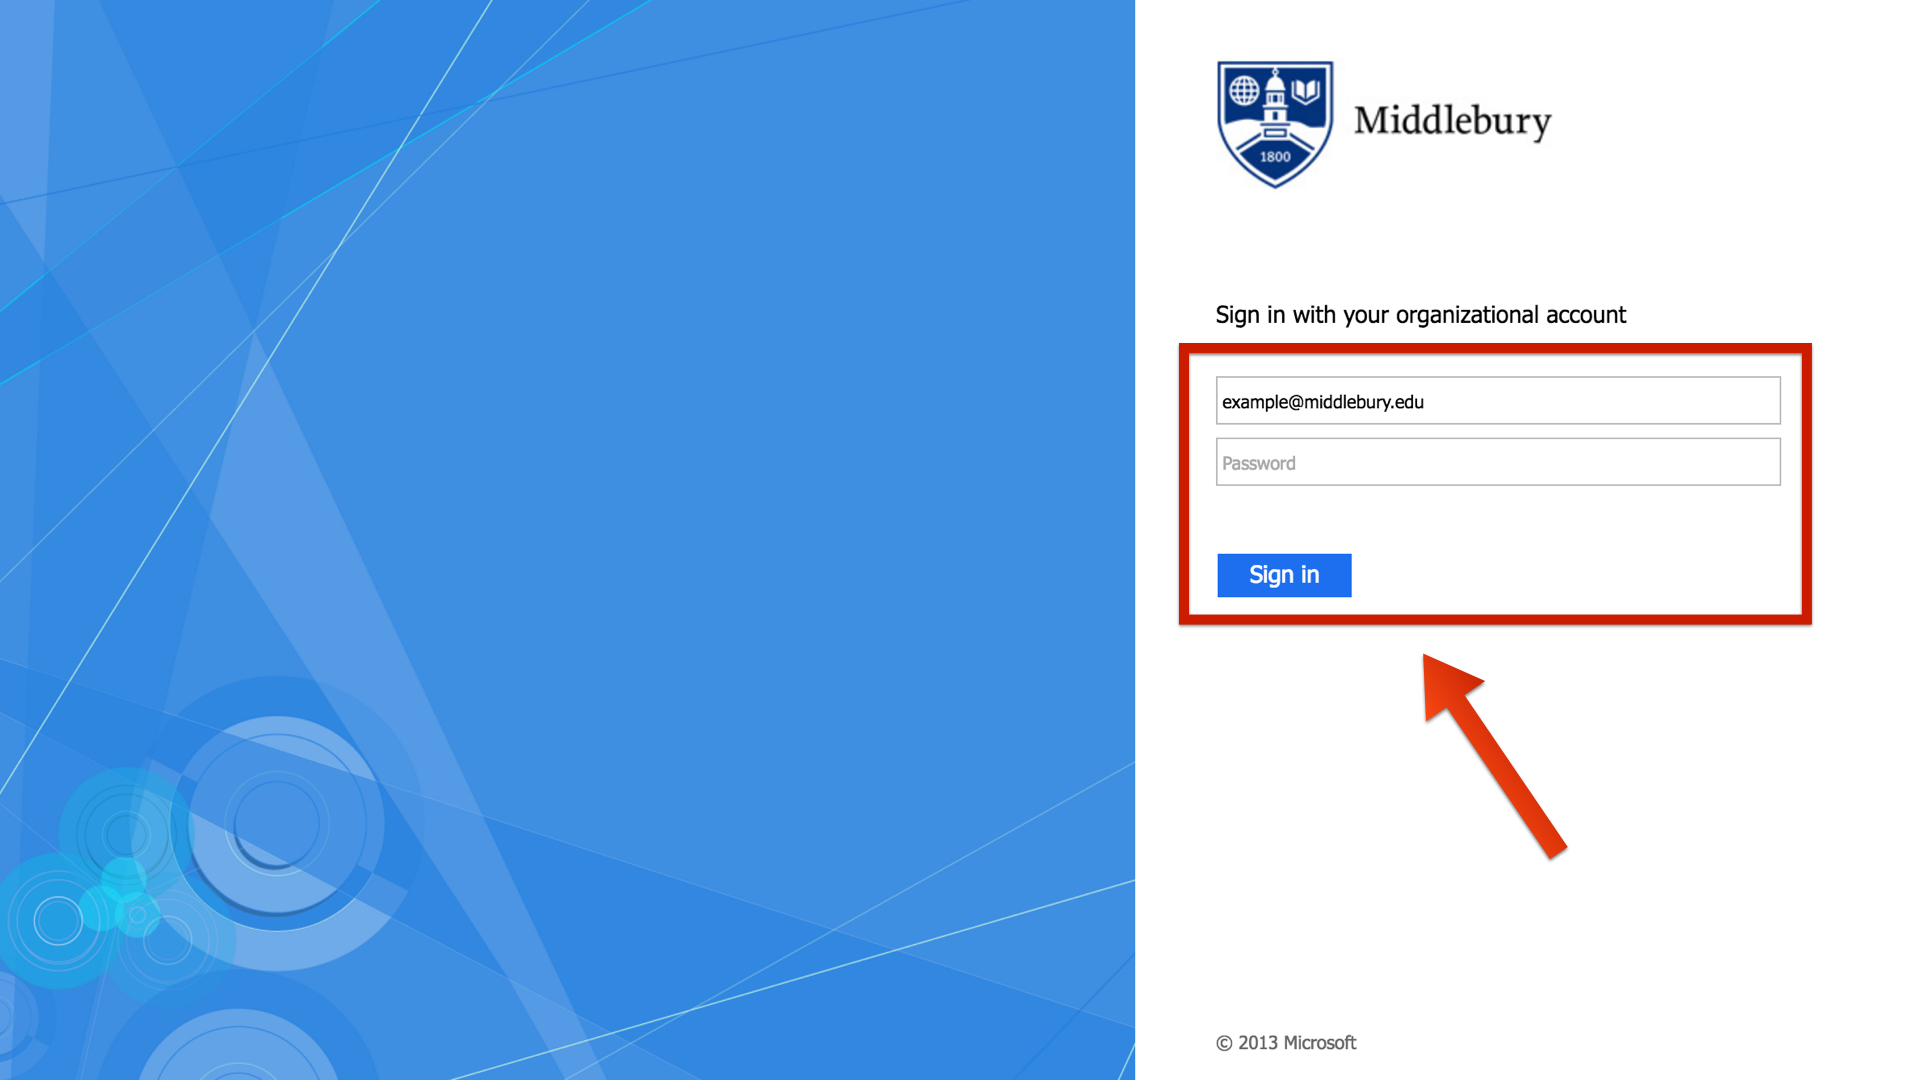
Login to domains.skidmore.edu with your Skidmore username and password to access your cPanel.sign in.001

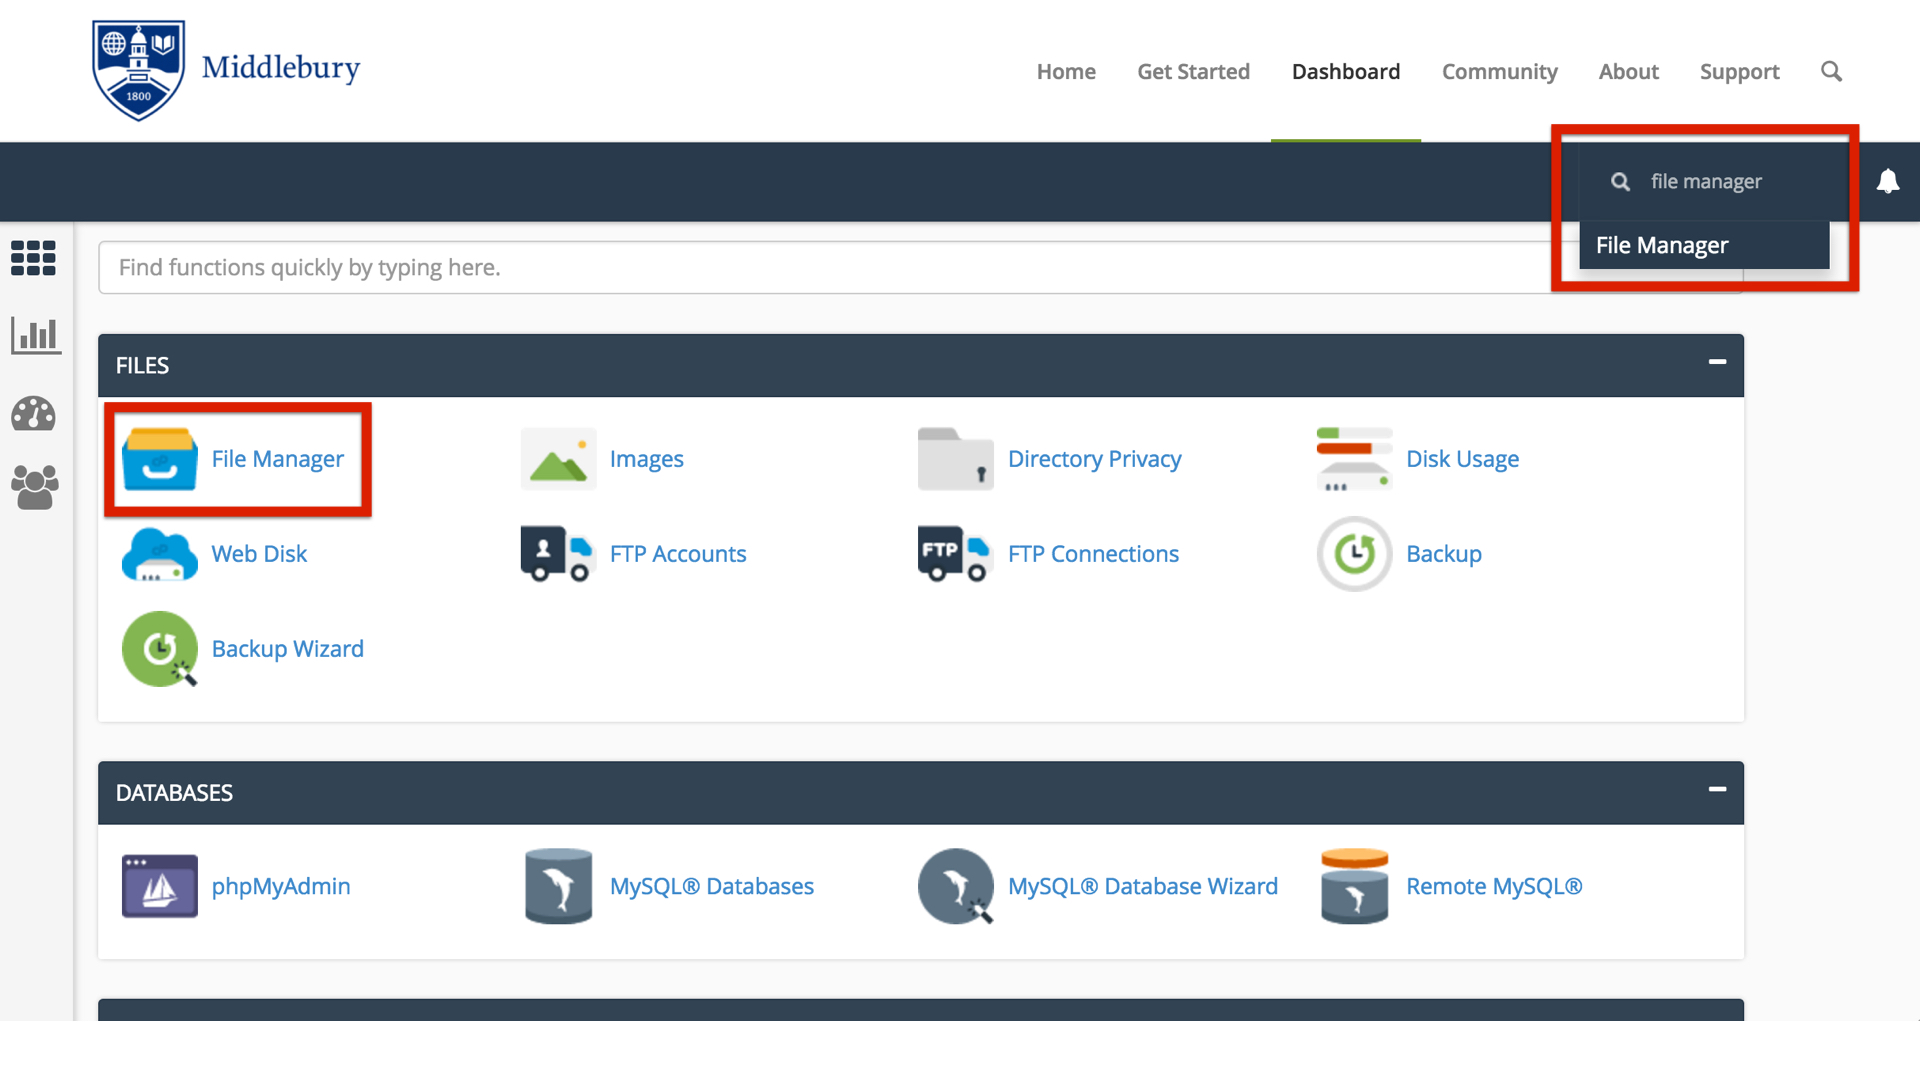
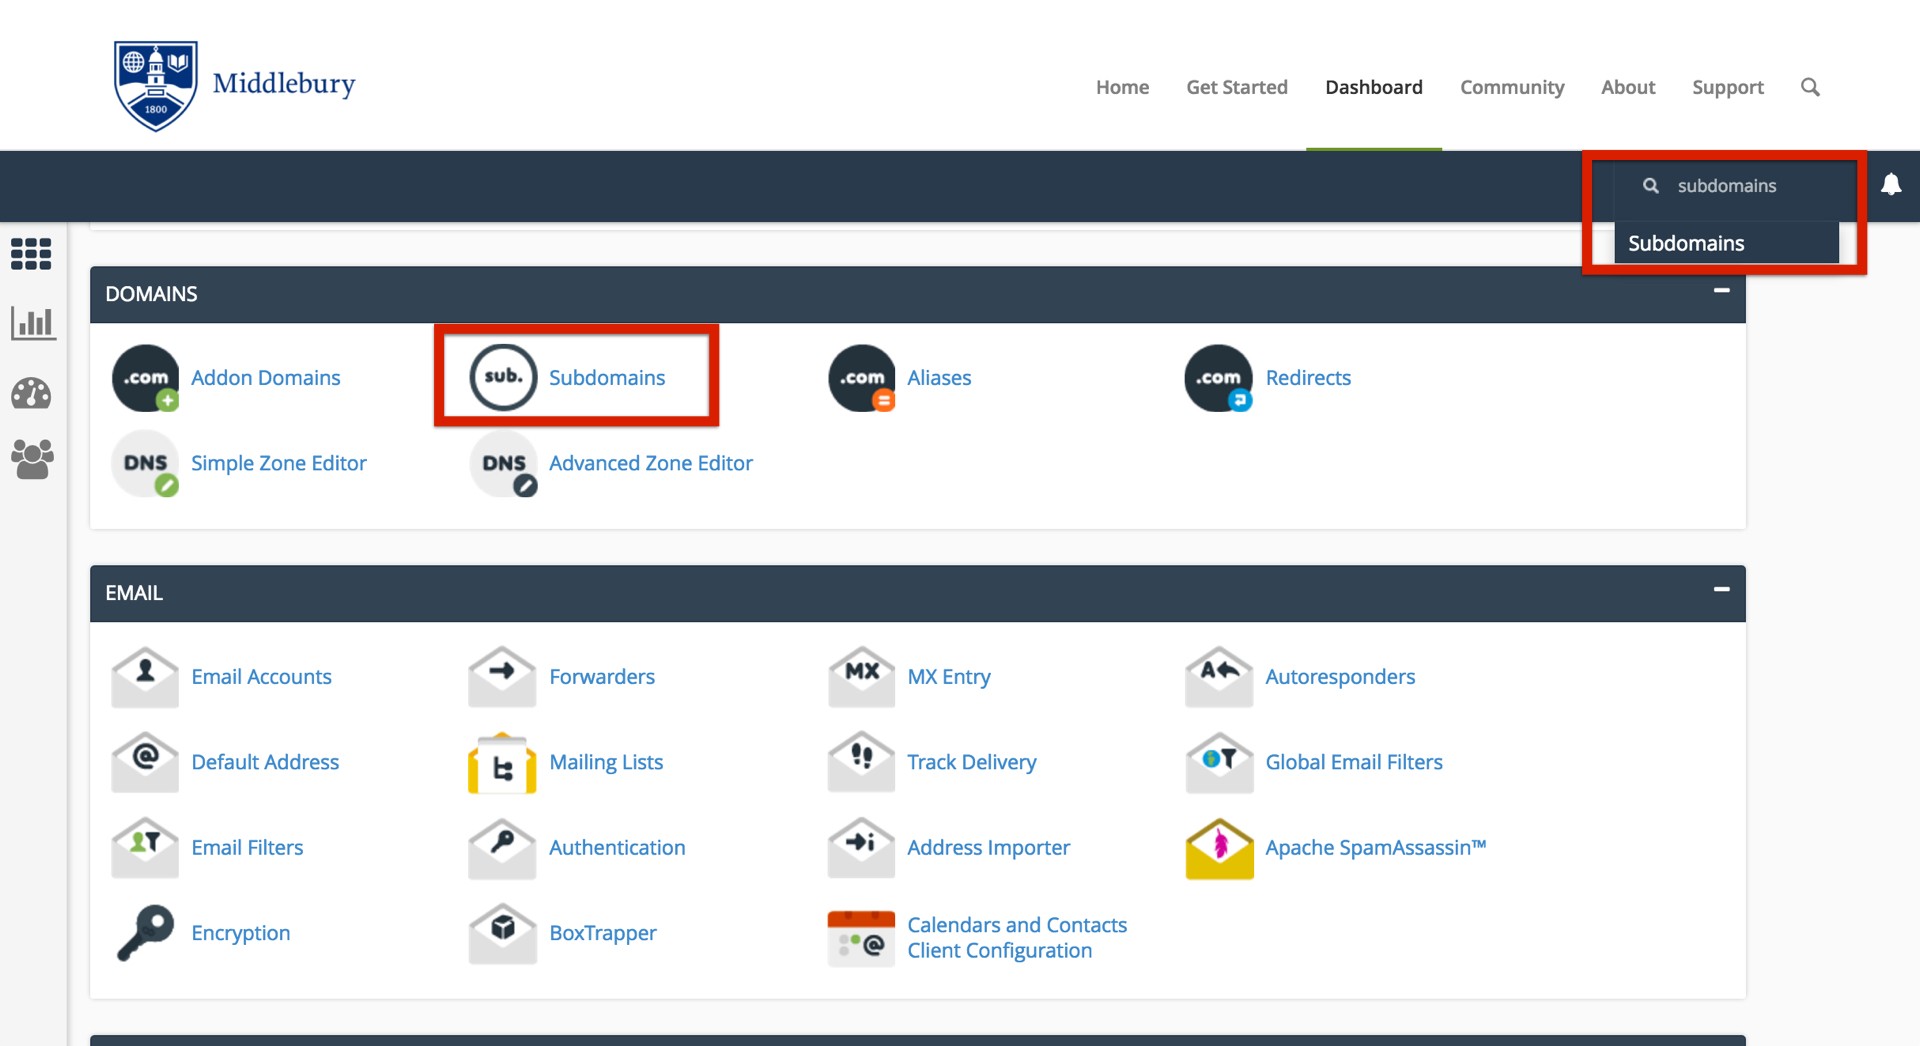
Once logged in you’ll be at the homepage of your control panel. The easiest way to navigate the panel is using the search feature in the top right panel. Click the Search box and type “subdomains” (without the quotes). When you press enter, you will automatically be take to the Subdomains page. Or, you can scroll down and click the Subdomains button on the cPanel.

subdomains search.001

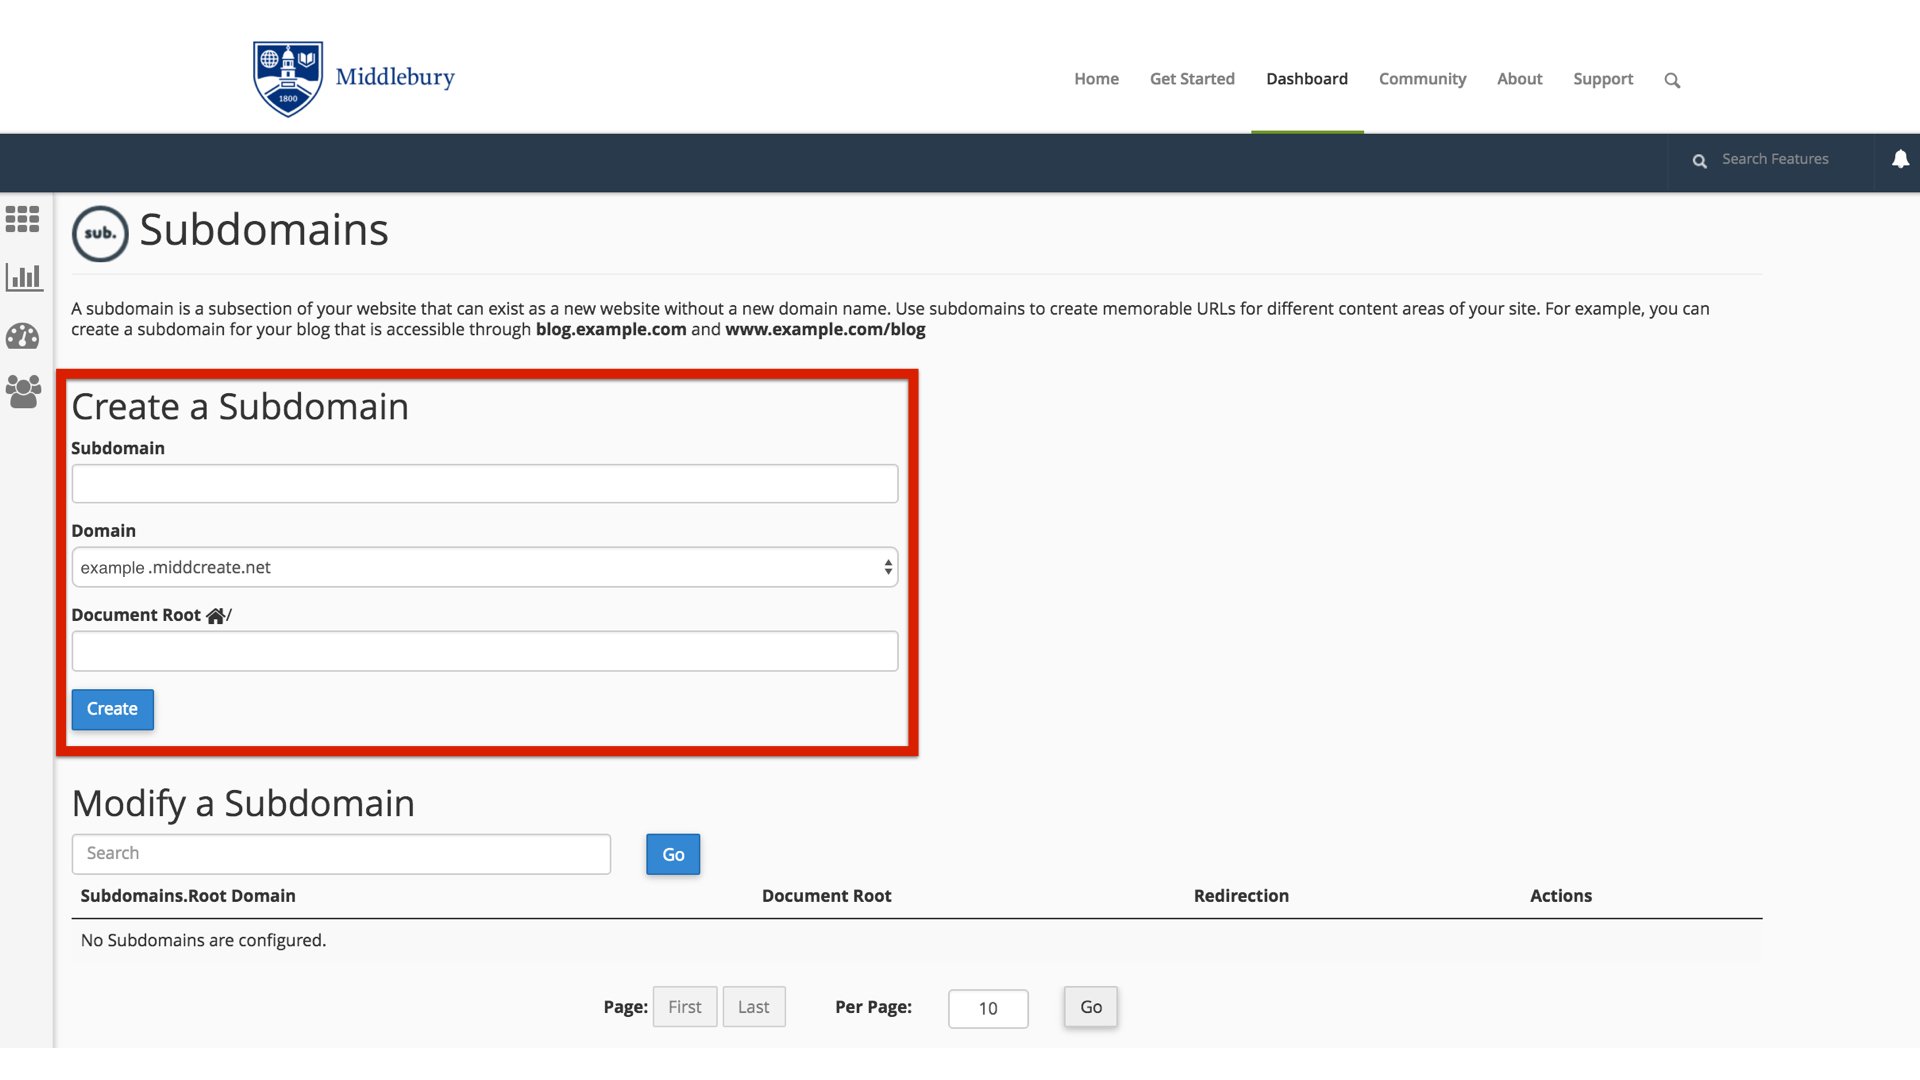
Choose a name for your subdomain and type it into the Subdomain box. Just like top-level domains (e.g. createoutestdomain.com), subdomains can only contain numbers, letters, and hyphens, and the best subdomains are simple, short, and descriptive.

create subdomain.001

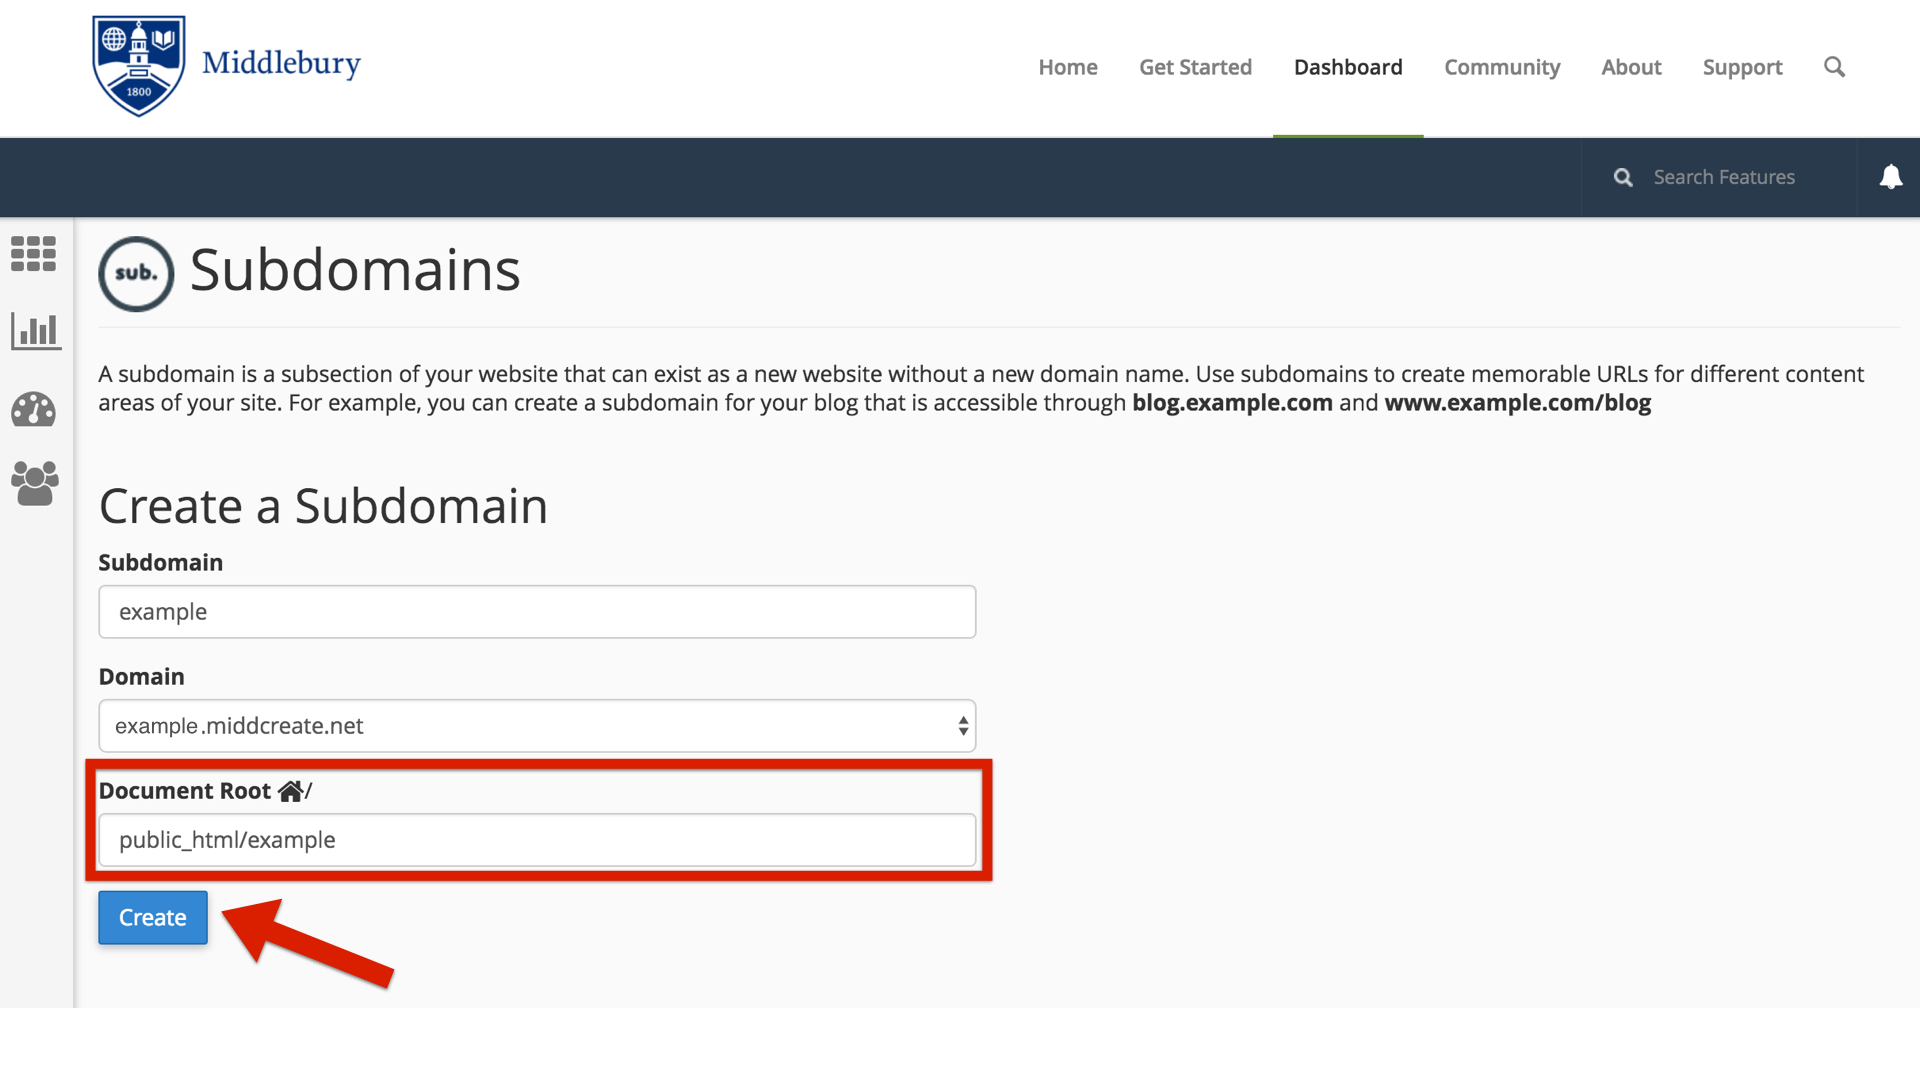
Once you’ve typed in a name, cPanel will automatically populate the Document root field for you. This will create a folder to contain your subdomain’s files. You’ll usually want this folder to match the name of your subdomain, so it’s easy to identify where different files live in your account. You might want to change the document root if you already have a folder in your account that has the same name as the subdomain you are trying to create, although this should be rare. Once you’re done, click Create.create subdomain doc root.001

Once you’re done, click Create. If everything went well, you should see a message that your subdomain was created successfully. Your subdomain will now be available as an option for automatic installation of various software (WordPress, MediaWiki, etc). If you prefer to install web applications manually, you can do so in the document root (folder) you created in step 5.

Video Tutorial & Ideas

What Can You Do with Your Skidmore Domains Account?

Your ability to do things on Skidmore Domains is dictated to a large degree by the limits of your imagination. That said, there are some technical requirements and limitations that you should be aware of and might want to review.

To spark your imagination, here are some ideas that might help you get started:

Install a Web Application in Your Space

domains.skidmore.edu makes it very simple to install certain Web applications in your Web space. Web applications are just special software that run on a Web server. Usually they allow you to build and manage a Web site. The kind of site you can build depends upon the type of application you install. Here are some examples of applications that you can easily install within the domains.skidmore.edu Web hosting interface:

WordPress LogoWordPress: WordPress is a blogging application. While it allows you to quickly and easily set up a blog, it also comes with a set of features that really make it possible to set up any kind of basic Web site without much difficulty. We have resources available that are focused on installing and using WordPress.

Mediawiki LogoMediawiki: If you’ve ever browsed or edited Wikipedia, you’ve already used Mediawiki. It is the open-source wiki software that runs the online encyclopedia, and you can install it on your Web space. It’s a good choice if you’re interested in publishing documents and then collaborating with others on them. We have instructions for installing Mediawiki.

ZenPhoto iconZenPhoto: This application is a good choice if you’re looking for a way to share images in your Web space. It’s also a quick install through Installatron in cPanel onto your domains.skidmore.edu Web space.

OwnCloud iconOwnCloud: If you’ve used DropBox, the concept of OwnCloud will be familiar. It allows you to upload and access files from anywhere with Web access. You can also share those files and sync them to your devices. This Web application is another quick install through Installatron in cPanel.

These are just a FEW of the open-source applications that are available to you in your domains.skidmore.edu Web space; you can find a list of all of the applications you can install automatically here.  We encourage you to read more about what Web applications are and which ones are available to you through this project.

Organize Your Site with Subdomains and Folders

Through this project, you’ve received a domain name that you can actually subdivide and organize anyway you like. One easy way to organize your domain is to create subdomains, in which you can then install other applications. In addition, you can just set up subfolders for your site (which can also have their own applications installed in them). Here’s an example of how you might organize your site (using the subdomain vs. the subfolder approach)

Subdomain Approach Subfolder Approach
yourdomain.com (“root”) Install WordPress as your “main site” yourdomain.com (“root”)
course1.yourdomain.com Install a second WordPress instance for a course you’re taking yourdomain.com/course1
photos.yourdomain.com Install ZenPhoto for a public photo gallery of your photos yourdomain.com/photos
docs.yourdomain.com Install MediaWiki for a club you belong to that wants to collaboratively edit its bylaws yourdomain.com/docs
files.yourdomain.com Install OwnCloud so you can access your files on your laptop and at work yourdomain.com/files

This is just an EXAMPLE of a way to organize your site and then use different sections to do different things. There is no one solution to this challenge, and what you do should be driven by what makes sense to you. To start, you may just want to install one thing at the “root” of your domain, and then let the rest evolve as you get to know more about what’s possible.

Map Your Domain (or a Subdomain)

If you already have a digital presence that you’d like to pull into your domains.skidmore.edu space, domain mapping is an option you may wish to explore. This allows you to assign your domain (or a subdomain) to another service. Some services that work with domain mapping are:

When you map a domain, users who visit your URL will automatically see your space on one of these services. It’s a great way to incorporate your activity elsewhere into your domain, and it might be a good first-step if you’ve already established a presence somewhere else and just want to point your new domain to that space.
Setting Up FTP

There may be times when you need to place files onto your space on your Web server. There are a number of scenarios when this might be necessary:

  • You’re working with an application that allows you to install plugins/extensions, but the files need to be manually moved to the server in order to add them. (Note: This is NOT required with WordPress which allows you to install plugins through the backend in your browser.)
  • You’ve developed a custom site/pages using a Web design program, and you need to upload the files you created to the server
  • You’re installing an application that isn’t part of the applications in Installatron.

One way to upload files is by using the File Manager that is part of cPanel. However, sometimes you’ll find it easier/necessary to use FTP, or File Transfer Protocol, to move files to the server. This can be particularly useful if you’re working with a Web space where you’re not the owner (so you don’t have access to the File Manager in cPanel) or if you need to provide file access to someone else to your space on the Web server.

What exactly is FTP?

File Transfer Protocol is a method that allows you to remotely move files to a Web server from another location – usually your local/personal computer. Using a pre-defined FTP account (with a username and password), you can configure an FTP client (a program you run on your computer that allows you to transfer files via FTP.

There are lots of FTP clients that you can use; some are free and some are not. A few free ones you might consider:

For the purpose of this tutorial, we’ll show you how to set up FTP in FileZilla, but you should be able to generalize these instructions to use in any FTP client.

Get Information about Your FTP Account

If you’re FTPing to your own space on the Web server, or if you’re setting up an FTP account for someone else to use to FTP to your space, you’ll need to start by getting information about the FTP credentials from cPanel:

  1. Login to domains.skidmore.edu.
  2. In the Search Box at the top of the page, search for “FTP”, and click the FTP Accounts icon that appears.ftp accounts.001
  3. You’ll have the option to create a new FTP account, or you can scroll down the page to find the credentials for the default FTP account. If you want to create an account, fill out the Add FTP Account form with a username and password. By default, the new FTP account will be limited to a directory with the same name as the account you’re creating. You can change this to a different directory, if you want to grant this account access to a different location.  NOTE: Make sure you know/remember the password you enter. When you’re done, click Create FTP Accountcreate ftp account.001
  4. Once you’ve created the new account, you’ll see it appear in the list at the bottom of the FTP Accounts page. In addition to any accounts you’ve created, in the Special FTP Accounts section, you’ll see the default FTP Account. You’ll know this account because the username corresponds to your cPanel username. This FTP account has full privileges to access any space on your Web server. ftp account name.001
  5. For whichever account you need credentials for, click the Configure FTP Client link.
  6. Write down the username, server, and port information that appears. You will need to use this (or you will need to provide this to the person you are giving FTP access) along with the password you created in Step 3 in order to configure your FTP client. ftp configuration.001

Configure FTP in Your FTP Client

Below are links to tutorials for setting up both FileZilla and CyberDuck to connect to you FTP account.

Privacy and Skidmore Domains

What you put up in your domains.skidmore.edu space rests entirely with you. You can choose not to pick a domain that reveals your name. You can use a pseudonym on your actual site. However, when you sign up through the default process, your name does get published as part of the public record about your domain name. Anyone can find it by looking up details about the ownership of that domain name through a public “Whois” request.

This is NOT an issue if you’re already planning on using your name openly on your site (in your domain name or elsewhere). This option is aimed, specifically, at those who, for whatever reason, feel they want to take every precaution to hide their identity on their site.