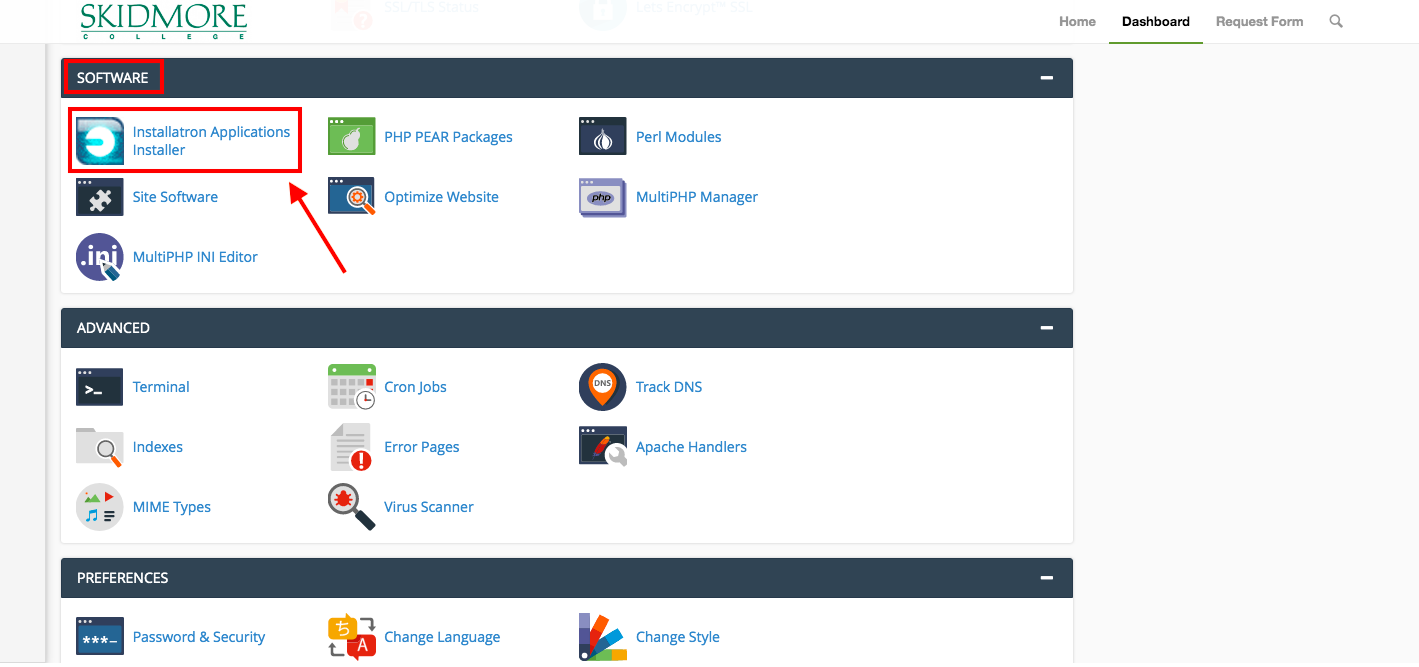
Skidmore Domains currently utilizes subdomains of .domains.skidmore.edu for the initial signup, however after using your space you may decide you’d like to register a top-level domain (a .com, .net, .org address). You can do this by registering a domain with a service provider (we make a recommendation below, but any domain provider should work) and adding it to your space as an Addon Domain.
To start you’ll need to get the domain registered. When choosing a domain we recommend keeping it all lower-case, avoiding hyphens, keeping it short, and of course it will need to be a unique address. Our service provider, Reclaim Hosting, has made the process of registering a domain quite simple, and the domain will work with very few additional steps due to the integration they have with our hosting system. To register a domain you would go to https://portal.reclaimhosting.com/cart.php?a=add&domain=register and type in the domain you’d like to purchase:
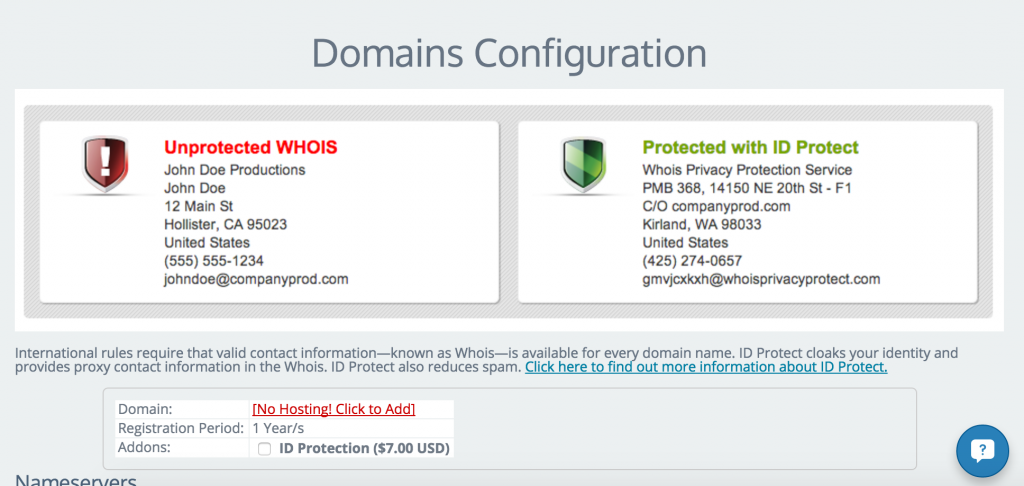
After ensuring the domain is available for purchase you’ll be prompted to select whether you’d like to protect the contact information associated with the domain. All domain registrations are required to have valid contact information publicly available, however a proxy service to protect your identity is available for an additional fee. You can read more about this service, ID Protect, at http://docs.reclaimhosting.com/FAQ/ID-Protect-FAQ/.
You’ll also be prompted for nameservers for the domain. If registering the domain through Reclaim Hosting you can leave these with the default. If registering the domain elsewhere you’ll want to point the nameservers to ns1.reclaimhosting.com and ns2.reclaimhosting.com in order for the domain to work with our system.
Once you’ve completed the checkout process with payment information the domain will be registered automatically. The last step is to add it to your existing account here at Skidmore Domains. To do that you’ll log into your account at https://domains.skidmore.edu/dashboard and in cPanel navigate to Domains > Add-on Domains.
Here you will type in the domain that you registered previously to host it within your space on Skidmore Domains. cPanel will also setup a subdomain which you can leave with the default that it creates and verify a location for the files for the domain (typically a folder inside of public_html). The option to create an additional FTP account is present but not necessary. Once the domain is entered click Add Domain to add the domain to your hosting account.
At this point the domain will now be hosted in your account and you can use it to install software, upload files, and any number of other actions available to you in cPanel.
If you’ve built a great website on Skidmore Domains but want to customize it beyond the available options, you can transfer it to Skidmore Domains. Using your own domain on Skidmore Domains gives you full creative control over your site’s appearance and the flexibility to add new functionality. In addition, Skidmore Domains domains are hosted through Reclaim Hosting, which provides a convenient migration service so you can keep your site after you leave.
Caution:All the content and media contained within your posts and pages can be migrated, but files in your Media Library, your theme, and any appearance settings will not transfer to your new WordPress site. You will have to set these up again once you migrate your content.
Export Your Site
Go to your cPanel and sign in to your account. Go to My Sites and click on the dashboard of the site you want to migrate.
Click on Tools > Export in the toolbar to the left. Select what you want to transfer, then download the export file.
Install WordPress on your Skidmore Domains domain and go to your WordPress dashboard. You may want to delete the automatically generated example posts and pages (e.g. the “Hello world!” post).
Import Your Site
In your Skidmore Domains WordPress dashboard, go to Tools > Import in the toolbar on the left. Choose WordPress from the list of systems.
Click on Choose File and select the file you exported from SITES dot. Then upload the file and import it.
You will be asked to assign authors to the posts or pages you import. You can choose to keep and display the authors’ names from the SITES dot version of your content or change them to something else. Remember to update the passwords and roles of imported users once the migration is completed. If you want to keep the file attachments (image, video, document, etc. files uploaded into your posts from the post edit screen), be sure to check the import attachments box before you click Submit.
Congratulations! The migration is complete and you can start customizing your new site on Skidmore Domains
Omeka is an open-source web application that can be used to create and display online digital collections. Developed by programmers at George Mason University, Omeka was designed to be user-friendly, both during installation and setup and during daily usage. To install Omeka, use these simple steps:
Once logged in you’ll be at the homepage of your control panel. Navigate to the Web Applications section of the cPanel and find Featured Applications. Then select Omeka.
This page gives you more information about the Omeka software. To begin the install click install this application in the upper-righthand corner.
On the next page the installer will ask for some information about this install. The first thing you’ll want to do is decide where to install it. If you’re wanting to install Omeka on your main domain, you can leave the directory area empty. If you created a subdomain, you can select it from the dropdown menu. You also have the option of installing Omeka in a subfolder by typing in the folder name in the Directory field. Click here for more information about subdomains and subfolders.
By default the installer will automatically backup your website and update it anytime a new version comes out. While we recommend you keep this option, it is possible to only do minor updates, or turn them off completely. The installer will also create a database for you automatically, but if you’ve already created one for this website you can choose Let me manage the database settings and enter the details. Click Install to continue.
The installer will take just a few moments to install Omeka and a progress bar will keep you updated. When it is complete you will see a link to your new Omeka site as well as a link to the backend administrative section for your Omeka site. Click the website link to configure your new Omeka installation.
When you visit your new Omeka installation for the first time, you will be taken to the site configuration page. Enter a Username, Password, and Email for the administrative superuser (i.e. yourself).
Under “Site Settings,” enter an Administrator Email and a Site Title. The Administrator email is the address that messages from the system (e.g. forgot password email reminder) will appear to come from. You might want to create a custom email address using these instructions, for example webmaster@yourdomain.com or omeka-admin@yourdomain.com, to use for this purpose. The Site Title will appear at the top of your visitors’ browser windows.
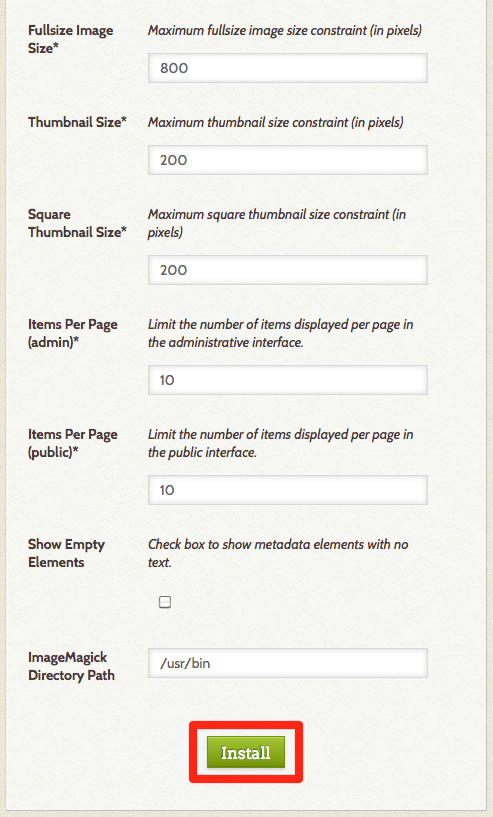
Further down the Site Settings page are several numerical settings; you may leave these at the defaults if you are new to Omeka. When you are done making changes, click the Install button to submit the configuration page and proceed.
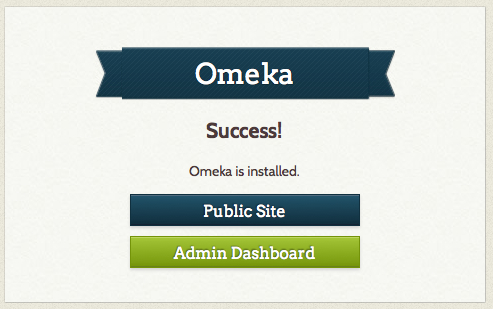
Congratulations! Omeka is now installed. Use the buttons to either proceed to the Public Site, or to begin adding content, go to the Admin Dashboard.
Installing Plugins
There are a variety of plugins that enable additional functionality in Omeka, but in order to easily add them you will first need to install Escher, a plugin installer. All the plugins available for Omeka and their descriptions can be found on this page.
1. Find the Escher plugin listing and click the red button on the right to download the Escher zip file.
2. Next, open up your cPanel Dashboard and click on the File Manager. You can find the File Manager under ‘Files’ or by typing “File Manager” in the upper right search bar.
3. Go to the public_html > omeka > plugins folder by clicking on the folder icons in the file menu, or by typing “public_html/omeka/plugins” into the navigation bar at the top and clicking ‘Go’.
4. Next you will need to upload the Escher zip file you downloaded into the plugins folder. Select the Upload option in the top menu to open up a new tab where you can upload the zip file. When the upload is complete, click the ‘Go back to home/yourdomain/public_html/omeka/plugins’ link at the bottom of the page to return to the File Manager. You will see that the Escher zip file has appeared in the plugins folder.
5. Make sure the Escher zip file is selected (it should be highlighted in blue), then click Extract from the menu at the top of the page. A small window will open up to confirm where the file will be extracted to. If you were in the plugins folder, it should say public_html/omeka/plugins, if not, type that into the box before you hit Extract File(s).
6. Another window will open that outlines the contents of the file. Just hit the Close button and the installation will be complete.
7. The Escher plugin should now be available in the plugins tab in your Omeka.
8. To use Escher to install other plugins, click on Escher in the left hand sidebar.
9. Next, select the plugin you’d like to install from the dropdown menu and click the Upload button. The plugin will be installed and appear in the plugins page, which you can access from the menu at the top of the page. You will then have to turn on the installed plugin by hitting the Activate button.
Using Omeka
You can learn how to use this application in the official Omeka Support Documentation. This support guide will help you get started and begin creating your Omeka site.
You will lose access to your Skidmore Domains domain six months after you graduate (or otherwise discontinue) from Skidmore. You can keep everything exactly the same while you still have access to your Skidmore email, which is for 6 months after graduation. However, when you lose access to your Skidmore email, you no longer have access to your Skidmore Domains cPanel.
You then have a number of options, with the ultimate goal to transition your account to one that is no longer managed by Skidmore or connected to your Skidmore email.
The easiest option is to migrate your site off of Skidmore Domains directly to Reclaim Hosting. This option keeps everything exactly the same on the back end, but just moves your content over automatically from the Skidmore Domains servers to the Reclaim Hosting Customer servers. Reclaim Hosting will give you the option to purchase your own domain name (so it will no longer be yourdomain.domains.skidmore.edu) and it will migrate the site for you – easy peasy. You don’t have to do any of the migration work yourself. After that point, your contact for troubleshooting will be “support@reclaimhosting.com.” The most popular plan through Reclaim is $30/year for 2GB of space, which is a very competitive deal.
Other options are to download your entire site to store on your computer, move everything over to another hosting provider, or—if you use WordPress—to export your site’s content, import it to WordPress.com for free, and re-do some of the formatting that doesn’t transfer over. (More info here.)
Using Reclaim Hosting
Skidmore Domains is hosted through Reclaim Hosting, a company that started out of the University of Mary Washington. Through our special partnership with them, you’re eligible to have your domain and content automatically migrated to a full hosting account for free for the first year. See this link for more details.
Just sign up for your own domain, submit a support ticket, and they’ll do the migration for you. You won’t have to provide any login information since they control the servers on both sides.
To sign up for your own Reclaim Hosting domain:
1. Login to domains.skidmore.edu.
2. Go to Migration Information under Manage Your Account in the top navigation menu.
3. Click on Get Started in the Migration Offer box.
4. You will be given the option to 1) register a new domain, 2) transfer your domain from another registrar, or 3) use your existing domain and update your nameservers.
If your site’s URL ends in domains.skidmore.edu, and you have never used a different URL or purchased hosting from somewhere else, the Register a new domain option allows you to get your own personal domain with Reclaim Hosting (outside of Skidmore Domains). Your site will no longer be located at “yoursite.domains.skidmore.edu” and you’ll be able to purchase a new URL.
If you have purchased (or intend to purchase) a URL from a different hosting company, but still want your site to be hosted with Reclaim Hosting, select the I will use my existing domain and update my nameservers option. Your site will be migrated to a personal Reclaim Hosting account, but then you will have to update the information that tells the other hosting company (that you got your URL from) where your site is located. It’s possible to get your hosting and URL from two separate companies, but it’s often easier and cheaper to get them together.
If you already have a site that’s hosted somewhere else, and want to transfer everything to a personal Reclaim Hosting account, select Transfer your domain from another registrar.
Other Hosting Providers
If you don’t want to continue with Reclaim and would rather use a different hosting company, you can download all your site files independently, purchase a URL, and upload the files to your new domain through FTP.
MediaWiki is an open-source publishing platform that can be used for creating a collaborative document repository. It’s the software that drives the Wikipedia website. Setting up a MediaWiki install on your own domain can be done by following these steps:
Once logged in you’ll be at the homepage of your control panel. Navigate the Web Applications section of the cPanel and click View More for the Featured Applications. Then find and select MediaWiki.
The next page gives you more information about the MediaWiki software. To begin the install, click install this application in the upper-righthand corner.
On the next page the installer will ask for some information about this install. The first thing you’ll want to do is decide where to install it. If you’re wanting to install MediaWiki on your main (the root) domain, you can leave the directory area empty. If you created a subdomain, you can select it from the dropdown menu. You also have the option of installing MediaWiki in a subfolder by typing in the folder name in the Directory field. In this instance, we have opted to install it in a subdomain called mediawiki.createoutestdomain.com. Click here for more information about subdomains and subfolders.
(By default the installer will automatically backup your MediaWiki website and update it anytime a new version comes out. While we recommend you keep this option, it is possible to only do minor updates, or turn them off completely. The installer will also create a database for you automatically, but if you’ve already created one for this website you can choose Let me manage the database settings and enter the details.)
Finally, you’ll need to create an initial username and password for the WordPress install. Enter that information in final section and click Install (Note: A default username and password are provided for you.)
The installer will take just a few moments to install WordPress and a progress bar will keep you updated. When it is complete you will see a link to your new MediaWiki site as well as a link to the back end administrative section for your MediaWiki site.
6. Congratulations, you have now completed the installation of MediaWiki! You can now start to create collaborative documents on your own domain.
Managing Permissions
The default Mediawiki installed has been customized to make it a bit harder for spammers to overwhelm wikis with illegitimate content and comments. This is done by modifying the LocalSettings.php file (a file that is included in every install in which it is possible to provide configurations details).
By default, Mediawiki allows anonymous users to create pages and edit pages in the wiki. The modifications change this in the following ways:
Anonymous users cannot edit existing pages
Anonymous users cannot create pages
Registered users must click the confirmation link in the registration email in order to edit or create pages
This approach should drastically reduce unsolicited content and comments on Mediawiki installations. One further step that administrator might take is to turn registration off after a predetermined amount of time. Users must create accounts by this date; after that, the settings are changed so that registrations are no longer open.
To add this setting, you must edit LocalSettings.php in your Mediawiki install:
In the File Manager, browser to the folder within publichtml that contains your Mediawiki install. If you installed the wiki at the root of your domain, you won’t need to go any further than publichtml. If you installed the wiki in a subdomain or subdirectory, you’ll need to find the directory that is associated with that space.
Locate LocalSettings.php and click the Edit or Code Editor icon at the top of the File Manager.
Browse to the bottom of the document, and locate the custom settings that were added during the Mediawiki install and the line “$wgGroupPermissions[‘*’][‘createaccount’] = false;”
Using MediaWiki
You can learn how to use this application at the official MediaWiki Help Pages. This support documentation wiki will show you how to manage all aspects of your wiki, including customizing its appearance, editing content, and changing user settings.
The cPanel has a Backup Wizard that lets you easily backup and restore all or parts of your domain files and databases.
Login to domains.skidmore.edu.
In the Search Box at the top of the page, search for “Backup Wizard”, or under Files click on Backup Wizard.
3. If you click the “Backup” button, you will have the option to create a full or partial backup. A full backup will create an archive of all the files and configurations on your website. You can only use this to move your account to another server, or to keep a local copy of your files. You can’t restore full backups through your cPanel interface. In order to restore files, you’ll need to download partial backups.
WordPress is an open source blog application. WordPress forked from b2/cafelog in 2003, and WordPress Mu multiple website functionality has been integrated since 2010. Today WordPress is the most used blog application powering millions of blogs and being used by tens of millions of people every day.
Installing WordPress
WordPress is an open-source publishing platform that can be used for setting up a blog or website easily. In fact it’s one of the most popular publishing platforms on the web. Setting up a WordPress install on your own domain can be done by following this video tutorial and/or these simple steps:
Once logged at https://domains.skidmore.edu you’ll be at the homepage of your control panel. Scroll down and look under Web Applications, then click the WordPress button.
This page gives you more information about the WordPress software. To begin the install click Install this Application in the upper-righthand corner.
On the next page the installer will ask for some information about this install. The first thing you’ll want to do is decide where to install it. For example, you could install it in a subdomain you have created by selecting it from the dropdown menu. You also have the option of installing WordPress in a subfolder by typing in the folder name in the Directory field. Click here for more information about subdomains.
By default the installer will automatically backup your website and update it anytime a new version comes out. While we recommend you keep this option, it is possible to only do minor updates, or turn them off completely. The installer will also create a database for you automatically, but if you’ve already created one for this website you can choose Let me manage the database settings and enter the details. Finally, you’ll need to create an initial username and password for the WordPress install. Enter that information in final section and click Install.
The installer will take just a few moments to install WordPress and a progress bar will keep you updated. When it is complete you will see a link to your new WordPress site as well as a link to the backend administrative section for your WordPress site.
Congratulations, you’ve now installed WordPress! Now you can start customizing it with themes, plugins, and more.
General Settings: Title and Tagline
Now that you have your WordPress installed and running, it’s time to look at some basic settings for your site. The place that you will access the settings for your site is called the Dashboard, and it provides the starting point for accessing all of your sites dials and knobs.
The setting we will look at here is your blog “title” and “tag line”. It is located under Settings > General. Once you’re on the General Settings page, you can give your blog any title you want. You can also give your blog a tagline, which can be a short description of the blog.
When you change the Blog title and tag line, they will show up at the top of your site. Depending on what theme you use, the title and tag lines will show up in various places. In the case of some themes, they might not show up at all depending on whether they allow custom configurations. We won’t worry about that for now. If you use the default theme (currently “Twenty Thirteen”), the blog title and tag line are both in the center left of what’s called the header of the site.
There are more settings on the General Settings page, such as setting the administrative email account, time zone, date format, etc. Change those to whatever is appropriate for your site and geographical location.
WordPress Themes
When it comes to WordPress, customizing the look of your site is simple and straightforward. When you install WordPress, the default (or pre-set) theme is called Twenty Fourteen (as of WordPress version 3.8). It is a very customizable theme. For example, while the default install doesn’t include a header, you have the option of adding one of your own images. You can also easily modify the colors of the different fonts and backgrounds used in the theme.
Twenty Fourteen also provides you with the option of choosing a slider or “grid layout” for your site’s homepage and to use a custom tag to determine which posts show up on your homepage.
In addition to Twenty Fourteen, you’ll have other themes available to you. (What themes you have depends upon if you did a default WordPress installation, or if you installed a special package.) If Twenty Fourteen doesn’t meet your needs, you can activate another theme on your site or install a completely new one.
Activating Themes
Start at your site’s Dashboard.
Navigate to Appearance > Themes.
You will see thumbnail images representing each of the themes that you currently have available on your site. Simply mouse over any one of them, and click the Activate link.
That’s all you need to do to change the look of your site with a new theme.
Installing Themes
If none of the themes that were provided when you installed WordPress are what you’re looking for, you can always search for and install other themes from the WordPress Theme Repository.
Navigate to Appearance > Themes.
Installing new themes is quite simple. You start by going to the Add New Button.
The initial page is the Search Theme page, and it’s not all that helpful (or visual). You can check a few “filter” boxes to see what comes up, but there is a more visual way. Click the Featured link at the top and you’ll get visual (screenshot) examples of other themes you can install. You can also click “Newest” or “Recently Updated”.
Under the thumbnail picture of each theme (when you hover your mouse over the theme) are three choices – Install, Preview, and Details & Preview. Those choices should be pretty self-explanitory so click Install to add a new theme to your site.
After you install the theme, it is still not active on your site. You will need to Activate it to use it.
Once activated, your site will be using the new theme. Visit your site’s homepage to view your new theme.
Publishing Content
The primary activity that you’re likely to be doing on your WordPress site is publishing content. The content could be text you write, pictures you take, videos or audios (which may be hosted on another site), or other media that you’ve found elsewhere on the Web. WordPress makes it very easy to publish media content of all types, whether hosted on your actual Web server or elsewhere.
Posts vs Pages
Out of the box, WordPress provides two primary content types for you two work with: posts and pages. If you read blogs or have ever written for a blog before, the concept of a post is probably a bit familiar. Posts often are content that appear on your blog in some kind of scheduled way. They usually are presented on your site in reverse-chronological order. Posts might be what you use to share your regular thoughts, reflections, or ideas about a topic. Posts make up a kind of “river” of content that you’re producing as part of your blogging activity.
Pages usually correspond to our more traditional concept of what makes up a Web site. Pages are presented outside of the “river” of content that are posts. They are more likely to stand alone and be organized according to a traditional hierarchy. Pages might be content that is less frequently updated or changed.
If you were using WordPress to build a business Web site with a lot of information content, you would probably use Pages. If you added a feature to that site where you started to advertise special events or news, you would probably use Posts.
A few other things to know about Pages vs Posts:
If you want your content to be accessible to your users via RSS/syndication, you’ll need to use Posts. By default, Pages do not appear in a site’s RSS feed.
Categories and Tags (which are used in WordPress to help you organize your content) are ONLY available on Posts. Page organization is done through customizing your site’s menus.
Okay this get’s a little tricky: WordPress, by default, also creates “Category Pages” and “Tag Pages” that display all the Posts in a category or tag. These are NOT related to the regular Page type.
Media
Upon occasion, you may want to include media (images, audio, video) in your site’s posts and pages. There are generally two approaches to handling media in WordPress:
Uploading: You can upload the files into your site’s Media Gallery and then link to them in your posts/pages. This works very well for images, and when you take this approach for images you have the added benefit of being able to make use of WordPress’ built in (albeit rudimentary) editing tools. Also, when you upload images to WordPress, it automatically creates different sizes that you can use, as needed. This approach works less well for audio and video. In order to have your media files actually show up in a “player” (with controls for stopping, pausing, etc.) you’ll need to install a plugin. Otherwise, you’ll only be able to include links to the files. How people view/listen to them will depend a bit on the setup on their own computer and in their own browser. They may, for example, have to download the media file and then open it in another program on their computer.
Embedding: You can embed media from other sites easily in WordPress. Embedding an image just means providing a URL to it’s location elsewhere on the Web. Instead of uploading it to the server, WordPress grabs that image from the external source and displays it on your post/page. However, with this approach you lose your editing capabilities as well as the resizing feature. Embedding audio and video from external sources becomes easier with every version of WordPress it seems. These days, you can embed video and audio from many external services (YouTube, Vimeo, SoundCloud, complete list here) by simply placing the full URL of the audio/video location on it’s own line in your post/page. There is a complete list of supported external services, and you can learn more about embedding from external sources at the WordPress site. Our general advice is to use externally hosted media whenever it makes sense and works. This is usually the case when you need to use audio or video; without plugins, well-presented audio and video in WordPress is tricky. For images, if you need to do basic editing and/or require different sizes of images, upload them to your site. Otherwise, consider referencing them from another location (your Flickr account, for example).
Post Formats
Recent versions of WordPress have built out a new “post format” feature which, if you are using a theme with the feature enabled, will style post formats differently depending on what they are. The formats that are built-in to WordPress (and are available for theme developers to use) are the following:
aside – Similar to a Facebook note update.
gallery – A gallery of images.
link – A link to another site.
image – A single image.
quote – A quotation.
status – A short status update, similar to a Twitter status update.
video – A single video.
audio – An audio file.
chat – A chat transcript.
Those of you familiar with Tumblr may recognize this approach to post formats.
For the most part, post formats are designed as a way to style a site (and customize styling depending on the kind of content that is being displayed). They have no special functionality, and their use depends entirely upon the theme you are using. Many older themes, for example, do not recognize post formats.
Reading Settings – Front Page
WordPress is a very flexible platform for creating full-blown websites, not just blogging sites. This page will show you how to change the “front page” of your website.
As we have said before, WordPress provides two primary content types for you two work with: posts and pages. Posts, as in blog posts, are a somewhat complex form of webpage. Each blog post gets published in reverse chronological order, on the front page of a WordPress site. You write a new post, and it gets published at the top of the front page. Pages, are a more static form of content. They are additional areas to put information that doesn’t change much. So what if you would like to make the front page of your WordPress site based on a page instead of your blog posts?
Start at the Dashboard.
Navigate to Settings > Reading.
Normally, the front page displays your latest blog posts. What we want to do instead is select a Page from the website. Obviously this page has to exist before you can select it. Select the “A static page” radio button and choose the About page from the Front page drop-down menu (an About page was created for you when you installed WordPress).
OK, great. Click the Save Changes button and now you will have the About page as your Front page. Edit it as you see fit and provide a good welcoming page for your visitors. But wait. What will happen to your blog posts? Most people will want them as the “dynamic” part of your site.
First, create a new Page and title it Blog (you can title it whatever you want but Blog is common and descriptive). Leave the page blank (don’t type any text in the edit box) and Publish it. Now go back to Settings > Reading. Under the static page area choose Blog from the Posts page drop-down.
Click the Save Changes button. Now your “home” page will actually display the About page. You will also have a Blog item in your menu (depending on your theme, you may have to customize your page display to see pages).
If you click on the Blog menu item, you will then see your blog posts. Notice the /blog added to the web address.
Permalinks
Part of the popularity of WordPress is how easily it makes a website functional and yet attractive. One of the smaller details that you might want to adjust is how the addresses to your blog posts are structured. Permalinkis the name given to the address of an individual blog post because they are “permanent links”. For example, the web address for this sample blog is http://createoutestdomain.com. The link to the first post, titled “Hello World” may be structured in many ways. The screenshot below shows one way.
So http://createoutestdomain.com/?p=1 may get you to that blog post, but it’s not a very informative link. With WordPress, you have many options to form the links to posts, and you can change them to make more sense than question marks and numbers. To change the permalink structure, start by going to the Dashboard.
Next, go to Settings > Permalinks.
As you can see, there are several choices under Common Settings. The Default setting gives us that uninformative “?p=123”. A popular choice is to use the Post name choice, which is a bit more informative. So our post titled “Hello World” will have an address of http://createoutestdomain.com/hello-world.
If you want to have the date as part of the address, you can choose Day and name or Month and name. You can also change the structure of category and tag names under the Optional section.
Finally, when you write a blog post, you have the option of editing the permalink for an individual post. Just click the Edit button (underneath the Title field).
Then type in whatever is appropriate (and hasn’t been used yet). Generally you want to make it as simple and short a word, or words, as makes sense. In the example below, we just added some more words.
Building Your Custom Menu
Start at your site’s Dashboard and choose Appearance the Menus.
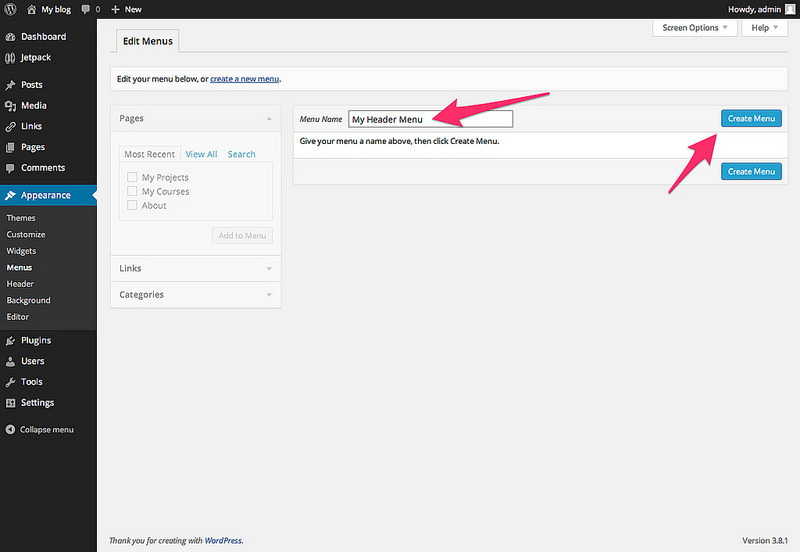
In the Custom Menus interface that appears, type a name for your menu. This can be anything you want. It doesn’t get displayed anywhere; it’s used by WordPress to identify and place your menu. Once you’ve typed the name, click Create Menu.
You’ll now be presented with a screen that includes a section titled Menu Settings. This is where you’ll indicate where you want your menu to appear in your theme. The number of locations available depends entirely upon the theme you choose. In the example shown below, there are two areas available; we’ve chosen to place the menu in the Top primary menu area which we know corresponds to the header menu. You may need to experiment a bit in order to find out where your menu will appear in your theme. You can always change this location later by coming back here and clicking the Manage Locations tab.
Now that you’ve set up your menu and assigned it to a location, you can begin to add links to it. On the left-hand side of the screen, you’ll see what content is available to add. On the right-hand side of the screen, in the Menu Structure area, you can arrange and organize your links.
By default, you may not see everything that is available to you to add to your menu. For example, posts can be added to menus, but they’re not usually displayed by default. To make more content available, click the Screen Options tab at the top of your WordPress screen, and then click off the check boxes that correspond to additional content.
To add content to your menu, simply check it off on the left, and click the Add to Menu button.
Your new content will appear on the right, and you can drag items in the order you want them to appear. Drag items to the right to indent them under other items. This will usually make them appear as drop-down items in your menu.
You can add custom links to your menu by clicking the Links section on the left. In the short form that appears, enter your link’s URL, and a text for the link. Click Add to Menu to move it to the left.
Note that you can change the link text of any item you add to your menu. This can be helpful if you have a page with a long title, and you’d like the link to not take up so much space. You can abbreviate the title in the Navigation Label section, and that shorter text will become the actual menu link.
When you are done, make sure you click Save Menu.
Other Notes about Menus
When you add a Category or Tag to a menu, the link will take your readers to an archive of all the posts on your site that use that category or tag. This can be a very useful feature for organizing your content when you’re using posts to share your work.
In addition to assigning Custom Menus to theme areas, there is a default Custom Menu widget that you can put in the sidebar of your site. This is useful for creating smaller, customized navigation for your site.
If you forget to click Save Menu after making changes to your menu location or content, you will lose your work!
WordPress Widgets
Widgets are a more advanced feature of WordPress that allow you even more control over the content on your site. In essence, widgets are small containers of content that can be placed in various areas of your site. Where you can place widgets depends entirely on the theme you are using. Many (most) themes include at least one “sidebar” into which you can place widgets. Some themes include additional “widgetized” areas. The best way to find out what areas are available to you is to go to Appearance > Widgets and take a look at the areas listed on the right. Each widgetized area will appear as a box on the right. In the example show below, the theme contains three widgetized areas: Primary Sidebar, Content Sidebar, and Footer Widget Area.
On the right, you will see a number of widgets available to you. WordPress comes with some default widgets. Other widgets might become available when you have a particular theme activated. Finally, some plugins provide additional widgets to you.
Widgets can present all different kinds of information. The simplest widgets allow you to add text to your site. But you’ll also find widgets with many options that you can set to display dynamic content or to interact with other services. Below is a list of the default widgets available in WordPress.
When you’re ready to start using widgets, all you need to do is drag them from the right-hand side of the Widgets interface into the boxes on the left. WordPress will immediately save them, but you may need to set some options
Default Widgets
Archives: Shows a monthly listing of your posts.
Calendar: Shows a calendar view of your posts.
Categories: Shows a list of all of the categories on your site.
Custom Menu: Shows a custom menu that you’ve set up with WordPress’ Custom Menu interface.
Links: Shows your links.
Meta: Shows links to your RSS feed and your login.
Pages: Shows a menu of all of your pages.
Recent Comments: Shows the most recent comments on your posts.
Recent Posts: Shows your most recent posts.
RSS: Allows you to show content from an RSS feed.
Search: Provides your users with a search box.
Tag Cloud: Shows a “cloud” of the tags/categories on your site.
Text: Shows whatever text you enter.
WordPress Plugins
WordPress has a lot of functionality built-in, but occasionally you might find a specific need that isn’t a part of the default software. To accomplish this, WordPress has a plugin architecture where developers can create plugins that add additional functionality to your site. From simple photo galleries to site statistics, to automatic Twitter and Facebook sharing of posts, there is practically a plugin for whatever you need for your blog (over 23,000 at the time of this writing). To start using and installing plugins just follow these simple instructions:
Log in to your WordPress dashboard.
From the left side menu locate and click plugins.
You will be given a list of all your currently installed plugins.
From this menu you are able to activate and disable specified plugins by using either the single plugin options located under each plugin name.- Or you may use the bulk action drop down menu to simultaneously activate/disable multiple plugins by checking desired plugins
– Additionally you may also sort through installed plugins using the sorting options above the bulk action menu.
To install a new plugin click “add new” either from the plugin sidebar or the main plugin menu, you will then be redirected to a search engine where you can search using general or specific terms to find plugins. – For example searching “photo gallery” brings up various plugins from different developers.
Once you find your desired plugin to install it hit “install now”, which will automatically install the plugin and prompt you if you would like to activate it now or return to the menu.
After installing your plugin be sure to visit the developers’ website if you have any additional questions about how the plugin works, as some plugins may require certain codes or other actions to be used properly.
Some plugins will have their own settings page located under the 'Settings‘, other plugins will break out their own menu item on the lefthand side of the Dashboard. The best way to understand how to use a plugin is to make sure you’ve read the documentation available on the plugin’s website as every plugin behaves differently and sometimes it won’t be explicit how the plugin interacts with your website.
Basic Privacy
WordPress is a platform intended to allow you to share your thoughts and ideas freely and easily with the world. However, there are options to publish to a more limited audience.
The first way is to limit who can find your website. That is done by keeping search engines, like Google, from seeing (known as indexing) your site.
To do this, we’ll start at the Dashboard.
Navigate to Settings > Reading.
Normally the box next to Search Engine Visibility is unchecked. If you decide to check the box, it will “Discourage search engines from indexing this site.” It will depend on the search engine to honor your “request”. Some search engines will simply ignore it. Obviously this is not a sure-fire way of keeping your blog private.
You also have options on individual posts to keep them private, so that only people who are logged in to your site can view a given post. You can also password protect posts with a password you supply. Choose the Private radio button to keep a post hidden behind the login, or choose the Password protected button and then type in the password you wish to use. Click on OK when you are finished. Then be sure you click the Update button to save your post with the new settings.
There is a plugin called More Privacy Options that allows you to fine-tune privacy settings on your site.
Discussion Settings
What makes WordPress a powerful platform is that not only can you create a dynamic website, but you can also allow dynamic discussions about the content with your visitors. Comments, the bread and butter of the discussion, can add to the overhead of your website management. You have to keep up with responses to your commenters or they will think you aren’t paying attention. Comments also can come, unfortunately, in the form of Spam. We will give you some additional information about dealing with Spam in another section. For now, here’s how to manage your Discussion Settings.
Start at the Dashboard.
Navigate to Settings > Discussion.
The two main forms of discussion on a website are enclosed – “Allow link notifications from other blogs (pingbacks and trackbacks)” and “Allow people to post comments on new articles”.
Comments are self-explanatory. People come to your website, read an article, and as long as you allow comments, people can write whatever is on their mind. Commenters must leave their name and email address (if you leave that setting checked). You can also require users to be registered to your site to comment. They would then need to be logged in to submit any comments. By default you will get an email sent to the admin account of the WordPress site when someone posts a comment, or when a comment is held in moderation. You can uncheck those boxes if you do not wish to receive those emails.
A comment will appear on the article (post or page) only after you approve it. If you have approved a comment author once, they will be automatically approved the next time they leave a comment on your site. If you uncheck the box labeled “Comment author must have a previously approved comment”, then all comments will appear automatically. We don’t recommend this setting.
You also have some control over comment moderation regarding how many links a comment contains (spammers like to put links in their “comments”). You also can filter out words, URLs, email addresses, to hold them in moderation. You can then approve them, spam them, or trash them.
Sometimes it’s nice to have visual representations of the people who are commenting on your blog. These are called Avatars and can be found under Settings > Discussion.
WordPress uses a common universal system of avatars called Gravatars (Globally Recognized Avatars). The system requires you to sign up with your email address. You can upload a graphical representation of yourself (a picture or other graphic). From then on you are identified with your Gravatar on any blog that you use that email address with.
In the WordPress Discussion Settings, you have a few options. Whether to show Avatars at all, the “rating” allowed to be shown, and what the default Avatar will be if a user does not have a Gravatar.
Managing Comment Spam with Akismet
SPAM! Everyone hates it in their email. If you’re new to WordPress and blogging platforms, spam exists in the form of comment spam – people (or vermin) leave comments promoting their services or schemes, on a post or page.
So how do you deal with comment spam when it can come in even more often than email spam? Do you have to delete every comment that comes in? Well, the answer to the second question is “no”, and the answer to the first question is, with a plugin called Akismet.
To get started we need to install a plugin. To do this, we’ll start at the Dashboard.
Navigate to Plugins > Installed Plugins.
At or near the top of the list of plugins that are automatically installed in a new WordPress installation, is Akismet. It is not activated, so part of the process of getting Akismet is Activating the plugin. Before you activate it, however, you need to get something that will be somewhat strange for most people. It’s called an API key. API stands for Application Programming Interface, and it’s a way for programs and services to “talk” to each other. The Akismet plugin requires you to get an Akismet API Key, which is simply a “code” that you supply when activating the plugin. The key is free if you use it on a personal WordPress installation, and it’s available on the Akismet website.
Once you arrive on the Akismet for WordPress site, click the Get an Akismet API key button.
If you have an account at WordPress.com you can sign in with that login and get your key. Otherwise, fill in an email address, a username, and a password to use for a new account. Click the Sign up button to proceed.
Type in the URL of the site you’ll use Akismet on and click on the Sign Up button under the Personal plan (that is if you want it to be the free version). When you get to the next page, the recommended contribution is $36. You can adjust the slider down to $0. The smiley face will begin to frown, but at least your key will be free.
Also fill in your name and click Continue.
You’re finished with the sign up process for your key, and it will be displayed on the page for you (we’ve blurred ours out). Now follow the steps that they show you for using your new key. You will enter the key in either the Akismet area under Plugins or JetPack (if you have that installed).
When you open the WordPress app, tap on Add Self-Hosted Site:
Then, you will be able to enter your WordPress site credentials:
These credentials come from your Installatron page of WordPress. To access these credentials, first open Installatron:
Next, click on your installed instance of WordPress:
From here, you can access your WordPress site credentials. You may consider making these your OUNetID (4×4) login and password to easily remember this information:
With these credentials, enter them into the WordPress App along with the url for your WordPress website and select Add Site:
On the next page, you will see all of the WordPress websites you have added to the WordPress App. Select the site you just added:
On this page, you can navigate your post, pages, comments, and more! To start a new post, tap on the Pencil Icon:
On this page, add your Title and Content:
You can also edit the properties of text by selecting the text and the different Text Property Buttons:
To view the progress of your post, select the Preview Icon:
When finished, select Publish:
Now when you visit your WordPress webpage, you will see your new blog post!
Skidmore Domains’s Installatron offers 9 e-commerce applications. However, members of the Skidmore College and Skidmore Institute of International Studies community are not allowed to utilize these applications to actually conduct sales or make money.
Unauthorized use of Skidmore College’s Web sites for commercial purposes is prohibited. Personal or institutional Web pages may not be used for direct advertising for personal profit or gain.
Under section 1d of the ‘Guidelines for Student Organization Sites, Personal Pages and Postings’, it further states that:
The College will review complaints, questions, and concerns regarding allegations of copyright infringement, misuse of intellectual property, harassment, use of College Web resources for commercial purposes, and other legal issues. If the complaint is valid, the College will contact the student organization’s Web editor and request immediate revision of the Web page and/or removal of inappropriate materials in compliance with College policies, intellectual property law, and guidelines for responsible use of computing resources. The College may shut down the Web site if there is inadequate or no response from the student organization. Illegal, irresponsible, or unethical activities may result in loss of privileges or penalties consistent with the judicial procedures and policies of the College.
E-commerce applications remain available in the Installatron solely for educational purposes, so that students, faculty, and staff can explore them in order to expand their knowledge of digital tools. Please feel free to install and experiment with them on your domain, but be aware that inappropriate usage could lead to a request to desist or result in your site being shut down.
Mapping your domain is an important part of domains.skidmore.edu; it reinforces the idea that you don’t necessary need to host all your own applications. You should, however, be mindful of making your web presences part of a domain you control. If you would like to map a subdomain and have not yet created it, use this tutorial on creating subdomains before proceeding. To map your domain, or a subdomain, to Blogger, use these steps:
To get started you’ll need to login to your control panel by going to the domains.skidmore.edu homepage and logging in.
Here you’ll login with you Skidmore username and password.
Once logged in you’ll be at the homepage of your control panel. The easiest way to navigate the panel is using the search feature in the top right panel. Click the Search box and type “DNS” (without the quotes). Click on Advanced Zone Editor and you will automatically be directed to the DNS Advanced Zone Editor page. Or, you can scroll down and click on the DNS Advanced Zone Editor button on the cPanel.
Find the domain, or subdomain, you want to map to Blogger in the list of Zone File Records. Under the Action column, click Edit.
Leave the Name, and TTL fields set to their defaults. Update the Type drop-down menu to CNAME, and the Address field to ghs.google.com. Click Edit Record when you are done. Keep this window open; you will need it in later steps.
In a new window, go to the Blogger website, and login with your Blogger/Google username and password.
From your Blogger Dashboard, find the blog you’d like to use, expand the More Options menu, and click Settings.
On the “Basic Settings” page, find the Publishing section, and click the Setup a 3rd party URL for your blog link.
Under Advanced Settings, type the full subdomain or domain you are mapping into the box, leave the Use missing files host? option set to No, then click Save.
You will be presented with a message that your domain cannot be verified, along with information about your existing DNS entry, and an additional DNS entry that needs to be made. This is normal. Copy the second entry under the Name, Label, or Host entry to your clipboard.
Go back to the window or tab containing the Advanced DNS Zone Editor in your create.ou.edu cPanel. In the Add a Record section, paste the text you just copied into the Name field. This information will be different for each domain. Set the TTL field to 14400, and the Type drop-down menu to CNAME.
Go back to the window or tab containing the Blogger Advanced settings panel, and copy the second entry under the Destination, Target, or Points to column to your clipboard.
Go back to the window or tab containing the Advanced DNS Zone Editor in your create.ou.edu cPanel. In the Zone File Records section, find the domain you were editing Action for and paste the text you just copied into the CNAME field. This information will be different for each domain. Click Edit record when you are done.
Return to the window or tab containing the Blogger Advanced settings panel, and click Save.
If everything was successful, your domain will now appear as the Blog Address. Keep in mind that it may take up to 72 hours for your domain or subdomain to correctly point all visitors to the correct location.
LimeSurvey is a survey making tool that allows you to easily create and execute a variety of assessments. Some of the features available in this application are:
Unlimited number of surveys, questions, and participants
Multi-lingual surveys: 80 different languages supported
Surveys can be shared via a link, or you can send tokens so only specific users can access the survey
Send invitations and reminders by email
Ready-made importable questions & surveys
28 different question types with more to come
Conditions for questions depending on earlier answers
2. Once logged in you’ll be at the homepage of your control panel. Navigate to the Installatron by looking under the ‘Software’ section or typing “Installatron” into the search bar at the upper right corner of the page.
3. Click on the Applications Browser tab (the one with the star). Then select LimeSurvey under the ‘Apps for Surveys and Statistics’ section.
4. This page gives you more information about the LimeSurvey software. To begin the install, click ‘install this application’ in the upper right-hand corner.
5. On the next page the installer will ask for some information about this install. The first thing you’ll want to do is decide where to install it. If you’re wanting to install LimeSurvey on your main domain, you can leave the directory area empty. If you created a subdomain, you can select it from the dropdown menu. You also have the option of installing LimeSurvey in a subfolder by typing in the folder name in the Directory field. Click here for more information about subdomains and subfolders.
6. By default the installer will automatically backup your website and update it anytime a new version comes out. While we recommend you keep this option, it is possible to only do minor updates, or turn them off completely. The installer will also create a database for you automatically, but if you’ve already created one for this website you can choose Let me manage the database settings and enter the details. Click Install to continue.
7. The installer will take just a few moments to install LimeSurvey and a progress bar will keep you updated. When it is complete you will see a link to your new LimeSurvey site as well as a link to the backend administrative section below it.
8. Congratulations, you have now completed the installation of LimeSurvey! Click the administrative link to log in and begin creating surveys with your new LimeSurvey installation.
Using LimeSurvey
You can learn how to use this application in the official LimeSurvey Manual. This support documentation wiki can help you get started by showing you how to do the following: