When You Leave

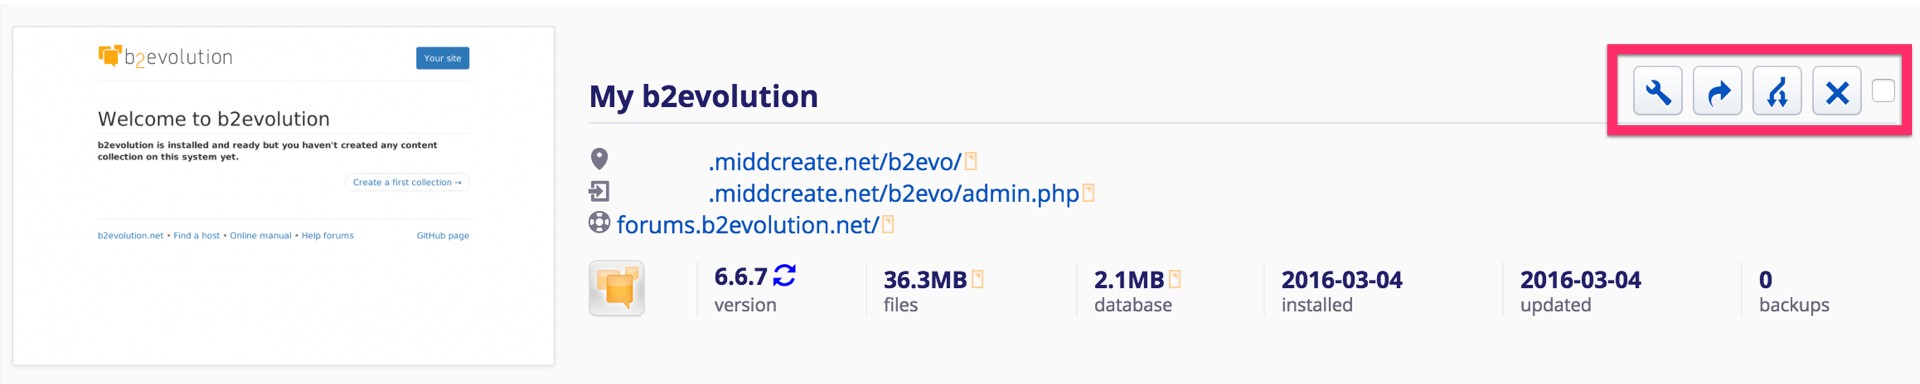
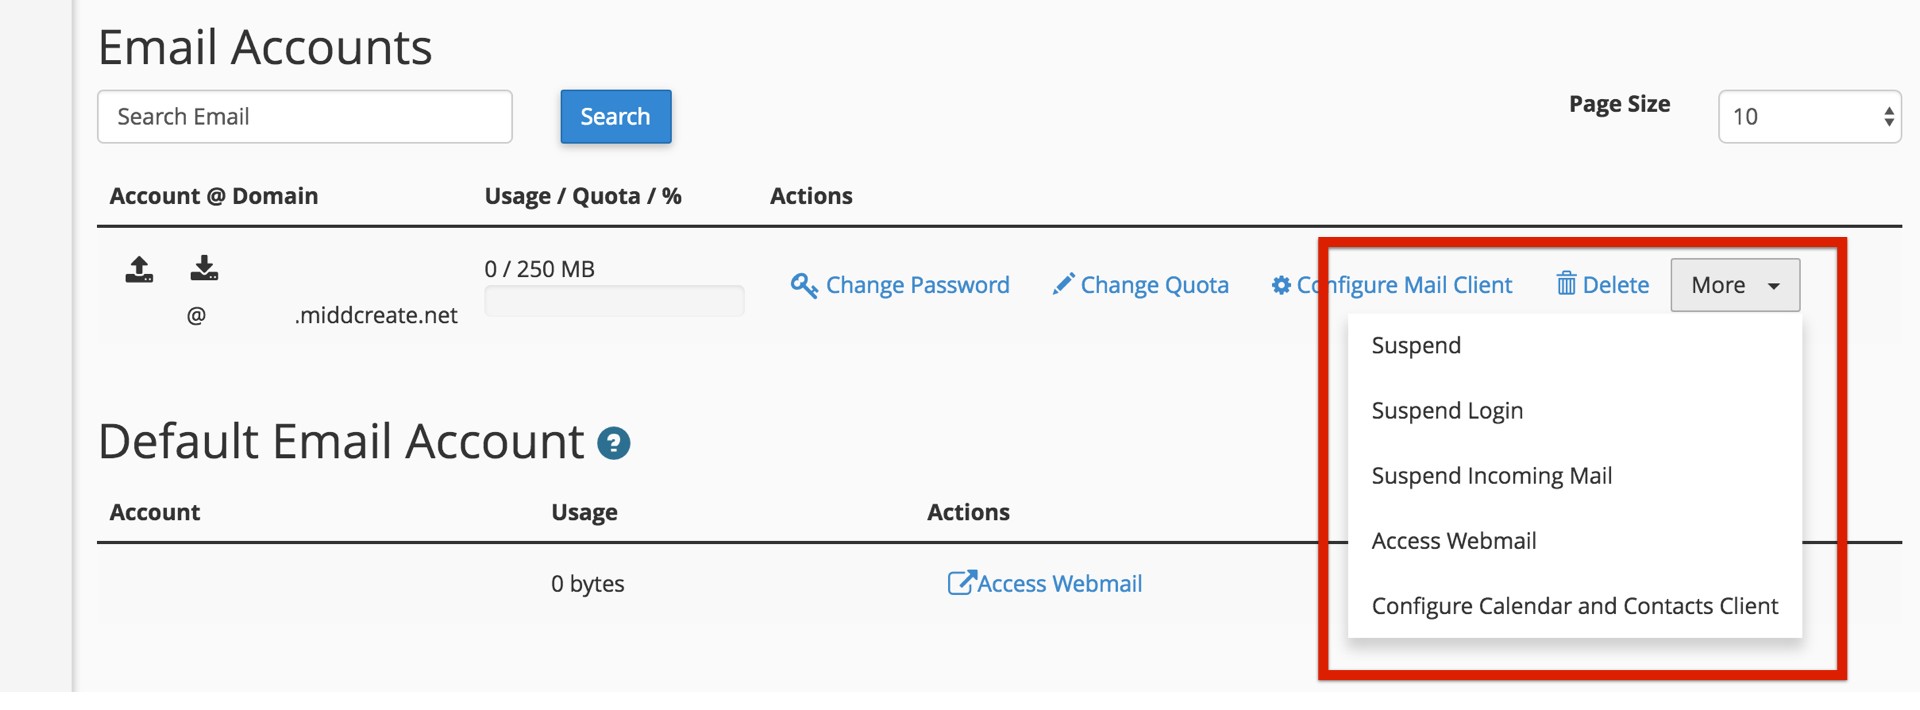
You will lose access to your Skidmore Domains domain six months after you graduate (or otherwise discontinue) from Skidmore. You can keep everything exactly the same while you still have access to your Skidmore email, which is for 6 months after graduation. However, when you lose access to your Skidmore email, you no longer have access to your Skidmore Domains cPanel.

You then have a number of options, with the ultimate goal to transition your account to one that is no longer managed by Skidmore or connected to your Skidmore email. 

The easiest option is to migrate your site off of Skidmore Domains directly to Reclaim Hosting. This option keeps everything exactly the same on the back end, but just moves your content over automatically from the Skidmore Domains servers to the Reclaim Hosting Customer servers. Reclaim Hosting will give you the option to purchase your own domain name (so it will no longer be yourdomain.domains.skidmore.edu) and it will migrate the site for you – easy peasy. You don’t have to do any of the migration work yourself. After that point, your contact for troubleshooting will be “support@reclaimhosting.com.” The most popular plan through Reclaim is $30/year for 2GB of space, which is a very competitive deal.

Other options are to download your entire site to store on your computer, move everything over to another hosting provider, or—if you use WordPress—to export your site’s content, import it to WordPress.com for free, and re-do some of the formatting that doesn’t transfer over. (More info here.)

Using Reclaim Hosting

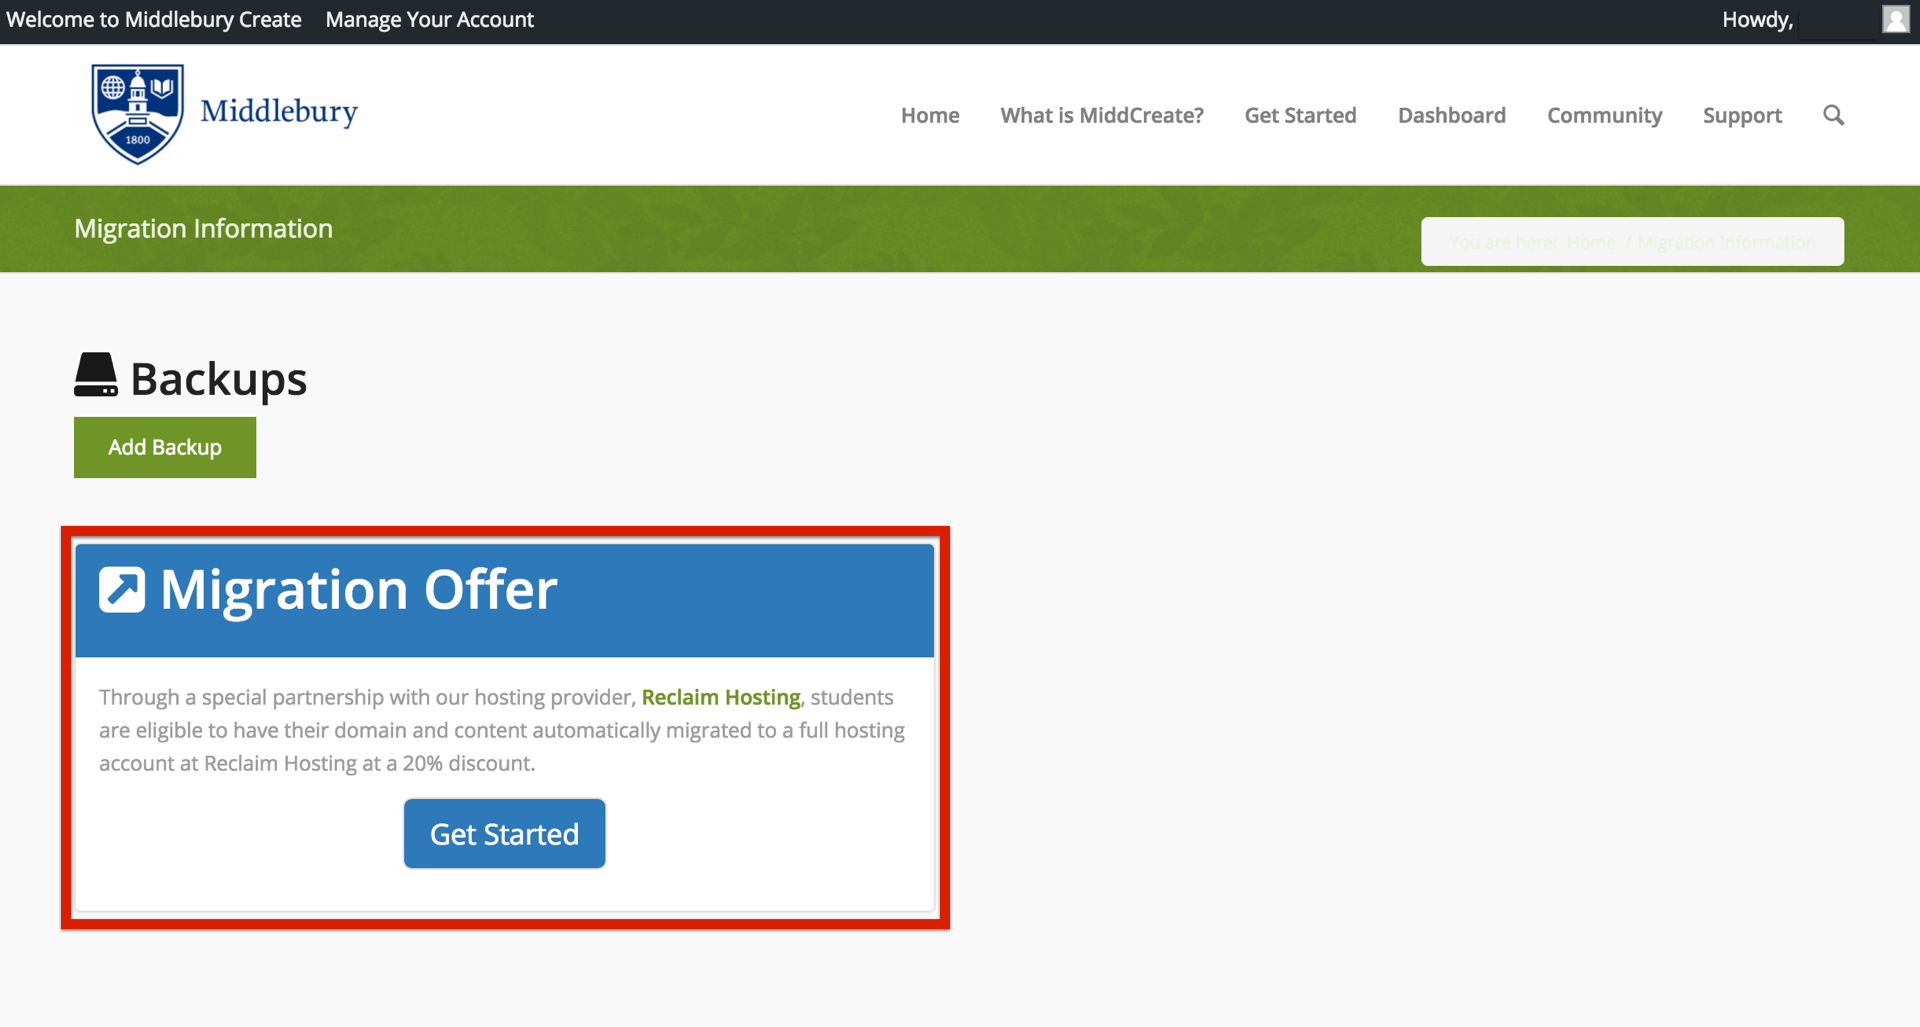
Skidmore Domains is hosted through Reclaim Hosting, a company that started out of the University of Mary Washington. Through our special partnership with them, you’re eligible to have your domain and content automatically migrated to a full hosting account for free for the first year. See this link for more details.

Just sign up for your own domain, submit a support ticket, and they’ll do the migration for you. You won’t have to provide any login information since they control the servers on both sides.

To sign up for your own Reclaim Hosting domain:

1. Login to domains.skidmore.edu.

2. Go to Migration Information under Manage Your Account in the top navigation menu.

migration info.001

3. Click on Get Started in the Migration Offer box.

migration offer.001

4. You will be given the option to 1) register a new domain, 2) transfer your domain from another registrar, or 3) use your existing domain and update your nameservers.domainname.001

If your site’s URL ends in domains.skidmore.edu, and you have never used a different URL or purchased hosting from somewhere else, the Register a new domain option allows you to get your own personal domain with Reclaim Hosting (outside of Skidmore Domains). Your site will no longer be located at “yoursite.domains.skidmore.edu” and you’ll be able to purchase a new URL.

If you have purchased (or intend to purchase) a URL from a different hosting company, but still want your site to be hosted with Reclaim Hosting, select the I will use my existing domain and update my nameservers option. Your site will be migrated to a personal Reclaim Hosting account, but then you will have to update the information that tells the other hosting company (that you got your URL from) where your site is located. It’s possible to get your hosting and URL from two separate companies, but it’s often easier and cheaper to get them together.

If you already have a site that’s hosted somewhere else, and want to transfer everything to a personal Reclaim Hosting account, select Transfer your domain from another registrar.

Other Hosting Providers

If you don’t want to continue with Reclaim and would rather use a different hosting company, you can download all your site files independently, purchase a URL, and upload the files to your new domain through FTP.

Migrating from SITES dot

If you’ve built a great website at SITES dot MIIS or SITES dot Skidmore but want to customize it beyond the available options, you can transfer it to Skidmore Domains. Using your own domain on Skidmore Domains gives you full creative control over your site’s appearance and the flexibility to add new functionality. In addition, Skidmore Domains domains are hosted through Reclaim Hosting, which provides a convenient migration service so you can keep your site after you leave.

Caution: All the content and media contained within your posts and pages can be migrated, but files in your Media Library, your theme, and any appearance settings will not transfer to your new WordPress site. You will have to set these up again once you migrate your content.

Export Your Site

Go to sites.mis.edu or sites.middlebury.edu and sign in to your account. Go to My Sites and click on the dashboard of the site you want to migrate.sites.miis.001

Click on Tools > Export in the toolbar to the left. Select what you want to transfer, then download the export file.export.001

Install WordPress on your Skidmore Domains domain and go to your WordPress dashboard. You may want to delete the automatically generated example posts and pages (e.g. the “Hello world!” post).deleteposts.001

Import Your Site

In your Skidmore Domains WordPress dashboard, go to Tools > Import in the toolbar on the left. Choose WordPress from the list of systems.import.001

Click on Choose File and select the file you exported from SITES dot. Then upload the file and import it.import2.001

You will be asked to assign authors to the posts or pages you import. You can choose to keep and display the authors’ names from the SITES dot version of your content or change them to something else. Remember to update the passwords and roles of imported users once the migration is completed. If you want to keep the file attachments (image, video, document, etc. files uploaded into your posts from the post edit screen), be sure to check the import attachments box before you click Submit.authors.001

author2.001

Congratulations! The migration is complete and you can start customizing your new site on Skidmore Domains.

Installing Applications with Installatron

Installatron is a script installer that allows you to quickly and easily install Web applications to on the Web space. By default, when you use Installatron, the application you add will be automatically upgraded whenever a new version is available (and a backup will be kept, just in case).

Installing Applications Using Installatron

sign in.001

  • Once logged in you’ll be at the homepage of your control panel. You will need to scroll down until you see a section of the Control Panel labeled “Web Applications.” Within this section you will see a link to the Installatron which you should click.​ Or, you can type “installatron” (without quotes) into the search bar.  When you press enter you will automatically be redirected to the Installatron page.

installatron new.001

  • When Installatron opens, you will see a list of any applications you’ve already installed. To install something new, click on the Applications Browser button (labeled with a large star).

apps browser.001


  • A listing of all of the applications you can install be default in Installatron will appear. Browse to the one you want to install, and click the icon.
  • After clicking the icon, a page will appear with information about the application, links to resources, and a link to install it.

install window.001


  • Click “Install this application” when you are ready.
  • A page will appear with a number of settings you can choose/change. The image below shows these settings; here is a rundown of them:

installing an app.jpeg.001


  • Location: You’ll need to choose where to install your new application. You can install it at the root of your domain or in a subdomain (which you need to set up first). In addition, you can place your application in a folder (in either your root domain or a subdomain)
  • Version Information: You can choose a version of the application. Generally, we recommend choosing the default version. It is likely to be the most recent, stable release.
  • Updates & Database Management: By default, the system is set up to automatically upgrade (and create backups upon upgrading) all applications. In addition, by default, the database will be set up for you automatically. We recommend NOT changing these options.
  • Username/Password: An username/password will be automatically generated for you. You can choose to change this, if you like.
  • Website Title: Pick a title for the site that will be created when you install your application. You should change this from the default title! After installation, you’ll be taken back to the main Installatron page, with details about the application you just installed. At anytime you can come back here to review the application details, back it up manually, or uninstall it.

app controls.001


To get to your new site, you can click the “website” link. What’s more, with certain applications you can use this space to login to the admin area.

In addition, you’ll have received an email with your username/password and a link to your new site.

Applications Available in Installatron

Installatron, the script installer that is part of the domains.skidmore.edu cPanel, allows you to easily install Web applications to your Web space. Below is a list of all of the applications currently available to you through Installatron:

Community Building

  • Vanila Forums
  • MediaWiki
  • ExtCalendar
  • phpScheduler
  • WebCalendar
  • phpFreeChat
  • phpMyChat
  • Dada Mail
  • PHPlist
  • Site Recommender
  • FluxBB
  • MyBB
  • phpBB
  • Simple Machines
  • XMB Forum
  • Elgg
  • Oxwall
  • Pligg
  • GBook
  • Lazarus Guestbook
  • DokuWiki
  • PmWiki
  • WikkaWiki

Content Management

  • WordPress
  • Drupal
  • Omeka
  • b2evolution
  • Geeklog
  • PivotX
  • Serendipity
  • Textpattern
  • CMS Made Simple
  • concrete5
  • Contao
  • ImpressPages
  • liveSite
  • Nucleus CMS
  • phpwcms
  • PyroCMS
  • SilverStripe
  • Soholaunch
  • TYPO3
  • WebsiteBaker
  • Chamilo
  • Moodle
  • phpMyFAQ
  • Code Igniter
  • Coranto
  • MODx
  • e107
  • Joomla
  • Mahara
  • Mambo
  • ocPortal
  • PHP-Fusion
  • PHP-Nuke
  • Tiki Wiki CMS Groupware
  • Xoops
  • Zikula

e-Commerce and Business

  • OpenX
  • OSClass
  • Quicksell Classifieds
  • FrontAccounting
  • OrangeHRM
  • Feng Office
  • SugarCRM
  • Vtiger
  • Zurmo
  • CubeCart
  • Magento
  • OpenCart
  • osCommerce
  • PrestaShop
  • TomatoCart
  • Zen Cart
  • BoxBilling
  • phpCOIN
  • Simple Invoices
  • WHMCS
  • Collabtive
  • Mantis
  • PHProjekt
  • Crafty Syntax Live Help
  • Help Center Live
  • HESK
  • osTicket

Photos and Files

  • ownCloud
  • Gallery
  • GQ File Manager
  • OpenDocMan
  • Power File Manager
  • ProjectSend
  • Coppermine
  • Piwigo
  • TinyWebGallery
  • ZenPhoto

Surveys and Statistics

  • Aardvark Topsites
  • Advanced Poll
  • LimeSurvey
  • phpESP
  • Simple Poll
  • phpMyCounter
  • Piwiki
  • Seo Panel

Miscellaneous

  • YOURLS
  • Tiny Tiny RSS
  • PHPLinks
  • SiteBar
  • iTron Clock
  • WebCards
  • Contact Form
  • Form Tools
  • phpFormGenerator
  • webtrees
  • Feed on Feeds
  • selfoss
  • Search Engine Project

Accessing Your Files through the File Manager

Your domains.skidmore.edu cPanel includes a File Manager that allows you to interact directly with the files stored in your webhosting account. This can be useful if you want to upload software that cannot be automatically installed via the Web Applications section of your cPanel, if you need to change the name or permissions of a file or group or files, or if you want to edit a plain text file. To access your files via the File Manager, use these steps:

Login to domains.skidmore.edu with your Skidmore username and password.

sign in.001


Once logged in you’ll be at the homepage of your control panel. The easiest way to navigate the panel is using the search feature in the top right panel. Click the Search box and type “File Manager” (without the quotes). When you press enter, you will be automatically redirected to the File Manager.  You can also find its icon under Files.

file manager search.001

On the left side of the “File Manager” window, you’ll see a navigation menu containing the file structure of your webhosting account. More information about the contents of these files and folders can be found in the “File Structures and the File Manager” documentation in this knowledge base.

In the navigation menu, choose the public_html option. This will take you directly into the folder that contains the files associated with your website(s). You’ll notice your current location (the public_html folder) is bolded and highlighted in this menu. Click the [+] (expand) icon next to a folder to see what subfolders it contains, or click on the name of the folder to view all of its contents in the file browser on the right side of the page. You can also navigate through the folders in your account by double-clicking on them in the file browser on the right side of the “File Manager” page.

file manager public html.001

To select an item, click once on its icon in the file browser. You can also use the “Select All” button above the file browser, or your computer’s keyboard shortcuts (Shift, Command, Control, etc), to select multiple items from this list.

file manager selection.001

Depending on what you have selected, different options will be available to you in the action menu across the top of the “File Manager” page. If you have selected a folder, for example, you can “Rename” it or “Change Permissions” on it, but do not edit it using the Code Editor or HTML Editor.

file manager options.001

If you know exactly what location you want to skip to within your webhosting account, you can type it into the box directly above the navigation menu and click Go.

file manager internal search.001

Alternatively, if you know the exact name of the file or folder you are looking for, but not its location, you can use the Search box to find it.

file manager search2.001

File Structures and the File Manager

Web hosting is, at it’s basic core, files and folders on a computer that is connected to the internet and setup to distribute them. How that computer (typically a server) is setup to do that is covered more in LAMP Environments but this article will explain the idea of the file structure and how it relates to what you view on your domain.

When you signed up for your domain a web hosting account was created. Although you typically will interact mostly with the web interface to create subdomains, install applications, and other common tasks, you might occasionally also need to work directly with the files in your account. The File Manager in your cPanel is one way to see these files. You can also create an FTP account in cPanel and use an FTP program to interact with these files (FTP stands for File Transfer Protocol, and it’s a way of using a desktop client to transfer files to and from your Web server space).

Let’s take a look at the File Manager built into your cPanel to get a better understanding of the file structure that makes up your website(s).

  • Login to cPanel with your Skidmore username and password.sign in.001


  • On the homepage of your control panel you’ll have all the various tools listed. You can easily find the File Manager by using the search tool in the upper righthand corner and typing File Manager. You can also find its icon under Files.file manager search.001


  • You are now sent to the File Manager and can navigate the folder structure there.

You’ll notice when the File Manager opens up that this looks very much like a folder on your computer. There are a few folders in it as well as files, and you can navigate down into those folders and see what’s inside of them. At the top level of the File Manager you also have the option of interacting with files and folders you select by moving them around or removing them. There is a larger article all about how to use the file manager at Accessing Your Files through the File Manager so we won’t talk much about how the interface works, rather we’ll cover what those folders and files actually mean and how they relate to what someone sees when they visit your website.

By default you have a variety of folders at the root of your web space (the first screen you see when you open up the file manager). Some of them are created automatically to store information about the panel and setup of certain sites. These folders are things like access-logs, etc, ssl, and tmp. You can safely ignore most of those folders because they don’t correspond to actual websites. Let’s look at which folders do and how it all works.

Your main domain, mydomain.com, corresponds with a folder called “public_html.” Whatever files and folders are inside of this folder are available at that domain. If you installed WordPress here you’ll likely see a lot of WordPress-related files within it (which were probably helpfully put there by the automated installer). Let’s say we uploaded an image called mypicture.jpg into the public_html folder. That image would now be available at mydomain.com/mypicture.jpg. The slash after your domain implies “this file is inside this folder”. But what if we had a folder inside the public_html folder? How does that appear? This is typically called a subfolder so let’s put a folder in public_html called “images” and put our image, mypicture.jpg, inside of that folder. What would you type in a browser to get to that file now? The location would be mydomain.com/images/mypicture.jpg. So subfolders are also indicated by a forward slash after a domain.

What about subdomains? You can have completely separate sites called subdomains that appear as nameofsubdomain.mydomain.com. But where are they in the file structure? When you created your subdomain the control panel asked you to give the folder a name. If I had a subdomain called photos.mydomain.com for example, I might want to name the folder “photos” (by default your control panel will call the folder by the name of the subdomain). Folders for subdomains are located inside the public_html folder. So when you go to the File Manager and navigate to public_html you’ll see folders listed for all of your subdomains and once you navigate inside one of those folders you’ll see files and folders specifically for that subdomain that appear on the web at that subdomain’s address.

The File Manager in your control panel is great to view these files and folders, but it can be limiting if you want to upload an entire folder of information to your website. If you find yourself wanting to do more with the files and folders on your web space you can download an FTP program like Filezilla and connect to your website by creating an FTP account in your control panel (also located in the Websites and Domains tab). An FTP program will allow you to upload and download an unlimited number of files and folders quickly.

Creating an Email Address

Creating an email address in the control panel creates a mailbox on the server for mail to be delivered to. In some cases this might be desired if you want to maintain full control of the email you receive, however in many cases users may wish to simply create an Email Forwarder that sets up a custom email address and sends all mail sent to it on to the address of your choice. This article will show you how to setup both methods.

  • On the homepage of the control panel you will see a section titled Email that contains several tools for setting up email addresses. To get started let’s go to the Email Accounts page.email.001

This screen will allow us to setup an email address that uses a mailbox stored on the server. You will be able to access mail sent to this email address either through a webmail client or a desktop/mobile client directly. Enter the desired email address as well as a password to associate with that email address. You can choose to set a quota for how large of a mailbox you need, or set this to unlimited (keep in mind your quota will still be dictated by the limits of the hosting account). Once you’re done click Create Account.email setup.001

Your email address is created and it’s ready to be used. You have the choice of accessing it via the webmail options built into your control panel, or setting up a mail client directly from your desktop, laptop, or mobile device. To access these options you can click on the More button.email settings.001

email settings more.001

If you already have an email address you want to use like a Gmail or Hotmail account, you may wish to create an Email Forwarder instead of a mailbox. Setting up a forwarder is very simple. Start by clicking on instead of a mailbox. Setting up a forwarder is very simple. Start by clicking on Forwarders from the Mail section of your control panel homepage.

forwarder.001

The first screen will show you any existing forwarders that you have created. To setup a new forwarding account, click Add Forwarder.

add forwarder.001

To create a new forwarding account, simply type in the desired email address as well as the email address you’d like all mail to be forwarded to. When you are done click Add Forwarder.forwarding address.001

You have now successfully created an Email Forwarder and all email sent to your custom email address will be forwarded on to the address you entered.

Video Tutorials

Create a Self-Hosted Email Account:


Access your Self-Hosted Email Account:

Setting Up FTP

There may be times when you need to place files onto your space on your Web server. There are a number of scenarios when this might be necessary:

  • You’re working with an application that allows you to install plugins/extensions, but the files need to be manually moved to the server in order to add them. (Note: This is NOT required with WordPress which allows you to install plugins through the backend in your browser.)
  • You’ve developed a custom site/pages using a Web design program, and you need to upload the files you created to the server
  • You’re installing an application that isn’t part of the applications in Installatron.

One way to upload files is by using the File Manager that is part of cPanel. However, sometimes you’ll find it easier/necessary to use FTP, or File Transfer Protocol, to move files to the server. This can be particularly useful if you’re working with a Web space where you’re not the owner (so you don’t have access to the File Manager in cPanel) or if you need to provide file access to someone else to your space on the Web server.

What exactly is FTP?

File Transfer Protocol is a method that allows you to remotely move files to a Web server from another location – usually your local/personal computer. Using a pre-defined FTP account (with a username and password), you can configure an FTP client (a program you run on your computer that allows you to transfer files via FTP.

There are lots of FTP clients that you can use; some are free and some are not. A few free ones you might consider:

For the purpose of this tutorial, we’ll show you how to set up FTP in FileZilla, but you should be able to generalize these instructions to use in any FTP client.

Get Information about Your FTP Account

If you’re FTPing to your own space on the Web server, or if you’re setting up an FTP account for someone else to use to FTP to your space, you’ll need to start by getting information about the FTP credentials from cPanel:

  1. Login to domains.skidmore.edu.
  2. In the Search Box at the top of the page, search for “FTP”, and click the FTP Accounts icon that appears.ftp accounts.001
  3. You’ll have the option to create a new FTP account, or you can scroll down the page to find the credentials for the default FTP account. If you want to create an account, fill out the Add FTP Account form with a username and password. By default, the new FTP account will be limited to a directory with the same name as the account you’re creating. You can change this to a different directory, if you want to grant this account access to a different location.  NOTE: Make sure you know/remember the password you enter. When you’re done, click Create FTP Accountcreate ftp account.001
  4. Once you’ve created the new account, you’ll see it appear in the list at the bottom of the FTP Accounts page. In addition to any accounts you’ve created, in the Special FTP Accounts section, you’ll see the default FTP Account. You’ll know this account because the username corresponds to your cPanel username. This FTP account has full privileges to access any space on your Web server. ftp account name.001
  5. For whichever account you need credentials for, click the Configure FTP Client link.
  6. Write down the username, server, and port information that appears. You will need to use this (or you will need to provide this to the person you are giving FTP access) along with the password you created in Step 3 in order to configure your FTP client. ftp configuration.001

Configure FTP in Your FTP Client

Below are links to tutorials for setting up both FileZilla and CyberDuck to connect to you FTP account.

Setting Up Subdomains

A subdomain is one way of organizing and separating content on your site. To create a subdomain, use the following steps:

Login to domains.skidmore.edu with your Skidmore username and password to access your cPanel.sign in.001

Once logged in you’ll be at the homepage of your control panel. The easiest way to navigate the panel is using the search feature in the top right panel. Click the Search box and type “subdomains” (without the quotes). When you press enter, you will automatically be take to the Subdomains page. Or, you can scroll down and click the Subdomains button on the cPanel.

subdomains search.001

Choose a name for your subdomain and type it into the Subdomain box. Just like top-level domains (e.g. createoutestdomain.com), subdomains can only contain numbers, letters, and hyphens, and the best subdomains are simple, short, and descriptive.

create subdomain.001

Once you’ve typed in a name, cPanel will automatically populate the Document root field for you. This will create a folder to contain your subdomain’s files. You’ll usually want this folder to match the name of your subdomain, so it’s easy to identify where different files live in your account. You might want to change the document root if you already have a folder in your account that has the same name as the subdomain you are trying to create, although this should be rare. Once you’re done, click Create.create subdomain doc root.001

Once you’re done, click Create. If everything went well, you should see a message that your subdomain was created successfully. Your subdomain will now be available as an option for automatic installation of various software (WordPress, MediaWiki, etc). If you prefer to install web applications manually, you can do so in the document root (folder) you created in step 5.

Video Tutorial & Ideas

Subdomains vs. Subdirectories

When you’re first getting started with a new space on a new Web host, you might think of yourself as owning a small “territory” of the Web. Everything you place in your public folder on the server becomes available for anyone on the Web to see (assuming they know the address of your site and the files you’ve placed there).

If you’re just putting up a handful of static, HTML pages which you want to make available to colleagues, friends, or family by sending them links, then working with this large, unorganized space may work. But as soon as you get to the point where you want to organize your site, you’re going to need a new strategy.

Consider this scenario: you want to have a personal blog on your new Web space, where you share pictures and short written pieces with family, friends, and colleagues. In addition, you’re working on a large research project that requires you to build a Web-based repository of digital images related to your discipline. You want to use one application (say, WordPress) to manage your personal blog. For your research project, you’ve settled on another open-source application (Say, Omeka). Both of these are applications that need to be installed on your Web host, but you can’t just put them both at your main domain name – if you did, both sites would quickly experience conflicts and errors. You need to cordon off separate spaces for your different Web “properties.”

There are two primary strategies for parceling up your Web space. You can create subdomains or subdirectories. But before you can understand the difference, you need to first understand what we mean when we talk about your root domain.

Root Domain

Let’s say you’ve registered a new domain for domains.skidmore.edu called yourdomain.com. Anything that is stored at this core URL is considered to be at the root of your domain: Nothing comes before the address or after the address. You can certainly decide that you simply want to have a single site on your Web host (say a blog running WordPress), and you can set that blog up at your domain’s root. To get to your site in this scenario, users would simply go to yourdomain.com.

Subdomains

When you want to do more than just have a single site at the root of your site, you need to decide now to organize your space. One way to do so is by setting up subdomains.

You’re already familiar with the concept of subdomains, even if you don’t know it. Consider OU’s public Web site at http://ou.edu. As you browse parts of that site, you’ll notice that the domain changes. When you’re looking at your department Web site, say the site for the Chemistry & Biochemistry Department at http://chem.ou.edu, the URL is no longer just ou.edu. Now the root of the url is chem.ou.edu, indicating that you’re on the part of the site that is dedicated to the Chemistry & Biochemistry Department.

If you browse to the technology store pages at http://itstore.ou.edu, you’ll notice that the domain changes again, this time indicating that you’re in the technology store of the OU site.

As you can see the domains serve two purposes: they help to organize the site from a technical perspective, but they also serve as indications to the users that they are in a new/different space.

As you work on your site, you’re welcome to create as many subdomains as you like, and in each subdomain you can actually create a distinct, individual Web site.

Subdirectories

The alternative for organizing your space is to simply set up subdirectories. These function much like file folders on your computer. Instead of creating a blog at blog.yourdomain.com you would place it in a subdirectory called “blog” making the address yourdomain.com/blog. Setting up subdirectory is really easy. You can create folders on the fly when installing applications (like WordPress), and you can also manually create them in your file browser.

There is one particular issue you need to be aware of. Let’s say you’ve installed WordPress to be your primary blog at yourdomain.com. Later, you decide you want to create another image gallery site on your site, and you want to place it at yourdomain.com/gallery. But, if for some reason you’ve already created a page on your WordPress site called “Gallery” then the url yourdomain.com/gallery will already be taken. If you try to create a subdirectory of the same name, you’ll get a conflict and errors.

Tips & Review
  • Subdomains are generally a cleaner, more elegant solution to organizing your site. You’re less likely to get conflicts or errors. However, when using subdomains the process is slightly more complicated: You must create subdomains first, before you can install anything in them.
  • Subdirectories don’t create as pretty URLs as subdomains, but they’re easier to set up. They can, however, result in conflicts with existing Web pages.
  • As soon as you create subdomains or subdirectories to organize your site, you need to consider how people are going to find them. If you’ve created a new primary blog at blog.yourdomain.com, and someone goes to just yourdomain.com, they won’t see that new site. It is possible to set up redirects to avoid this issue. You can also always create links from pages on one subdomain of your site to another.
  • If you really just need one site, sometimes installing at the root of your domain is the easiest thing to do, at least as you’re getting started. You can always add more pieces to your territory later with either subdomains or subdirectories.
Tutorials