File Structures and the File Manager

Web hosting is, at it’s basic core, files and folders on a computer that is connected to the internet and setup to distribute them. How that computer (typically a server) is setup to do that is covered more in LAMP Environments but this article will explain the idea of the file structure and how it relates to what you view on your domain.

When you signed up for your domain a web hosting account was created. Although you typically will interact mostly with the web interface to create subdomains, install applications, and other common tasks, you might occasionally also need to work directly with the files in your account. The File Manager in your cPanel is one way to see these files. You can also create an FTP account in cPanel and use an FTP program to interact with these files (FTP stands for File Transfer Protocol, and it’s a way of using a desktop client to transfer files to and from your Web server space).

Let’s take a look at the File Manager built into your cPanel to get a better understanding of the file structure that makes up your website(s).

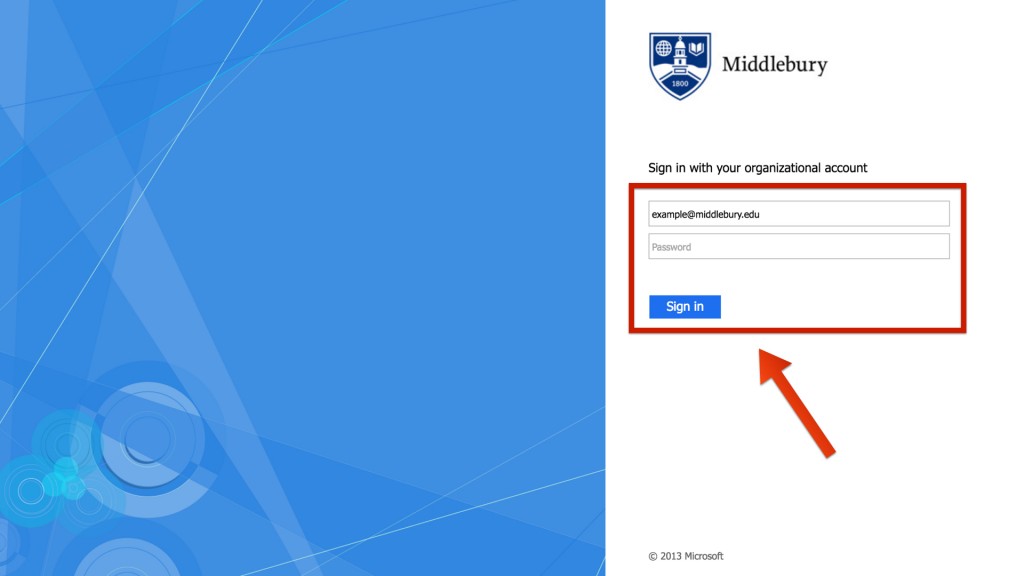
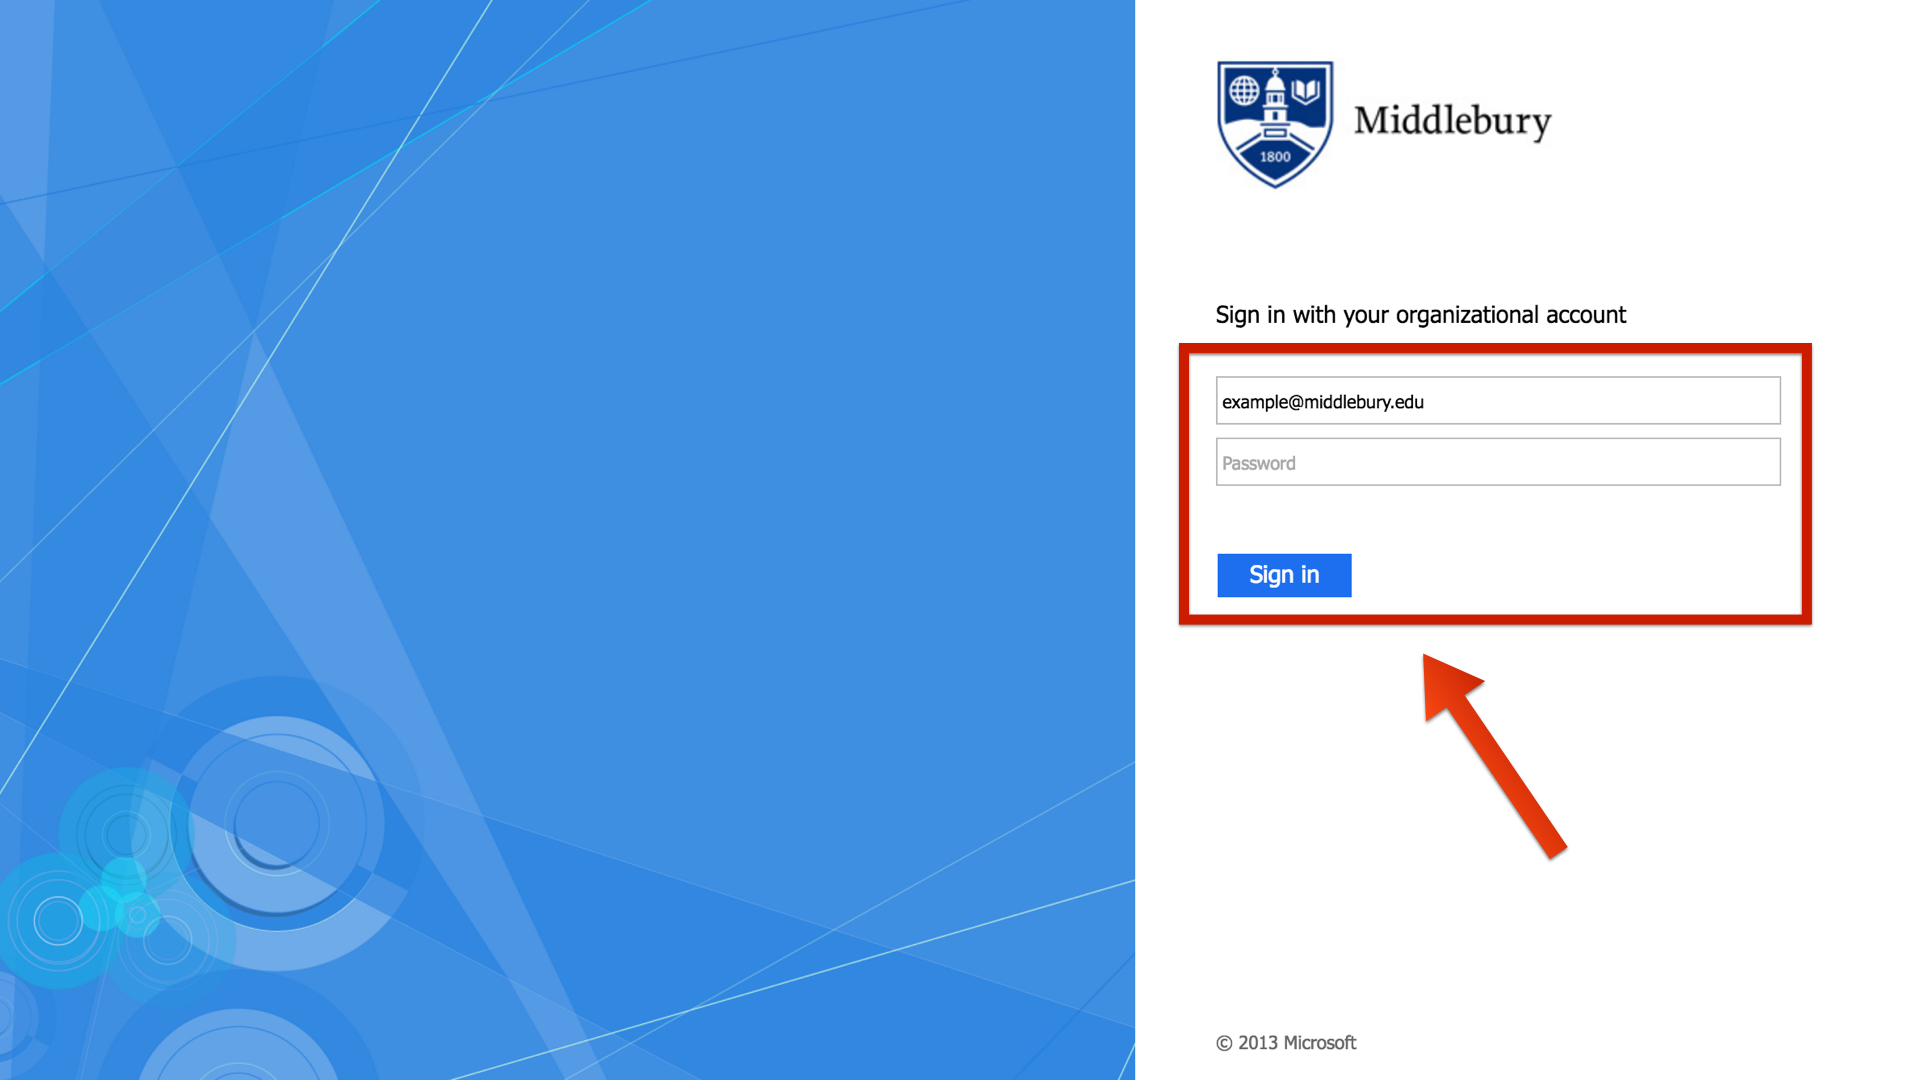
  • Login to cPanel with your Skidmore username and password.sign in.001


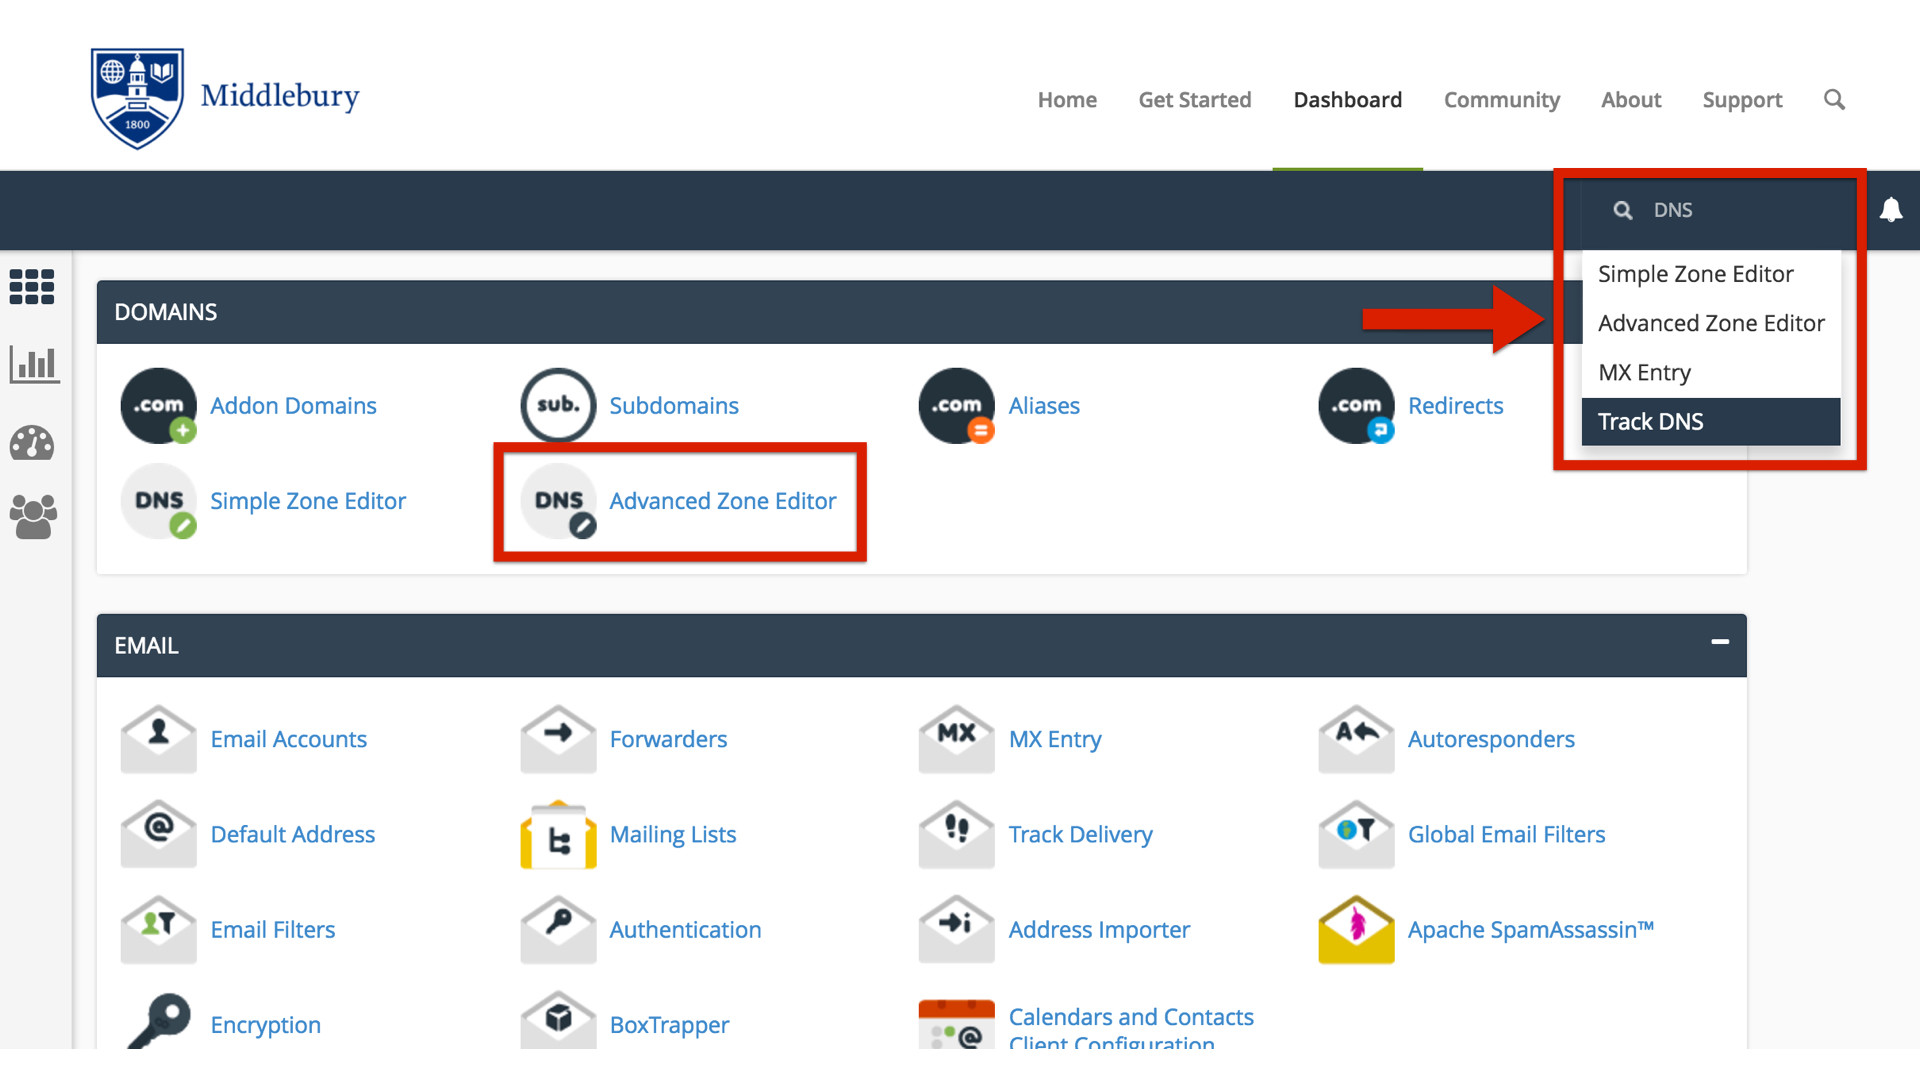
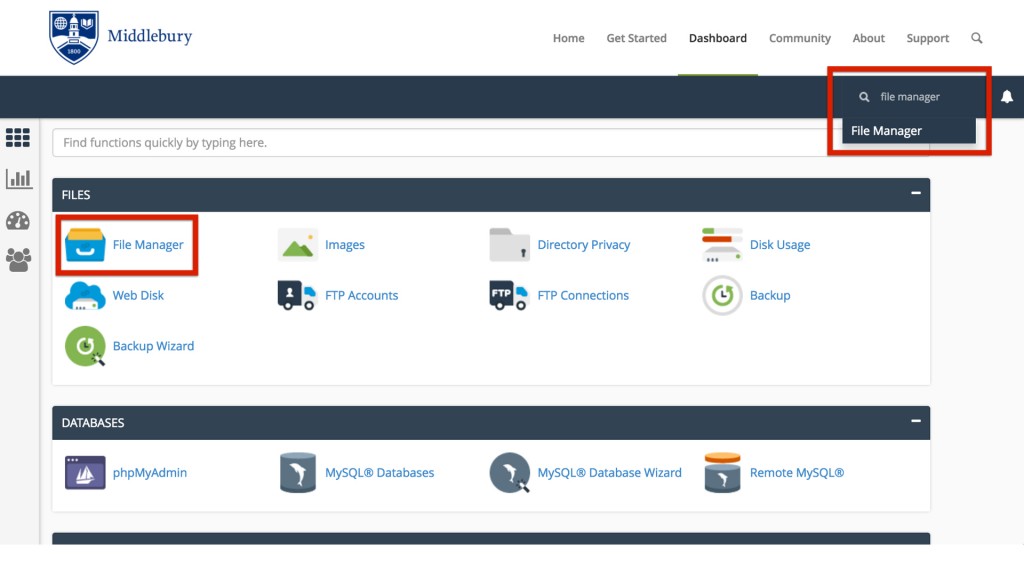
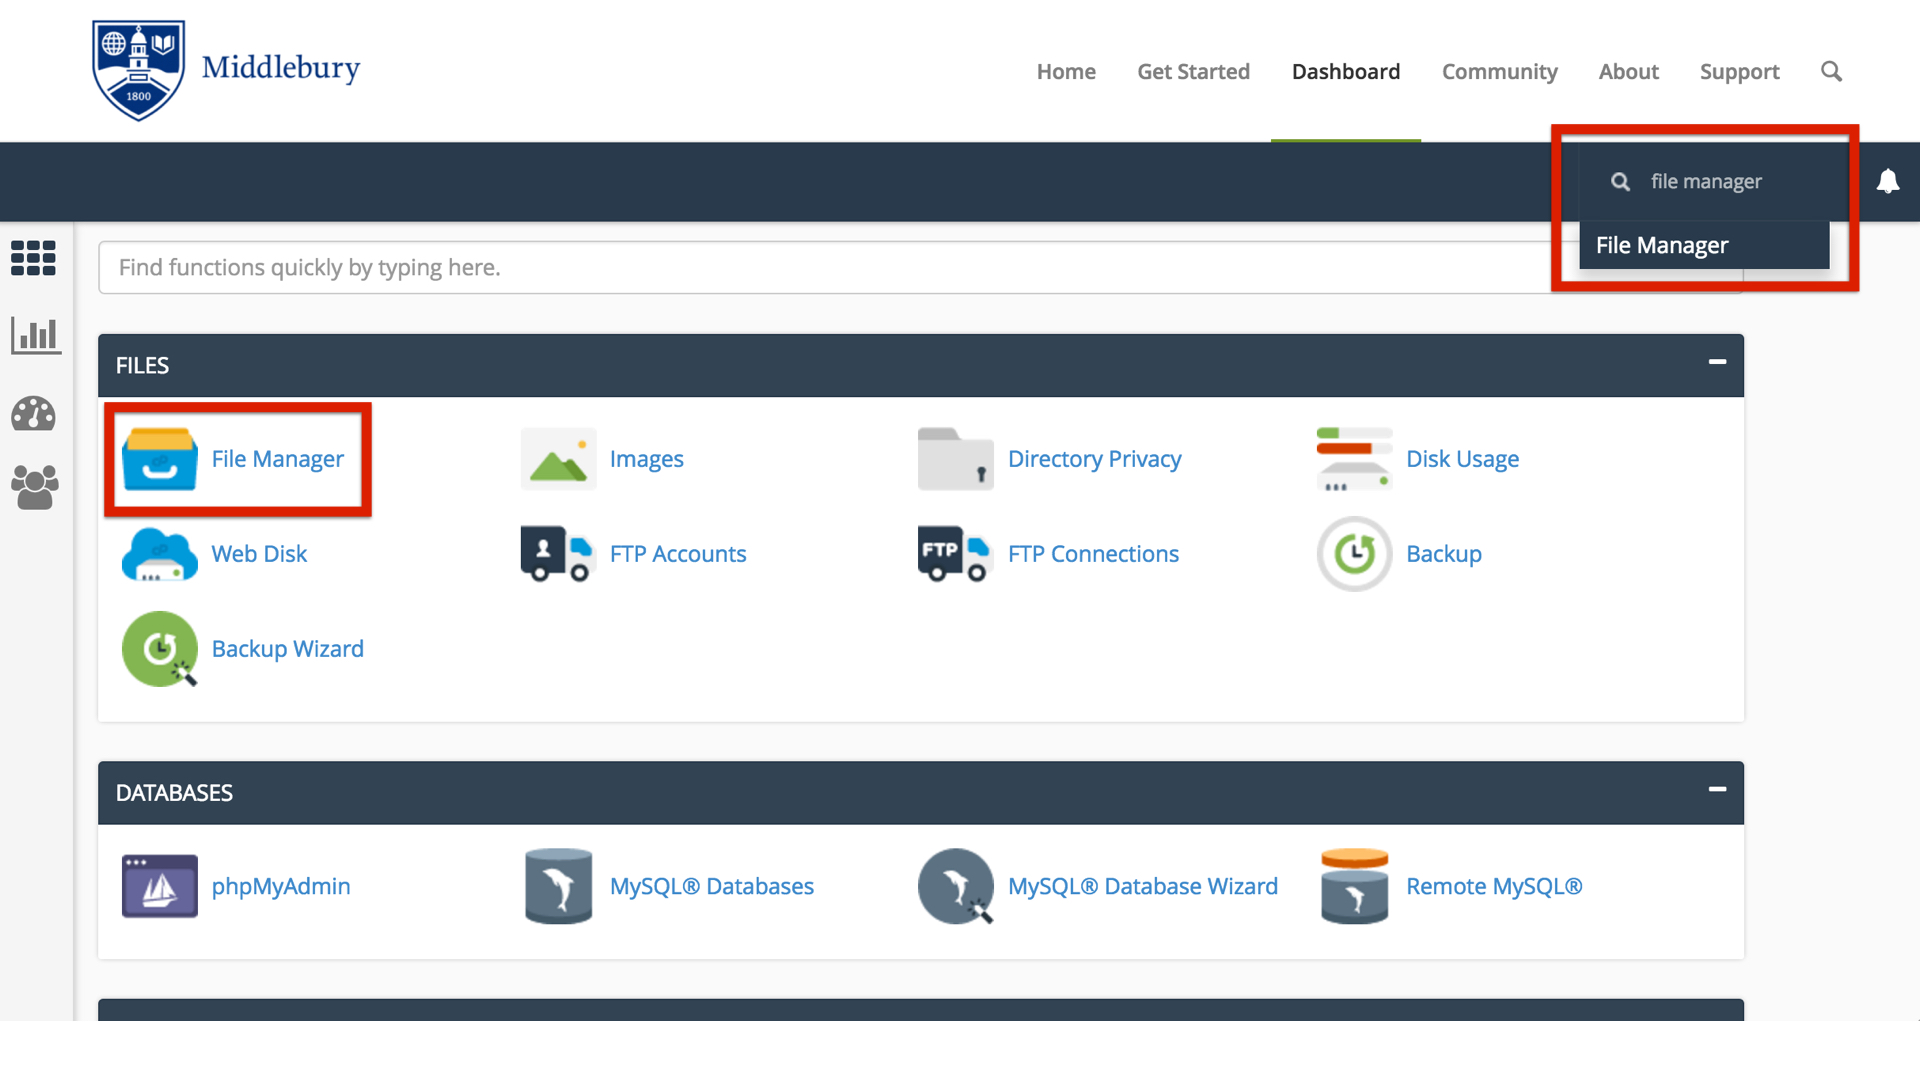
  • On the homepage of your control panel you’ll have all the various tools listed. You can easily find the File Manager by using the search tool in the upper righthand corner and typing File Manager. You can also find its icon under Files.file manager search.001


  • You are now sent to the File Manager and can navigate the folder structure there.

You’ll notice when the File Manager opens up that this looks very much like a folder on your computer. There are a few folders in it as well as files, and you can navigate down into those folders and see what’s inside of them. At the top level of the File Manager you also have the option of interacting with files and folders you select by moving them around or removing them. There is a larger article all about how to use the file manager at Accessing Your Files through the File Manager so we won’t talk much about how the interface works, rather we’ll cover what those folders and files actually mean and how they relate to what someone sees when they visit your website.

By default you have a variety of folders at the root of your web space (the first screen you see when you open up the file manager). Some of them are created automatically to store information about the panel and setup of certain sites. These folders are things like access-logs, etc, ssl, and tmp. You can safely ignore most of those folders because they don’t correspond to actual websites. Let’s look at which folders do and how it all works.

Your main domain, mydomain.com, corresponds with a folder called “public_html.” Whatever files and folders are inside of this folder are available at that domain. If you installed WordPress here you’ll likely see a lot of WordPress-related files within it (which were probably helpfully put there by the automated installer). Let’s say we uploaded an image called mypicture.jpg into the public_html folder. That image would now be available at mydomain.com/mypicture.jpg. The slash after your domain implies “this file is inside this folder”. But what if we had a folder inside the public_html folder? How does that appear? This is typically called a subfolder so let’s put a folder in public_html called “images” and put our image, mypicture.jpg, inside of that folder. What would you type in a browser to get to that file now? The location would be mydomain.com/images/mypicture.jpg. So subfolders are also indicated by a forward slash after a domain.

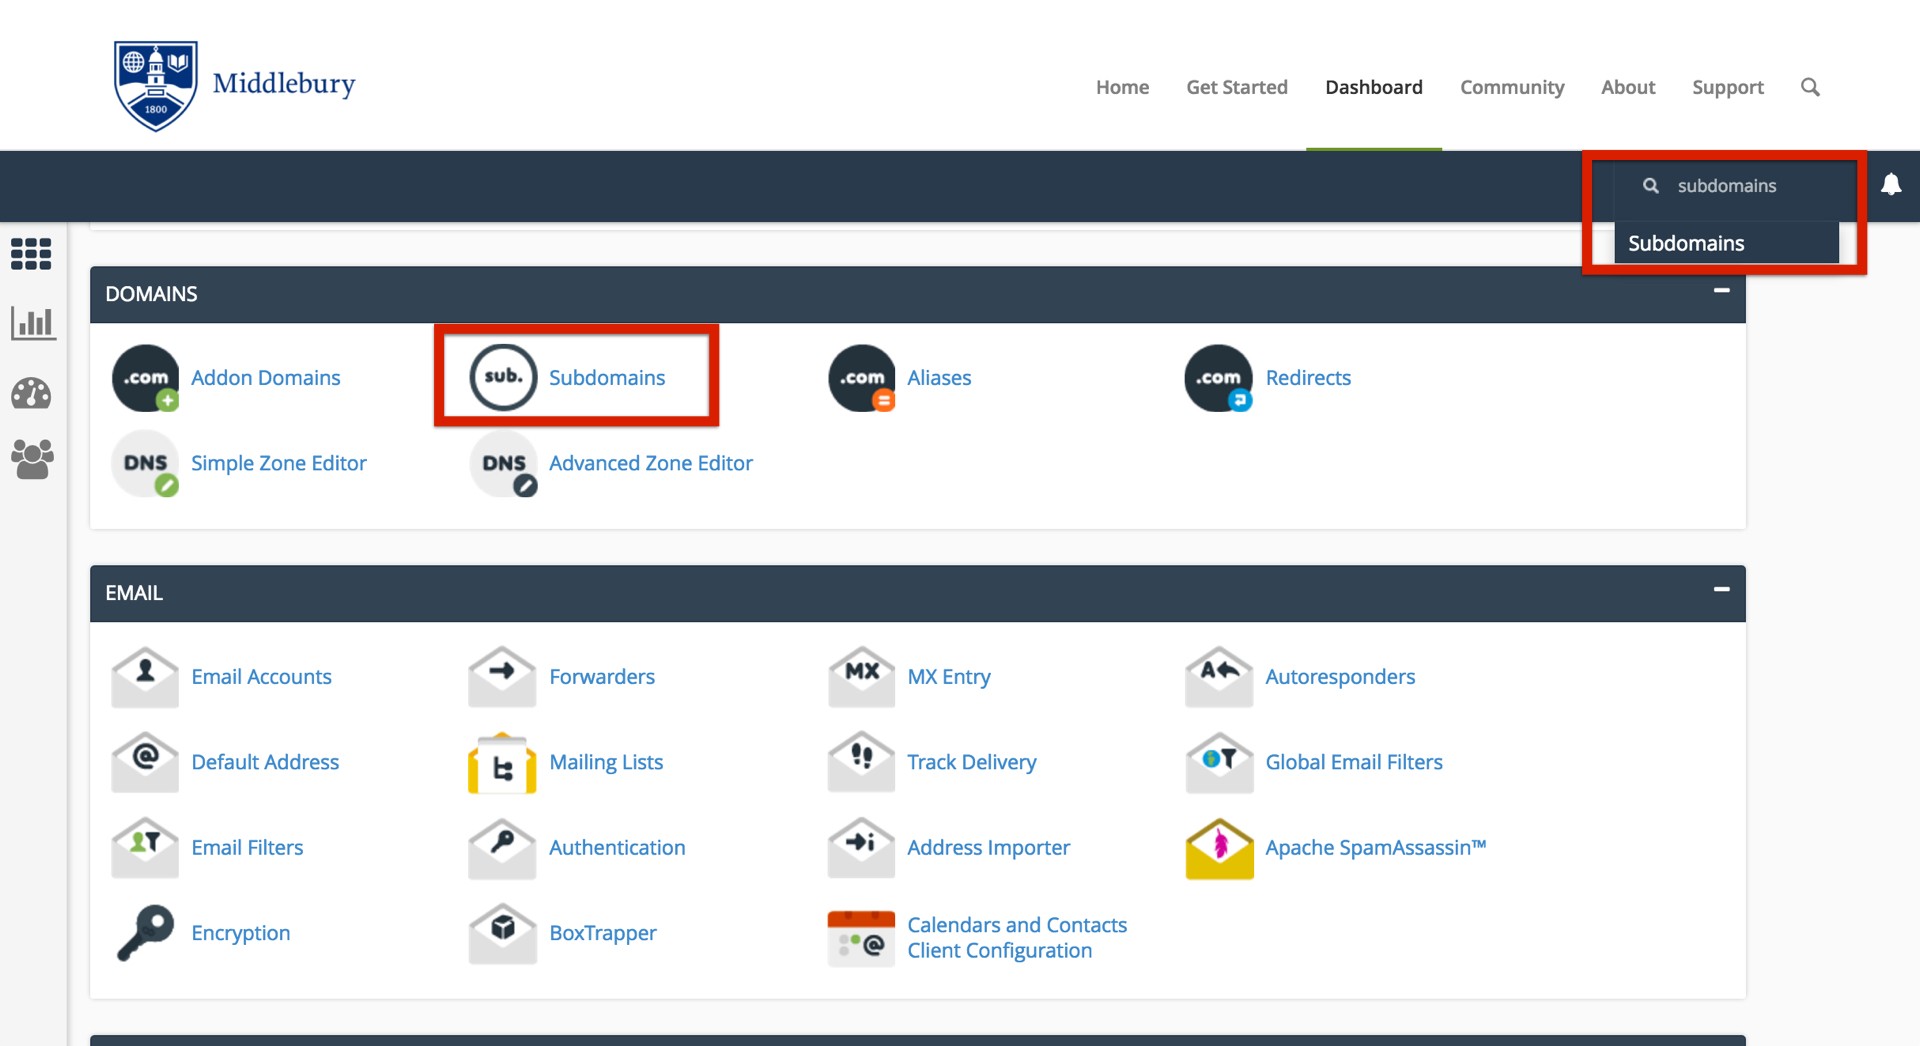
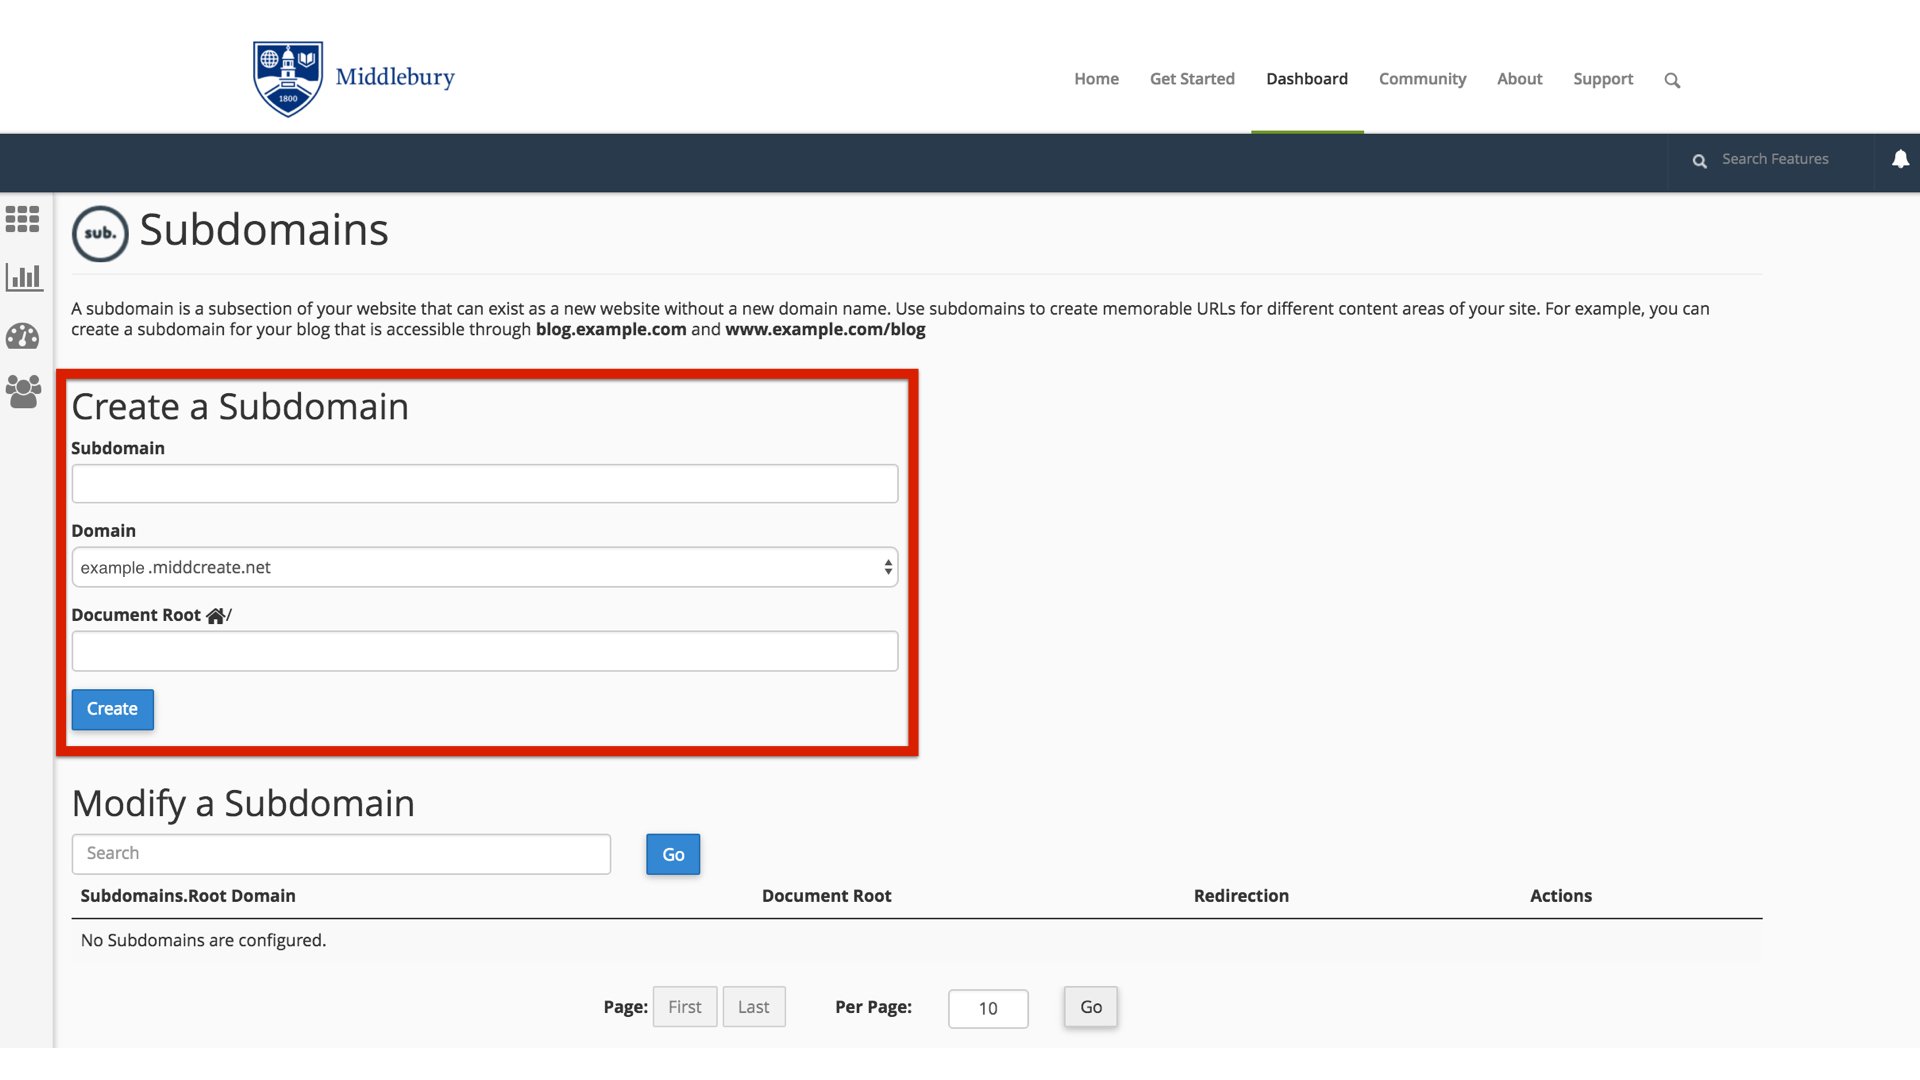
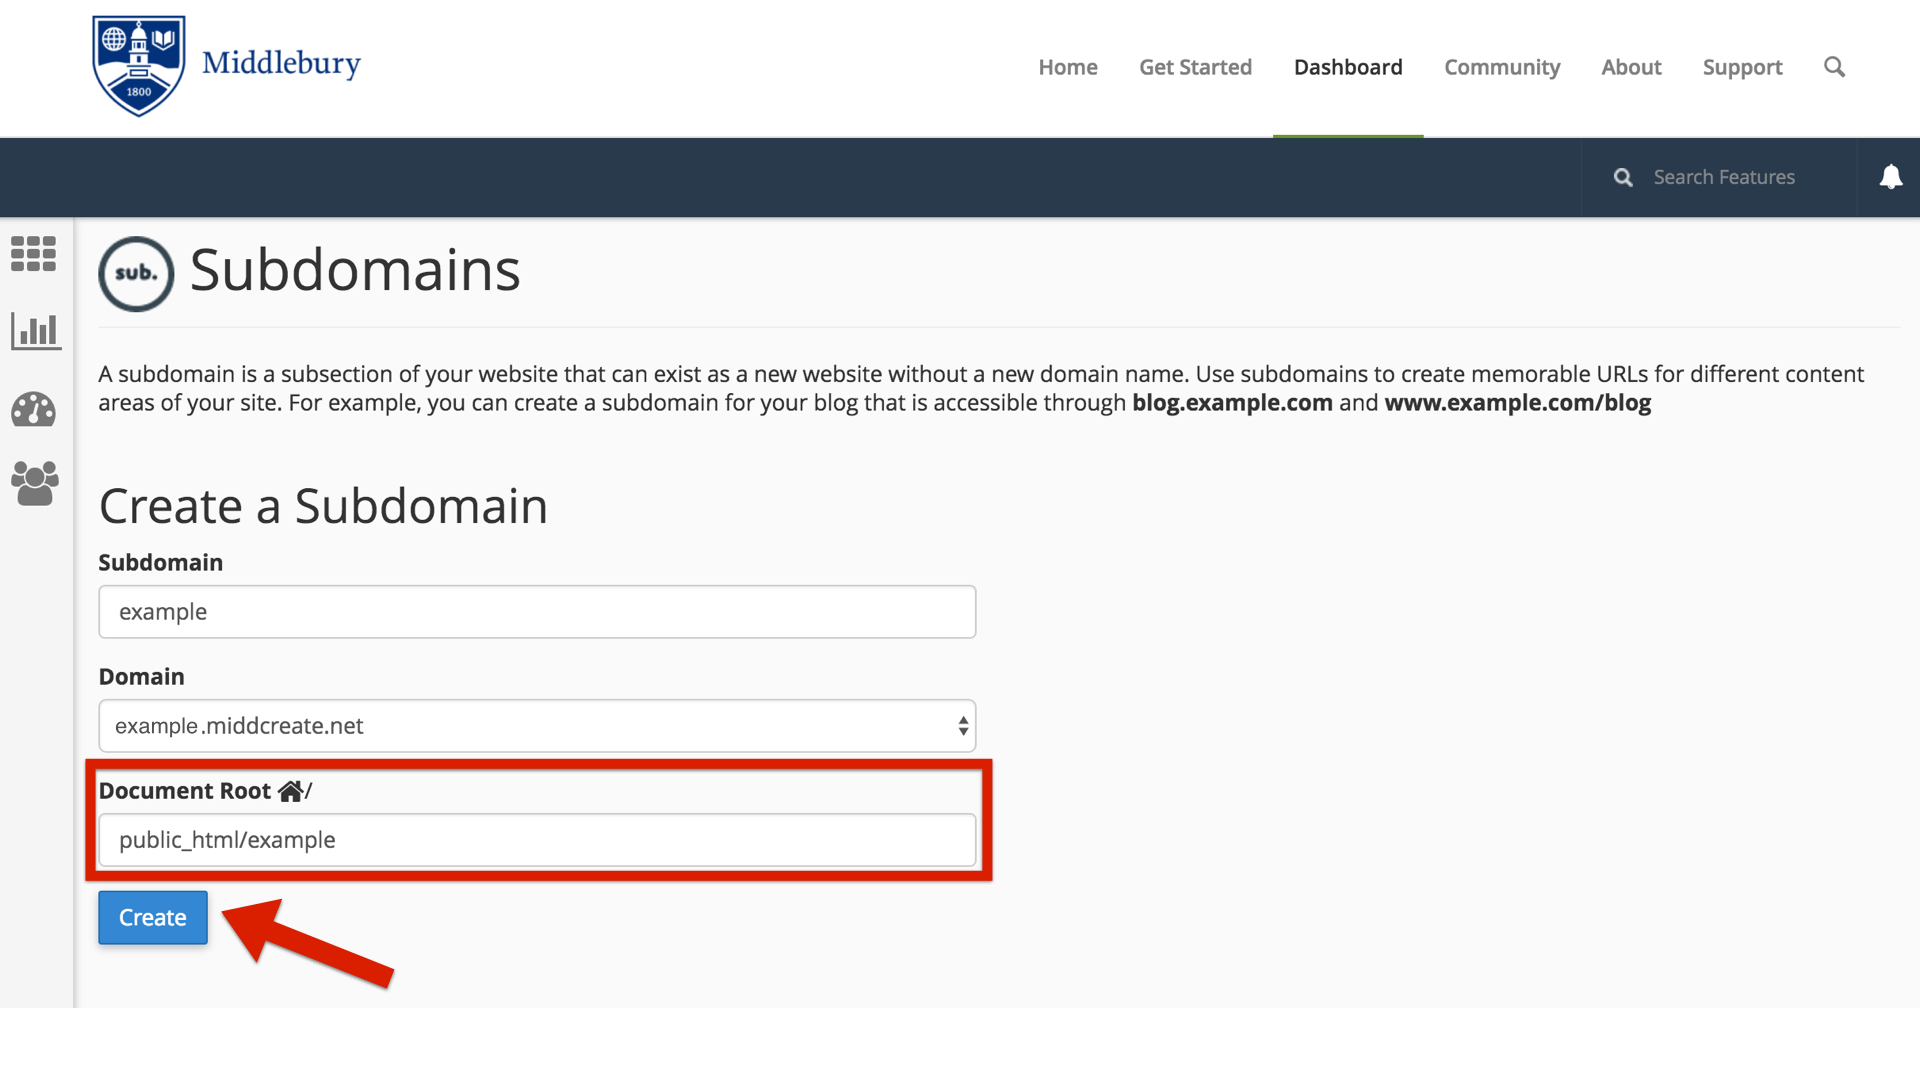
What about subdomains? You can have completely separate sites called subdomains that appear as nameofsubdomain.mydomain.com. But where are they in the file structure? When you created your subdomain the control panel asked you to give the folder a name. If I had a subdomain called photos.mydomain.com for example, I might want to name the folder “photos” (by default your control panel will call the folder by the name of the subdomain). Folders for subdomains are located inside the public_html folder. So when you go to the File Manager and navigate to public_html you’ll see folders listed for all of your subdomains and once you navigate inside one of those folders you’ll see files and folders specifically for that subdomain that appear on the web at that subdomain’s address.

The File Manager in your control panel is great to view these files and folders, but it can be limiting if you want to upload an entire folder of information to your website. If you find yourself wanting to do more with the files and folders on your web space you can download an FTP program like Filezilla and connect to your website by creating an FTP account in your control panel (also located in the Websites and Domains tab). An FTP program will allow you to upload and download an unlimited number of files and folders quickly.

Creating an Email Address

Creating an email address in the control panel creates a mailbox on the server for mail to be delivered to. In some cases this might be desired if you want to maintain full control of the email you receive, however in many cases users may wish to simply create an Email Forwarder that sets up a custom email address and sends all mail sent to it on to the address of your choice. This article will show you how to setup both methods.

  • On the homepage of the control panel you will see a section titled Email that contains several tools for setting up email addresses. To get started let’s go to the Email Accounts page.email.001

This screen will allow us to setup an email address that uses a mailbox stored on the server. You will be able to access mail sent to this email address either through a webmail client or a desktop/mobile client directly. Enter the desired email address as well as a password to associate with that email address. You can choose to set a quota for how large of a mailbox you need, or set this to unlimited (keep in mind your quota will still be dictated by the limits of the hosting account). Once you’re done click Create Account.email setup.001

Your email address is created and it’s ready to be used. You have the choice of accessing it via the webmail options built into your control panel, or setting up a mail client directly from your desktop, laptop, or mobile device. To access these options you can click on the More button.email settings.001

email settings more.001

If you already have an email address you want to use like a Gmail or Hotmail account, you may wish to create an Email Forwarder instead of a mailbox. Setting up a forwarder is very simple. Start by clicking on instead of a mailbox. Setting up a forwarder is very simple. Start by clicking on Forwarders from the Mail section of your control panel homepage.

forwarder.001

The first screen will show you any existing forwarders that you have created. To setup a new forwarding account, click Add Forwarder.

add forwarder.001

To create a new forwarding account, simply type in the desired email address as well as the email address you’d like all mail to be forwarded to. When you are done click Add Forwarder.forwarding address.001

You have now successfully created an Email Forwarder and all email sent to your custom email address will be forwarded on to the address you entered.

Video Tutorials

Create a Self-Hosted Email Account:


Access your Self-Hosted Email Account:

Setting Up FTP

There may be times when you need to place files onto your space on your Web server. There are a number of scenarios when this might be necessary:

  • You’re working with an application that allows you to install plugins/extensions, but the files need to be manually moved to the server in order to add them. (Note: This is NOT required with WordPress which allows you to install plugins through the backend in your browser.)
  • You’ve developed a custom site/pages using a Web design program, and you need to upload the files you created to the server
  • You’re installing an application that isn’t part of the applications in Installatron.

One way to upload files is by using the File Manager that is part of cPanel. However, sometimes you’ll find it easier/necessary to use FTP, or File Transfer Protocol, to move files to the server. This can be particularly useful if you’re working with a Web space where you’re not the owner (so you don’t have access to the File Manager in cPanel) or if you need to provide file access to someone else to your space on the Web server.

What exactly is FTP?

File Transfer Protocol is a method that allows you to remotely move files to a Web server from another location – usually your local/personal computer. Using a pre-defined FTP account (with a username and password), you can configure an FTP client (a program you run on your computer that allows you to transfer files via FTP.

There are lots of FTP clients that you can use; some are free and some are not. A few free ones you might consider:

For the purpose of this tutorial, we’ll show you how to set up FTP in FileZilla, but you should be able to generalize these instructions to use in any FTP client.

Get Information about Your FTP Account

If you’re FTPing to your own space on the Web server, or if you’re setting up an FTP account for someone else to use to FTP to your space, you’ll need to start by getting information about the FTP credentials from cPanel:

  1. Login to domains.skidmore.edu.
  2. In the Search Box at the top of the page, search for “FTP”, and click the FTP Accounts icon that appears.ftp accounts.001
  3. You’ll have the option to create a new FTP account, or you can scroll down the page to find the credentials for the default FTP account. If you want to create an account, fill out the Add FTP Account form with a username and password. By default, the new FTP account will be limited to a directory with the same name as the account you’re creating. You can change this to a different directory, if you want to grant this account access to a different location.  NOTE: Make sure you know/remember the password you enter. When you’re done, click Create FTP Accountcreate ftp account.001
  4. Once you’ve created the new account, you’ll see it appear in the list at the bottom of the FTP Accounts page. In addition to any accounts you’ve created, in the Special FTP Accounts section, you’ll see the default FTP Account. You’ll know this account because the username corresponds to your cPanel username. This FTP account has full privileges to access any space on your Web server. ftp account name.001
  5. For whichever account you need credentials for, click the Configure FTP Client link.
  6. Write down the username, server, and port information that appears. You will need to use this (or you will need to provide this to the person you are giving FTP access) along with the password you created in Step 3 in order to configure your FTP client. ftp configuration.001

Configure FTP in Your FTP Client

Below are links to tutorials for setting up both FileZilla and CyberDuck to connect to you FTP account.

Setting Up Subdomains

A subdomain is one way of organizing and separating content on your site. To create a subdomain, use the following steps:

Login to domains.skidmore.edu with your Skidmore username and password to access your cPanel.sign in.001

Once logged in you’ll be at the homepage of your control panel. The easiest way to navigate the panel is using the search feature in the top right panel. Click the Search box and type “subdomains” (without the quotes). When you press enter, you will automatically be take to the Subdomains page. Or, you can scroll down and click the Subdomains button on the cPanel.

subdomains search.001

Choose a name for your subdomain and type it into the Subdomain box. Just like top-level domains (e.g. createoutestdomain.com), subdomains can only contain numbers, letters, and hyphens, and the best subdomains are simple, short, and descriptive.

create subdomain.001

Once you’ve typed in a name, cPanel will automatically populate the Document root field for you. This will create a folder to contain your subdomain’s files. You’ll usually want this folder to match the name of your subdomain, so it’s easy to identify where different files live in your account. You might want to change the document root if you already have a folder in your account that has the same name as the subdomain you are trying to create, although this should be rare. Once you’re done, click Create.create subdomain doc root.001

Once you’re done, click Create. If everything went well, you should see a message that your subdomain was created successfully. Your subdomain will now be available as an option for automatic installation of various software (WordPress, MediaWiki, etc). If you prefer to install web applications manually, you can do so in the document root (folder) you created in step 5.

Video Tutorial & Ideas

Subdomains vs. Subdirectories

When you’re first getting started with a new space on a new Web host, you might think of yourself as owning a small “territory” of the Web. Everything you place in your public folder on the server becomes available for anyone on the Web to see (assuming they know the address of your site and the files you’ve placed there).

If you’re just putting up a handful of static, HTML pages which you want to make available to colleagues, friends, or family by sending them links, then working with this large, unorganized space may work. But as soon as you get to the point where you want to organize your site, you’re going to need a new strategy.

Consider this scenario: you want to have a personal blog on your new Web space, where you share pictures and short written pieces with family, friends, and colleagues. In addition, you’re working on a large research project that requires you to build a Web-based repository of digital images related to your discipline. You want to use one application (say, WordPress) to manage your personal blog. For your research project, you’ve settled on another open-source application (Say, Omeka). Both of these are applications that need to be installed on your Web host, but you can’t just put them both at your main domain name – if you did, both sites would quickly experience conflicts and errors. You need to cordon off separate spaces for your different Web “properties.”

There are two primary strategies for parceling up your Web space. You can create subdomains or subdirectories. But before you can understand the difference, you need to first understand what we mean when we talk about your root domain.

Root Domain

Let’s say you’ve registered a new domain for domains.skidmore.edu called yourdomain.com. Anything that is stored at this core URL is considered to be at the root of your domain: Nothing comes before the address or after the address. You can certainly decide that you simply want to have a single site on your Web host (say a blog running WordPress), and you can set that blog up at your domain’s root. To get to your site in this scenario, users would simply go to yourdomain.com.

Subdomains

When you want to do more than just have a single site at the root of your site, you need to decide now to organize your space. One way to do so is by setting up subdomains.

You’re already familiar with the concept of subdomains, even if you don’t know it. Consider OU’s public Web site at http://ou.edu. As you browse parts of that site, you’ll notice that the domain changes. When you’re looking at your department Web site, say the site for the Chemistry & Biochemistry Department at http://chem.ou.edu, the URL is no longer just ou.edu. Now the root of the url is chem.ou.edu, indicating that you’re on the part of the site that is dedicated to the Chemistry & Biochemistry Department.

If you browse to the technology store pages at http://itstore.ou.edu, you’ll notice that the domain changes again, this time indicating that you’re in the technology store of the OU site.

As you can see the domains serve two purposes: they help to organize the site from a technical perspective, but they also serve as indications to the users that they are in a new/different space.

As you work on your site, you’re welcome to create as many subdomains as you like, and in each subdomain you can actually create a distinct, individual Web site.

Subdirectories

The alternative for organizing your space is to simply set up subdirectories. These function much like file folders on your computer. Instead of creating a blog at blog.yourdomain.com you would place it in a subdirectory called “blog” making the address yourdomain.com/blog. Setting up subdirectory is really easy. You can create folders on the fly when installing applications (like WordPress), and you can also manually create them in your file browser.

There is one particular issue you need to be aware of. Let’s say you’ve installed WordPress to be your primary blog at yourdomain.com. Later, you decide you want to create another image gallery site on your site, and you want to place it at yourdomain.com/gallery. But, if for some reason you’ve already created a page on your WordPress site called “Gallery” then the url yourdomain.com/gallery will already be taken. If you try to create a subdirectory of the same name, you’ll get a conflict and errors.

Tips & Review
  • Subdomains are generally a cleaner, more elegant solution to organizing your site. You’re less likely to get conflicts or errors. However, when using subdomains the process is slightly more complicated: You must create subdomains first, before you can install anything in them.
  • Subdirectories don’t create as pretty URLs as subdomains, but they’re easier to set up. They can, however, result in conflicts with existing Web pages.
  • As soon as you create subdomains or subdirectories to organize your site, you need to consider how people are going to find them. If you’ve created a new primary blog at blog.yourdomain.com, and someone goes to just yourdomain.com, they won’t see that new site. It is possible to set up redirects to avoid this issue. You can also always create links from pages on one subdomain of your site to another.
  • If you really just need one site, sometimes installing at the root of your domain is the easiest thing to do, at least as you’re getting started. You can always add more pieces to your territory later with either subdomains or subdirectories.
Tutorials

What is DNS?

Remember back before everyone had computers that fit in their pocket, how companies would ship a book full of phone numbers to your doorstep? We might have known who we were looking for, but we needed to look up phone numbers unless they were your crazy relatives that you learned to memorize. When you get your own domain name, by default it’s nothing more than a shortcut, an address, or (to fit this very imperfect analogy) a phone number. When you type a domain name into the address bar of your browser, someone has to identify it and tell it what to display. That’s where a name server comes in.

A name server is a computer, running as a server, that keeps a record of all the domain names that are associated with it and keeps track of where those domains should go. In the case of domains.skidmore.edu the name server is the same computer that runs the hosting. You can peek behind the hood and see this in action by going to the 'Websites and Domains' tab of your panel account and clicking on 'DNS Settings'. You see, DNS stands for Domain Name System and the name server on domains.skidmore.edu gives control to it to identify what should be displayed when someone types in your domain. Consider the fact that you might have one or more subdomains in your account. The name server and DNS are able to identify those subdomains and let the world wide web know that they exist and point to some files/folders on a computer somewhere.

When you signed up for a domain through the domains.skidmore.edu system your name servers were chosen for you. So when people type in your address, the server responds with information about your account. When you migrate an account away from one hosting platform like domains.skidmore.edu and onto a new service, it will require you to change the name servers so that your domain name points to a new server with its own files and structure. It’s also possible to have subdomains that point to entirely different servers than domains.skidmore.edu. For example, you could have a subdomain that looks to Tumblr for files.

What is a subdomain?

A subdomain is one way of organizing and separating content on your site. You’re already familiar with the concept of subdomains, even if you don’t know it. Consider OU’s public Web site at http://ou.edu.

As you browse parts of that site, you’ll notice that the domain changes. When you’re looking at your department Web site, say the site for the Chemistry & Biochemistry Department at http://chem.ou.edu, the URL is no longer just ou.edu. Now the root of the url is chem.ou.edu, indicating that you’re on the part of the site that is dedicated to the Chemistry & Biochemistry Department.

If you browse to the technology store pages at http://itstore.ou.edu, you’ll notice that the domain changes again, this time indicating that you’re in the technology store of the OU site.

As you can see the domains serve two purposes: they help to organize the site from a technical perspective, but they also serve as indications to the users that they are in a new/different space. As you work on your site, you’re welcome to create as many subdomains as you like, and in each subdomain you can actually create a distinct, individual Web site.

Additionally, we have resources that demonstrate setting up subdomains and illustrate the difference between subdomains and subdirectories.

Video Tutorial & Ideas

What is Domain Mapping?

Domain mapping, simply put, is deciding where visitors should be directed when they visit various pieces of your website. Domains and subdomains can be mapped directly to folders located within your webhosting account, where you may have installed WordPress, Omeka, MediaWiki, or other web applications. Domains and subdomains can also be mapped to some third-party providers.

Map Your Domain to Tumblr

Mapping your domain is an important part of domains.skidmore.edu; it reinforces the idea that you don’t necessary need to host all your own applications. You should, however, be mindful of making your web presences part of a domain you control. If you would like to map a subdomain and have not yet created it, use this tutorial on creating subdomains before proceeding. To map your domain, or a subdomain, to Tumblr, use these steps:

  1. To get started you’ll need to login to your control panel by logging into domains.skidmore.edu/dashboarddashboard.001
  2. Here you’ll login with you Skidmore username and password. sign in.001
  3. Once logged in you’ll be at the homepage of your control panel. The easiest way to navigate the cPanel is using the search feature in the top right panel. Click the Search box and type “DNS” (without the quotes). As you type, the cPanel page will begin to narrow down results. Find and click on Advanced DNS Zone Editor to continue. DNS.001
  4. Find the domain, or subdomain, you want to map to Tumblr in the list of Zone File Records. Under the Action column, click Edit
  5. Leave the Name, and TTL fields set to their defaults. Update the Type drop-down menu to CNAME, and the Address field to domains.tumblr.com. Click Edit Record when you are done. 
  6. Visit the Tumblr website, and login with your Tumblr username and password. 
  7. After logging in, click the Tumblr Settings icon.tumblr.001
  8. For the Tumblog you’d like to use under the Username click the pencil icon to edit these settings.
  9. Check the Use a custom domain checkbox. Type the name of the domain or subdomain you want to map to Tumblr into the box, then click Test your domaintumblr edit.001
  10. If your domain mapping was successful, you’ll see a message that your domain is now pointing to Tumblr. Click the Save button before leaving the page. Keep in mind that it may take up to 72 hours for your domain or subdomain to correctly point all visitors to the correct location.

Map Your Domain to Blogger

Mapping your domain is an important part of domains.skidmore.edu; it reinforces the idea that you don’t necessary need to host all your own applications. You should, however, be mindful of making your web presences part of a domain you control. If you would like to map a subdomain and have not yet created it, use this tutorial on creating subdomains before proceeding. To map your domain, or a subdomain, to Blogger, use these steps:

  1. To get started you’ll need to login to your control panel by going to the domains.skidmore.edu homepage and logging in. dashboard.001
  2. Here you’ll login with you Skidmore username and password. sign in.001
  3. Once logged in you’ll be at the homepage of your control panel. The easiest way to navigate the panel is using the search feature in the top right panel. Click the Search box and type “DNS” (without the quotes). Click on Advanced Zone Editor and you will automatically be directed to the DNS Advanced Zone Editor page. Or, you can scroll down and click on the DNS Advanced Zone Editor button on the cPanel.DNS.001
  4. Find the domain, or subdomain, you want to map to Blogger in the list of Zone File Records. Under the Action column, click Edit
  5. Leave the Name, and TTL fields set to their defaults. Update the Type drop-down menu to CNAME, and the Address field to ghs.google.com. Click Edit Record when you are done. Keep this window open; you will need it in later steps. 
  6. In a new window, go to the Blogger website, and login with your Blogger/Google username and password. blogger sign in.001
  7. From your Blogger Dashboard, find the blog you’d like to use, expand the More Options menu, and click Settingsblogger edit.001
  8. On the “Basic Settings” page, find the Publishing section, and click the Setup a 3rd party URL for your blog link. blogger url.001
  9. Under Advanced Settings, type the full subdomain or domain you are mapping into the box, leave the Use missing files host? option set to No, then click Saveblogger publish.001
  10. You will be presented with a message that your domain cannot be verified, along with information about your existing DNS entry, and an additional DNS entry that needs to be made. This is normal. Copy the second entry under the Name, Label, or Host entry to your clipboard. blogger error.001
  11. Go back to the window or tab containing the Advanced DNS Zone Editor in your create.ou.edu cPanel. In the Add a Record section, paste the text you just copied into the Name field. This information will be different for each domain. Set the TTL field to 14400, and the Type drop-down menu to CNAME
  12. Go back to the window or tab containing the Blogger Advanced settings panel, and copy the second entry under the Destination, Target, or Points to column to your clipboard. blogger error2.001
  13. Go back to the window or tab containing the Advanced DNS Zone Editor in your create.ou.edu cPanel. In the Zone File Records section, find the domain you were editing Action for and paste the text you just copied into the CNAME field. This information will be different for each domain. Click Edit record when you are done. 
  14. Return to the window or tab containing the Blogger Advanced settings panel, and click Save.blogger save.001
  15. If everything was successful, your domain will now appear as the Blog Address. Keep in mind that it may take up to 72 hours for your domain or subdomain to correctly point all visitors to the correct location.